Microsoft Entra ID — SSO & SCIM Configuration on
Create Application
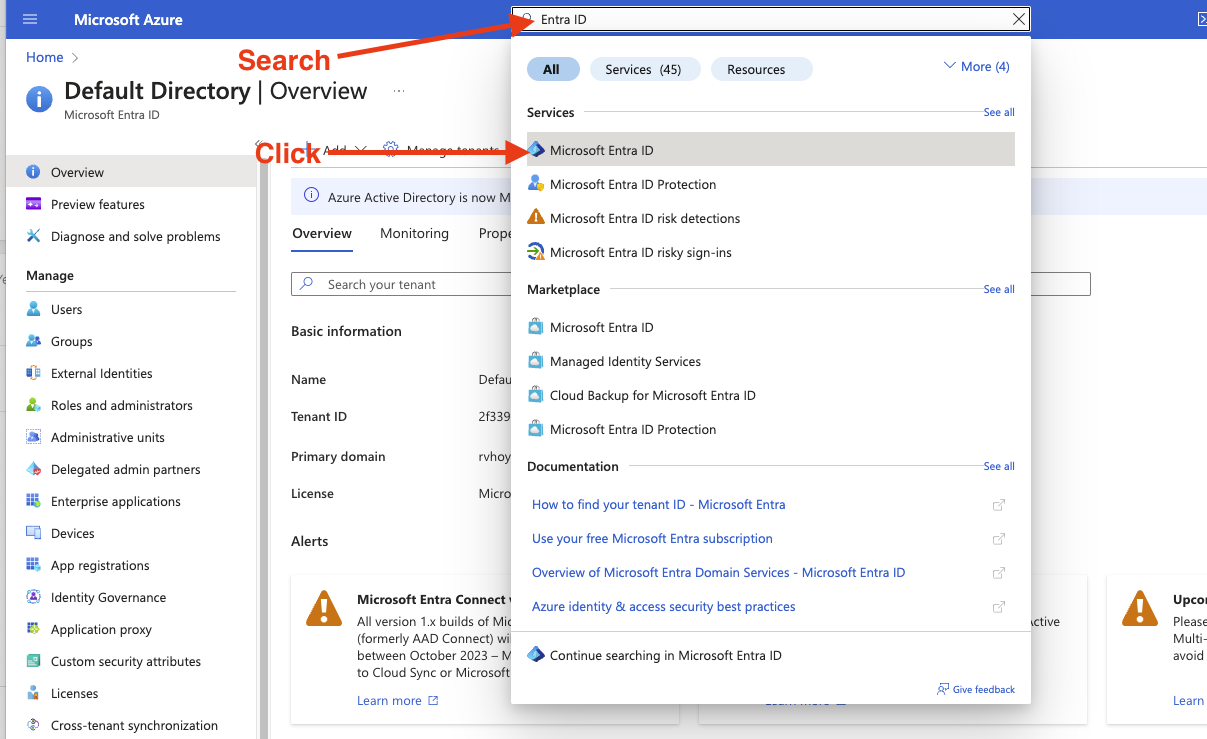
1 – Login to Azure and perform a search for “Entra ID” and click “Microsoft Entra ID”
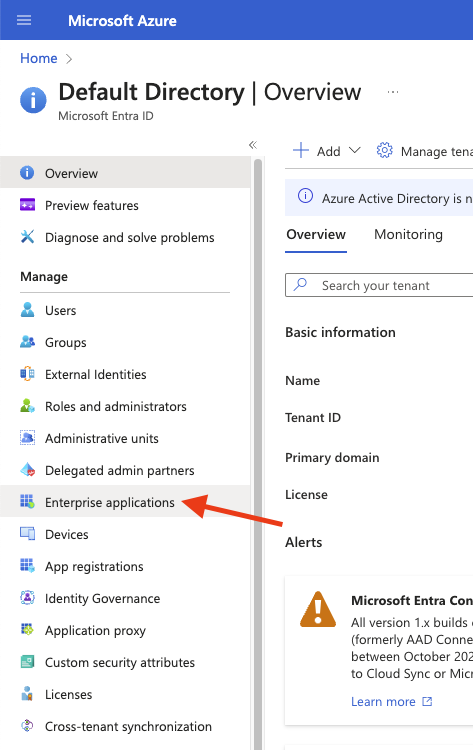
2 – Click “Enterprise Applications”
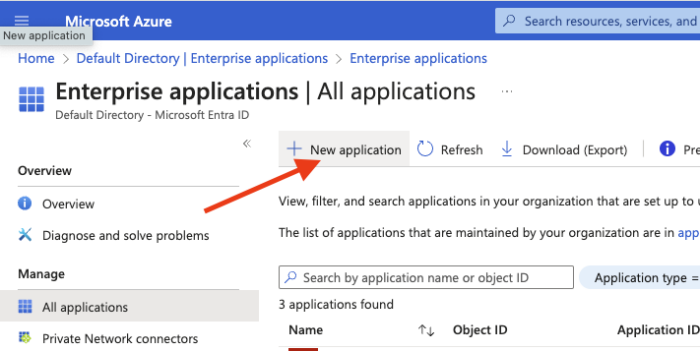
3 – Click “New Application”
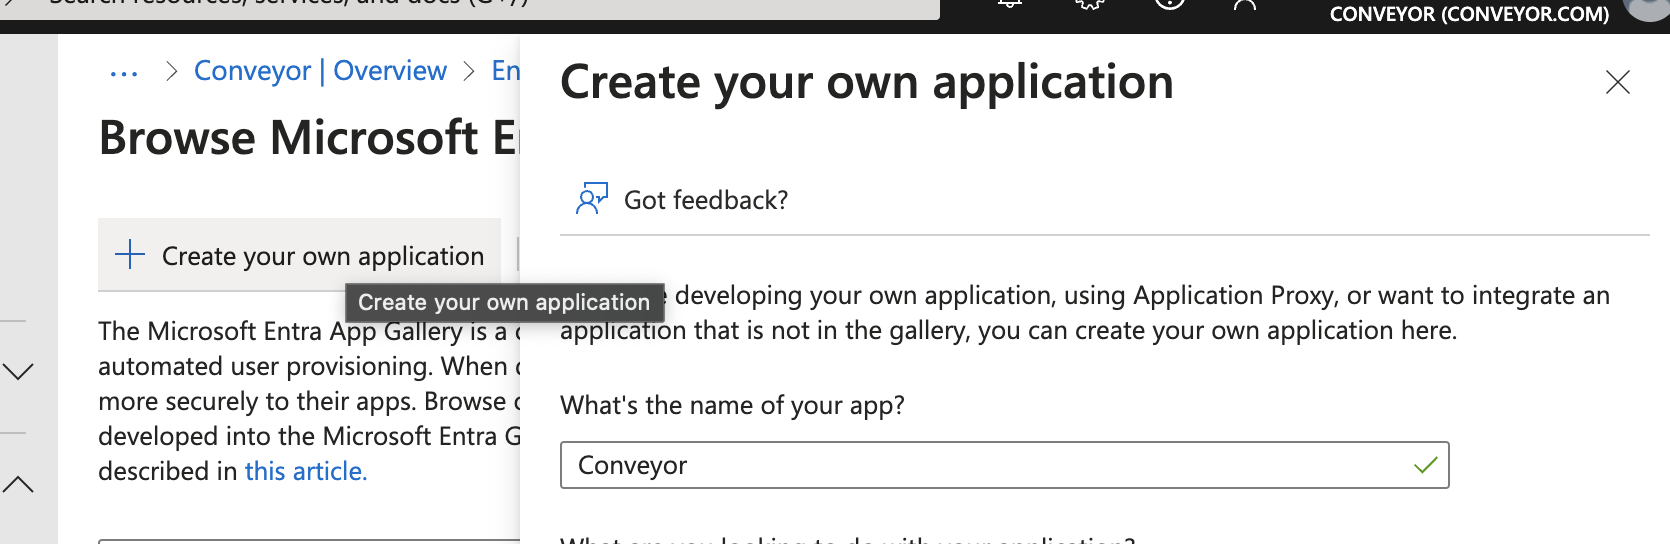
4 – “Create your own application”

5 – Name your application
SSO Configuration
1. Click on Get Started for "Set up single sign on" and choose "SAML"

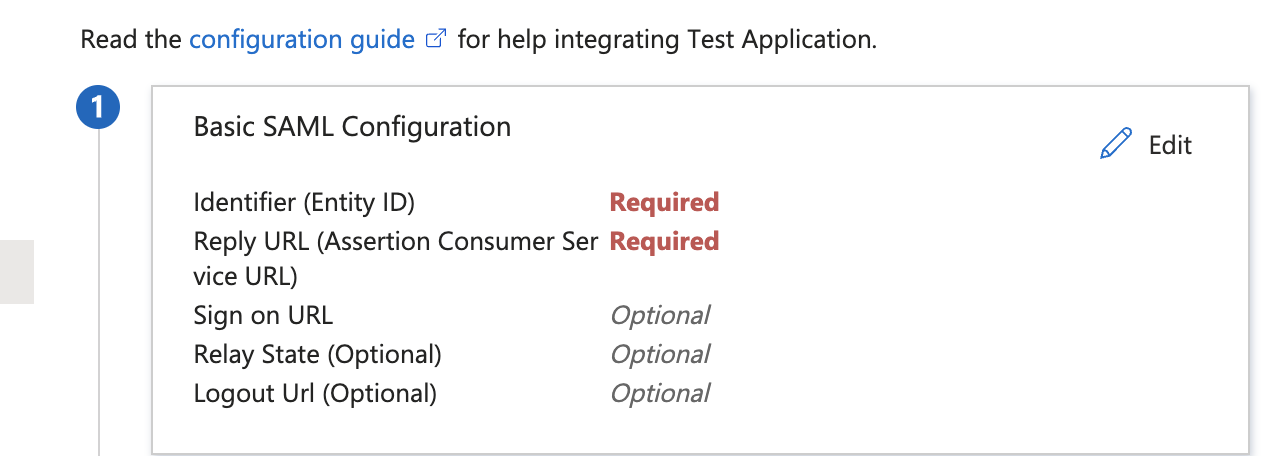
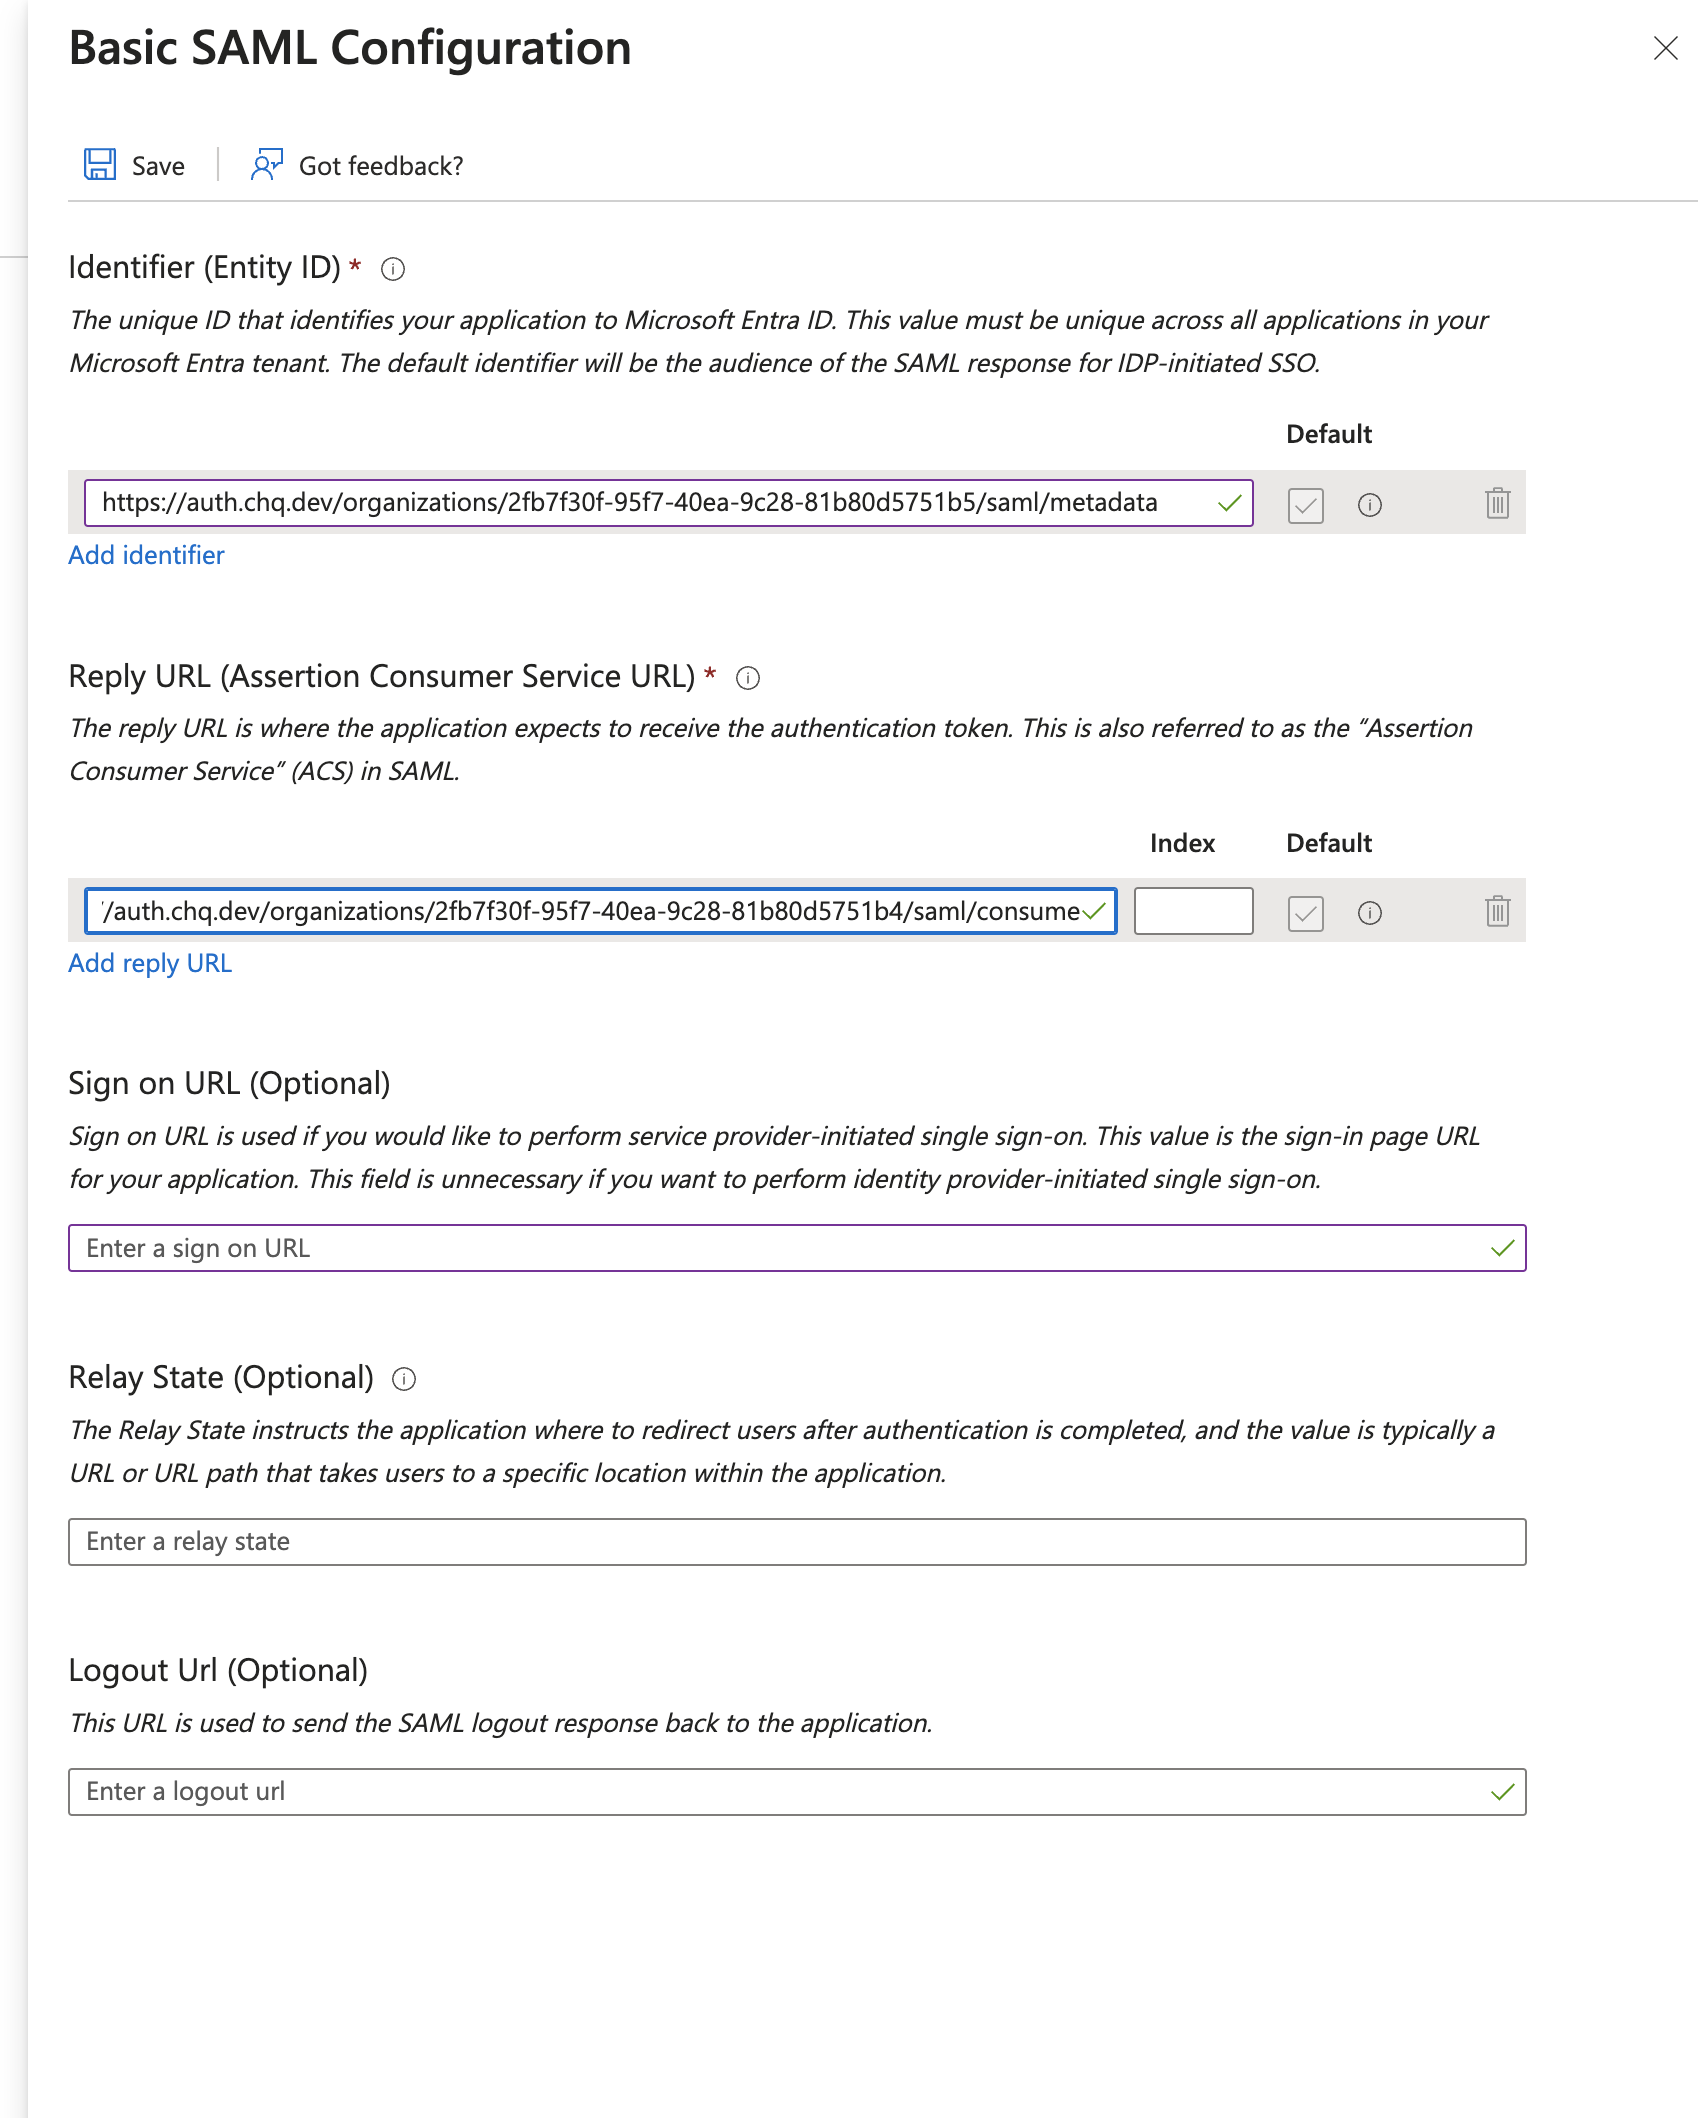
2. Fill the Identifier ID and Reply URL
-
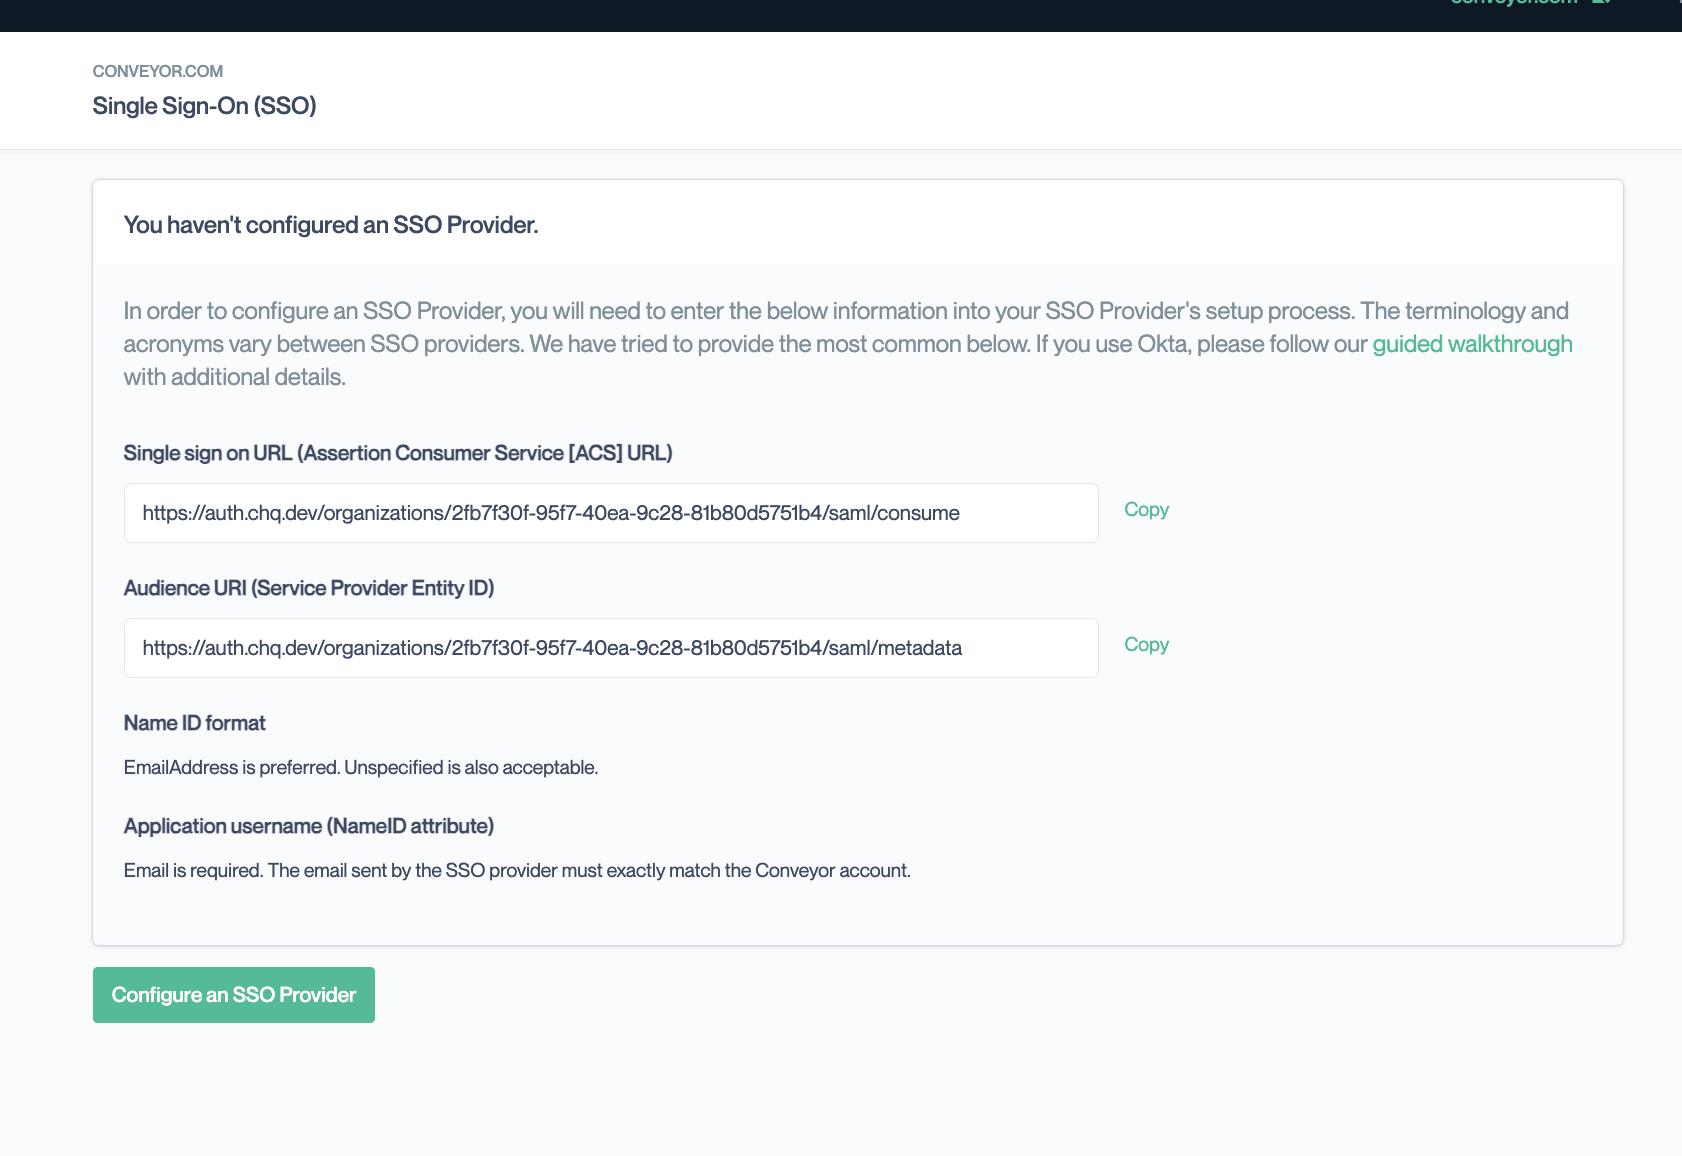
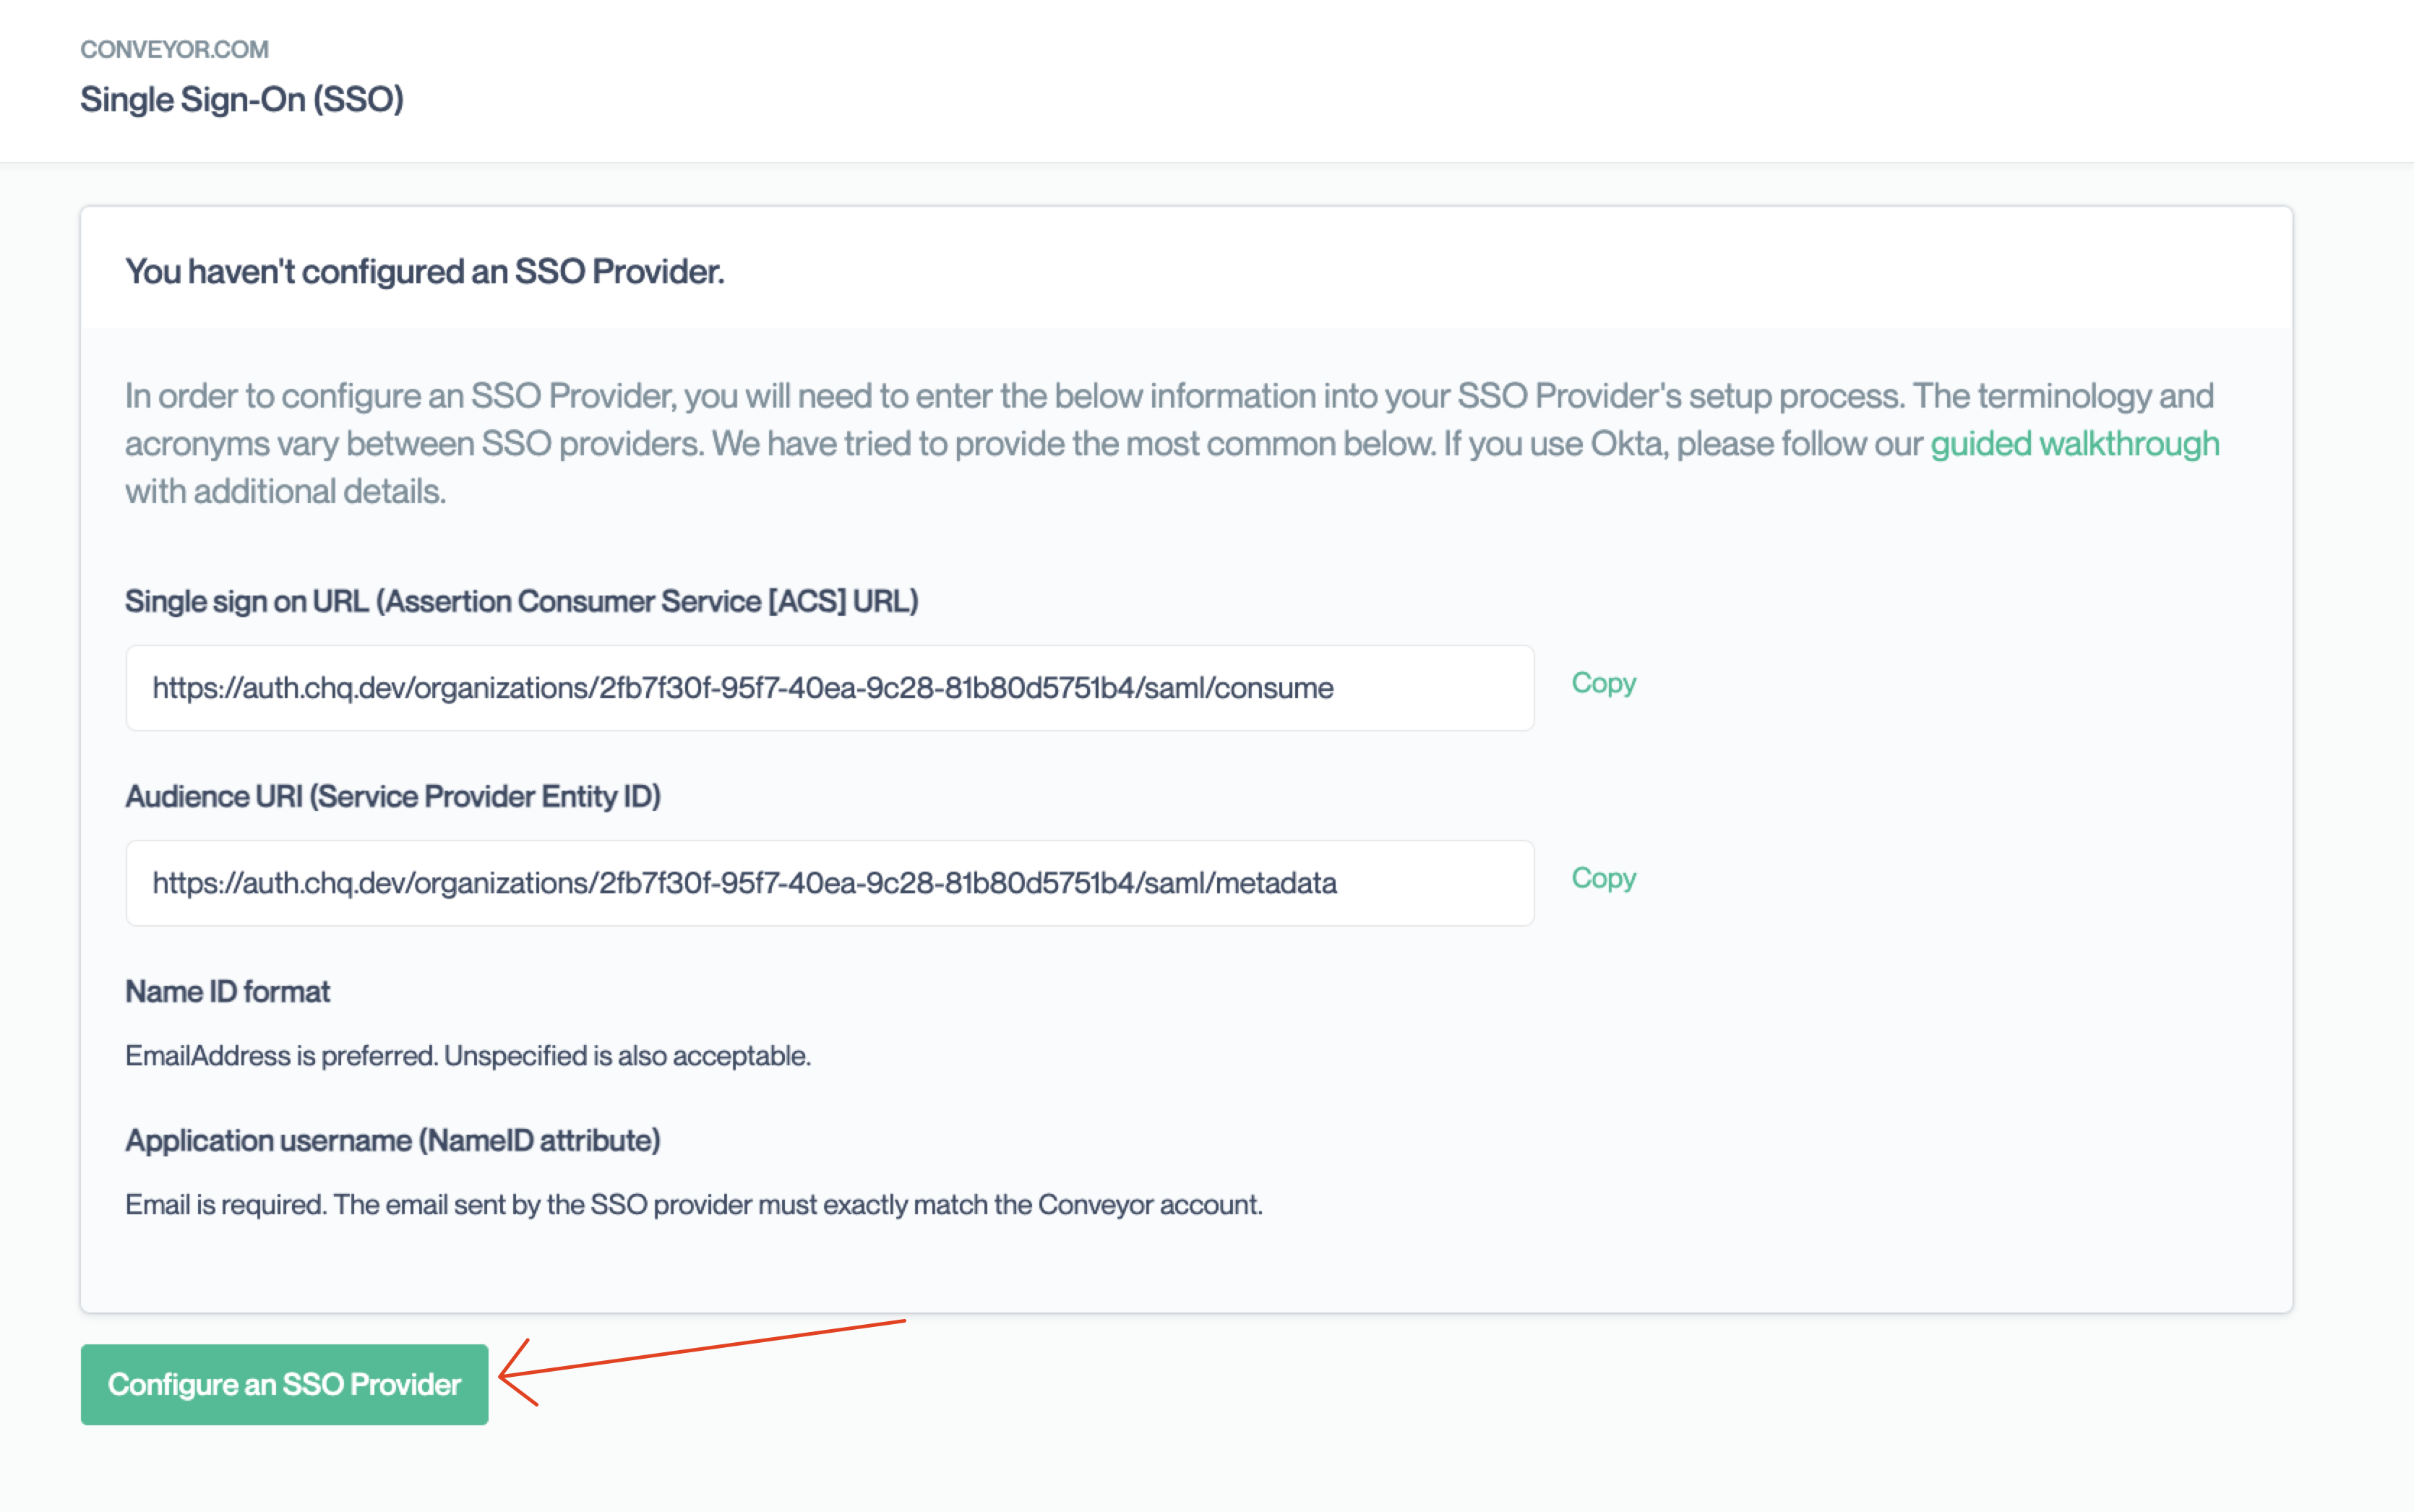
First, make sure make sure you have SSO enabled in your plan, if unsure contact support. You can access SSO settings by navigating to the settings page (top left menu), then Organization > Members & Access > Single Sign-On. You can also head directly there: https://app.conveyor.com/settings/organization/sso. You should see the following screen.
-
Copy the Audience URI into Identifier (Entity ID), and Single sign on URL into Reply URL
3 — Download Federation Metadata XML
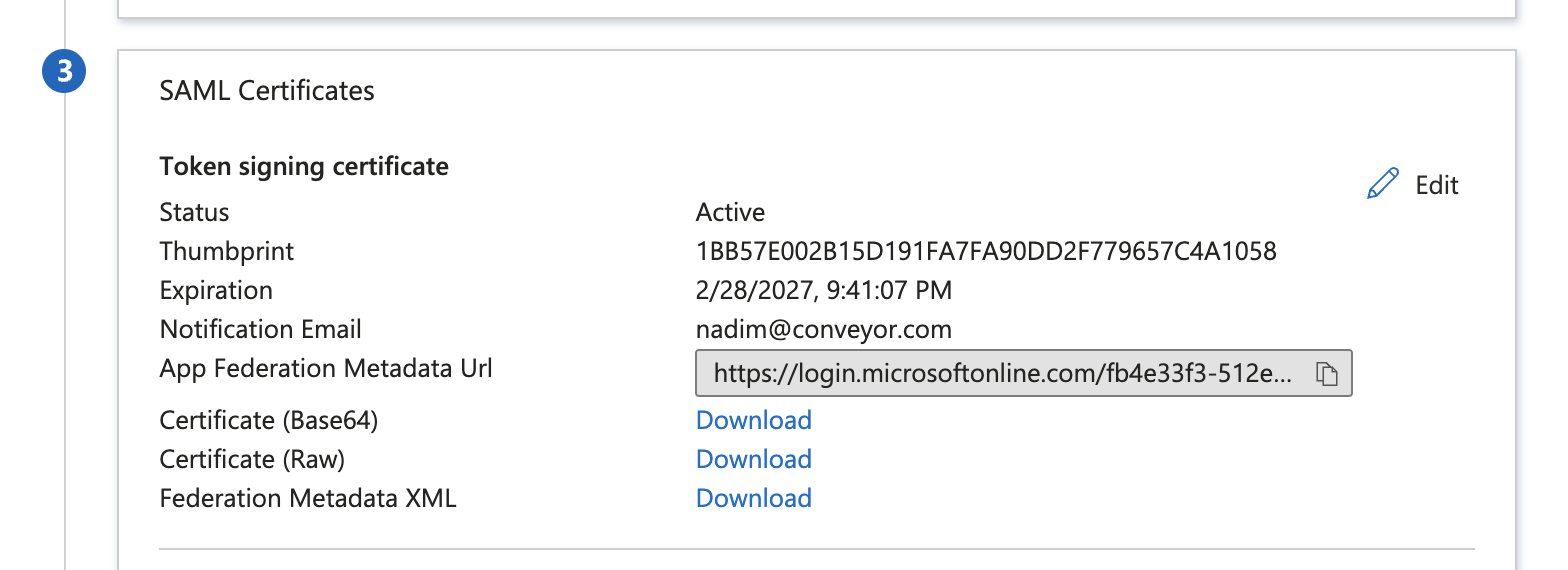
4 — Transfer Federation XML data to conveyor
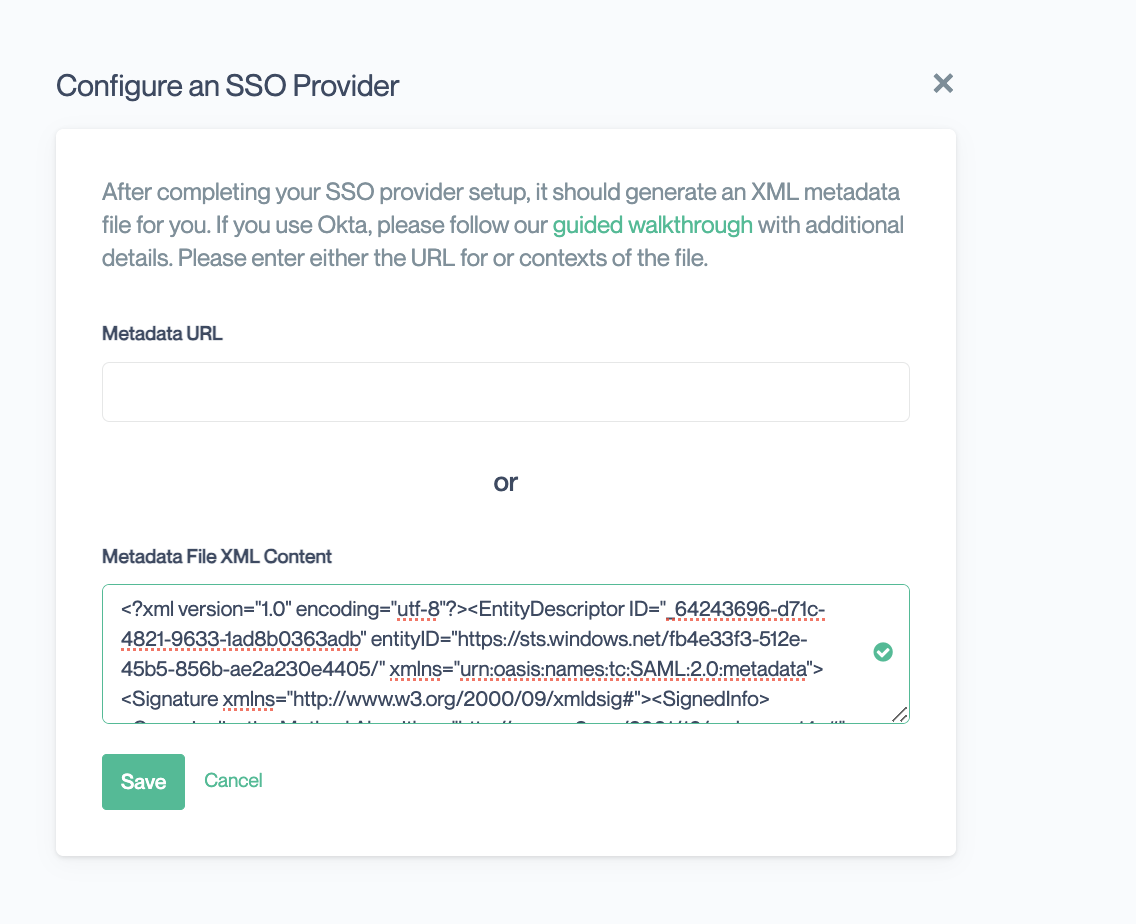
- In the conveyor's sso configure screen, press "Configure an SSO Provider"
- Insert the raw XML data in the Metadata File XML Content and press "Save"
Test single sign-on
You have multiple way to initiate SSO Login.
-
Initiate from Entra using their provided URL (login URL)
-

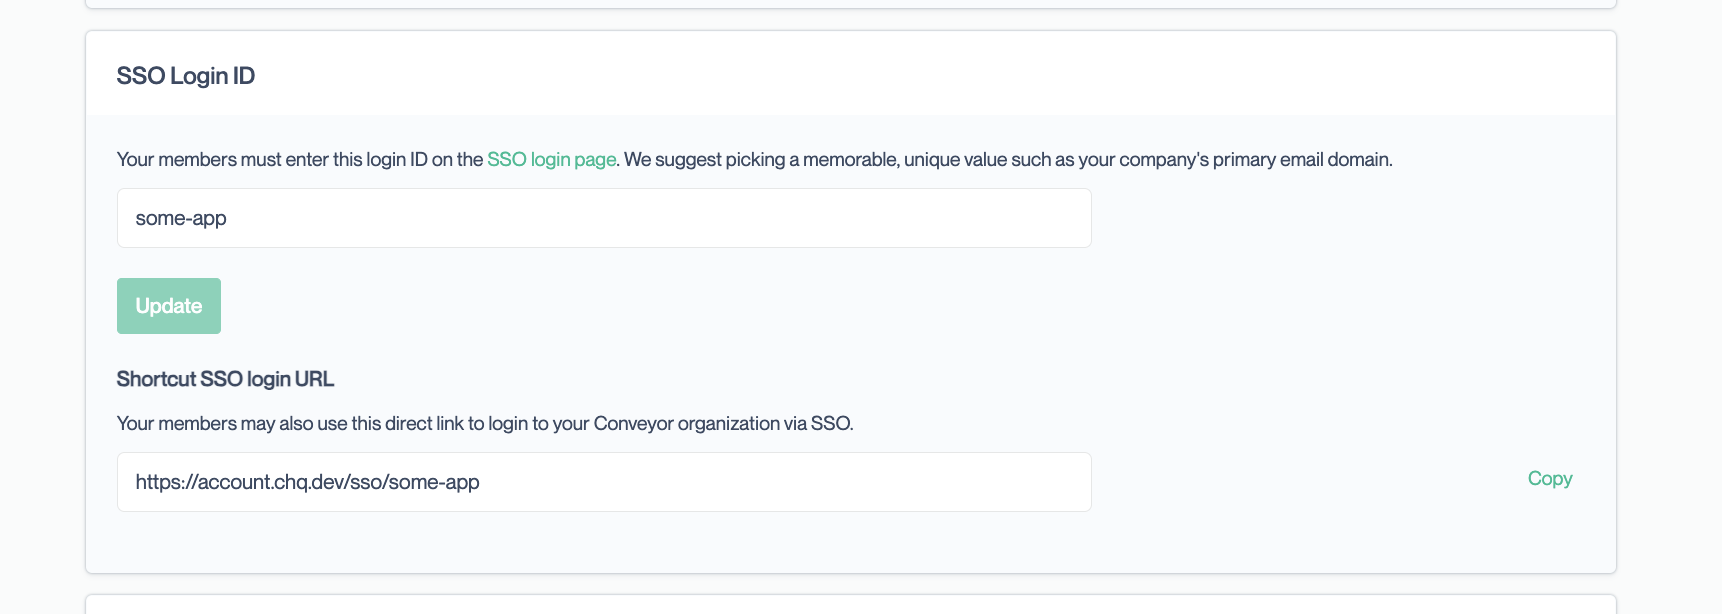
You can also initiate Login via conveyor and you can customize this url (the shortcut SSO login URL would initiate an entra login)
Auto provision and deprovision (Skip if you set up SCIM)
When a user logs in for the first time, you can set them up to be auto provisioned
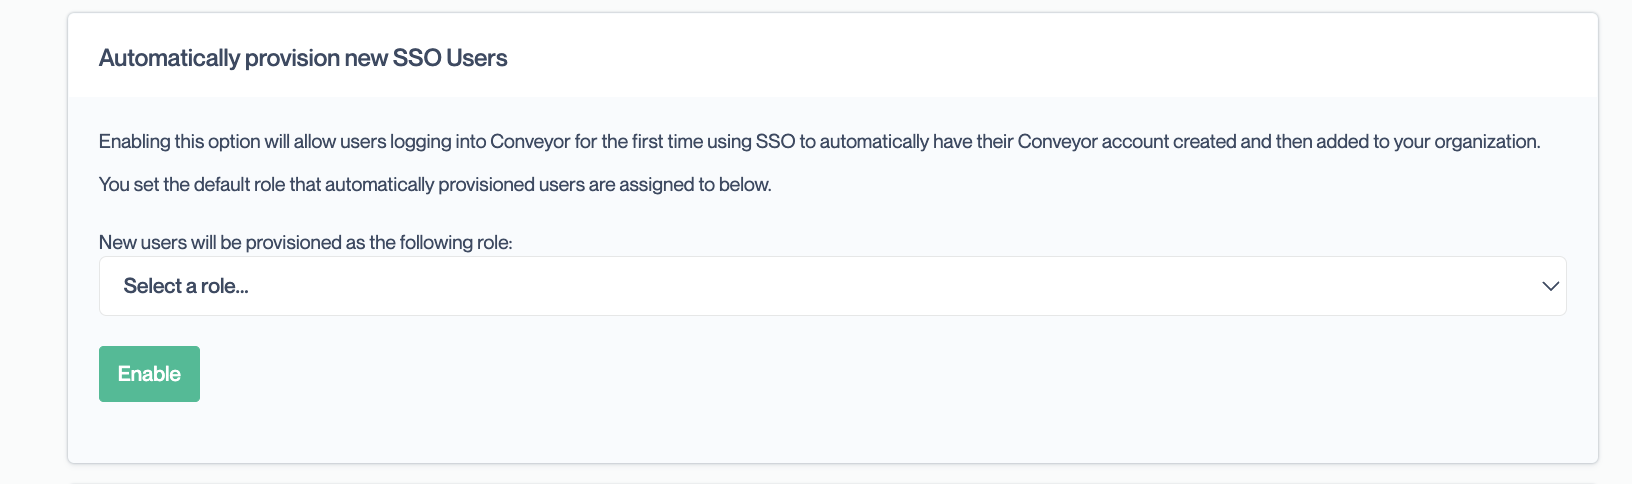
If you want users to be automatically deprovisioned, you must set up SCIM. Otherwise you can stop here.
SCIM Configuration
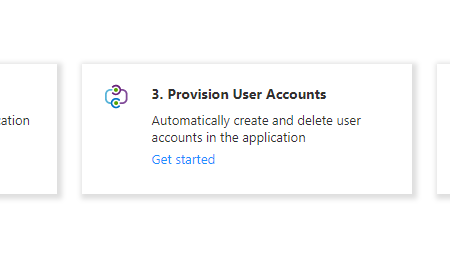
1 – In the new app, click Provision User Accounts
2 – Set provisioning mode to automatic.
- Fill out Tenant URL and Secret Token by using information in your Conveyor Account.
- Sign in to your Conveyor account and navigate to the Single Sign On settings and scroll to the Enable SCIM for your organization panel
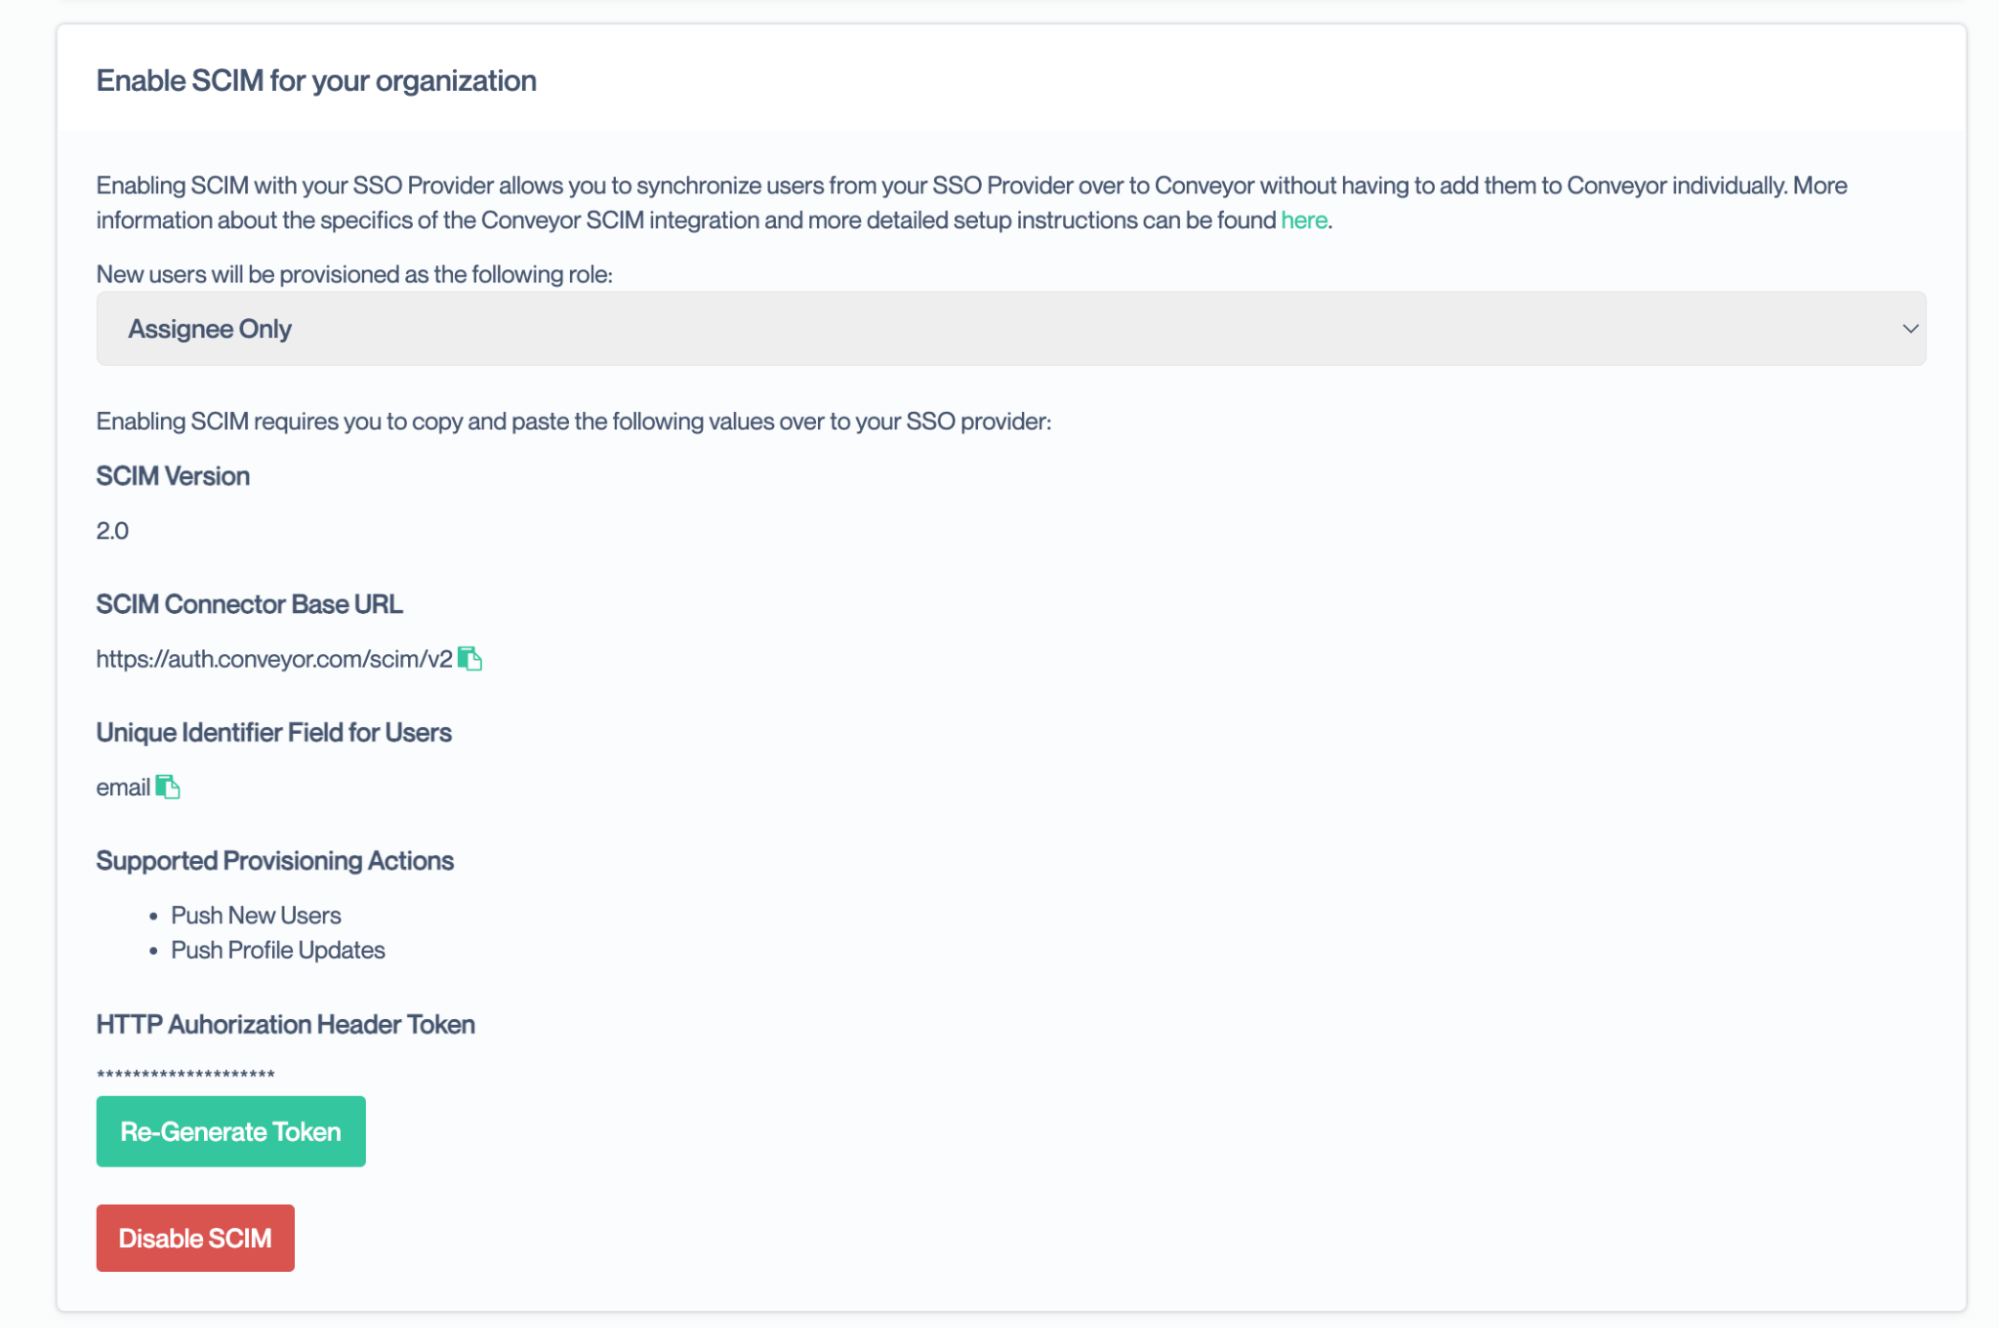
- Take the token and SCIM Connector URL and fill out the Tenant URL and Secret Token information
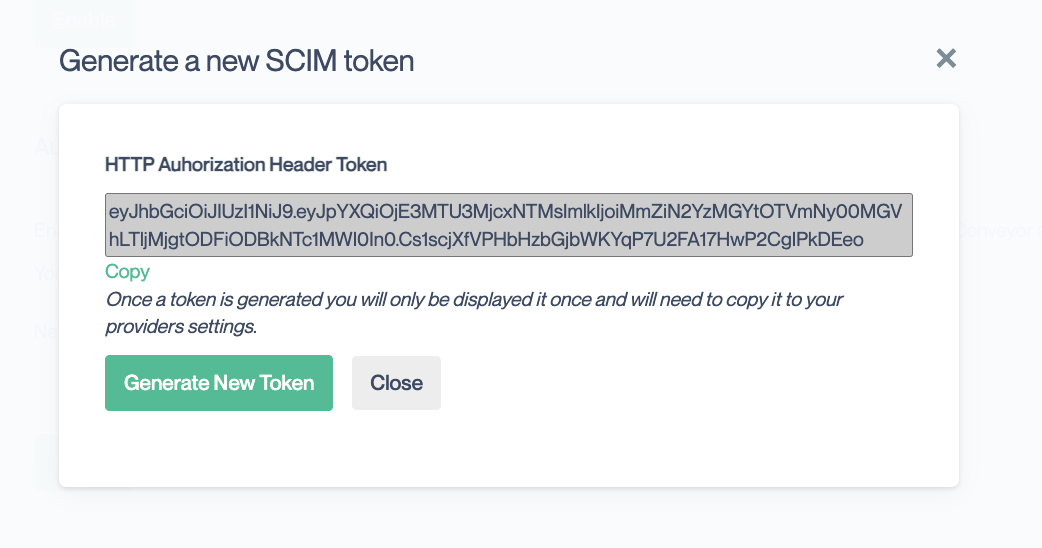
- Copy Generated HTTP Authorization Header Token and paste it into “Secret Token”
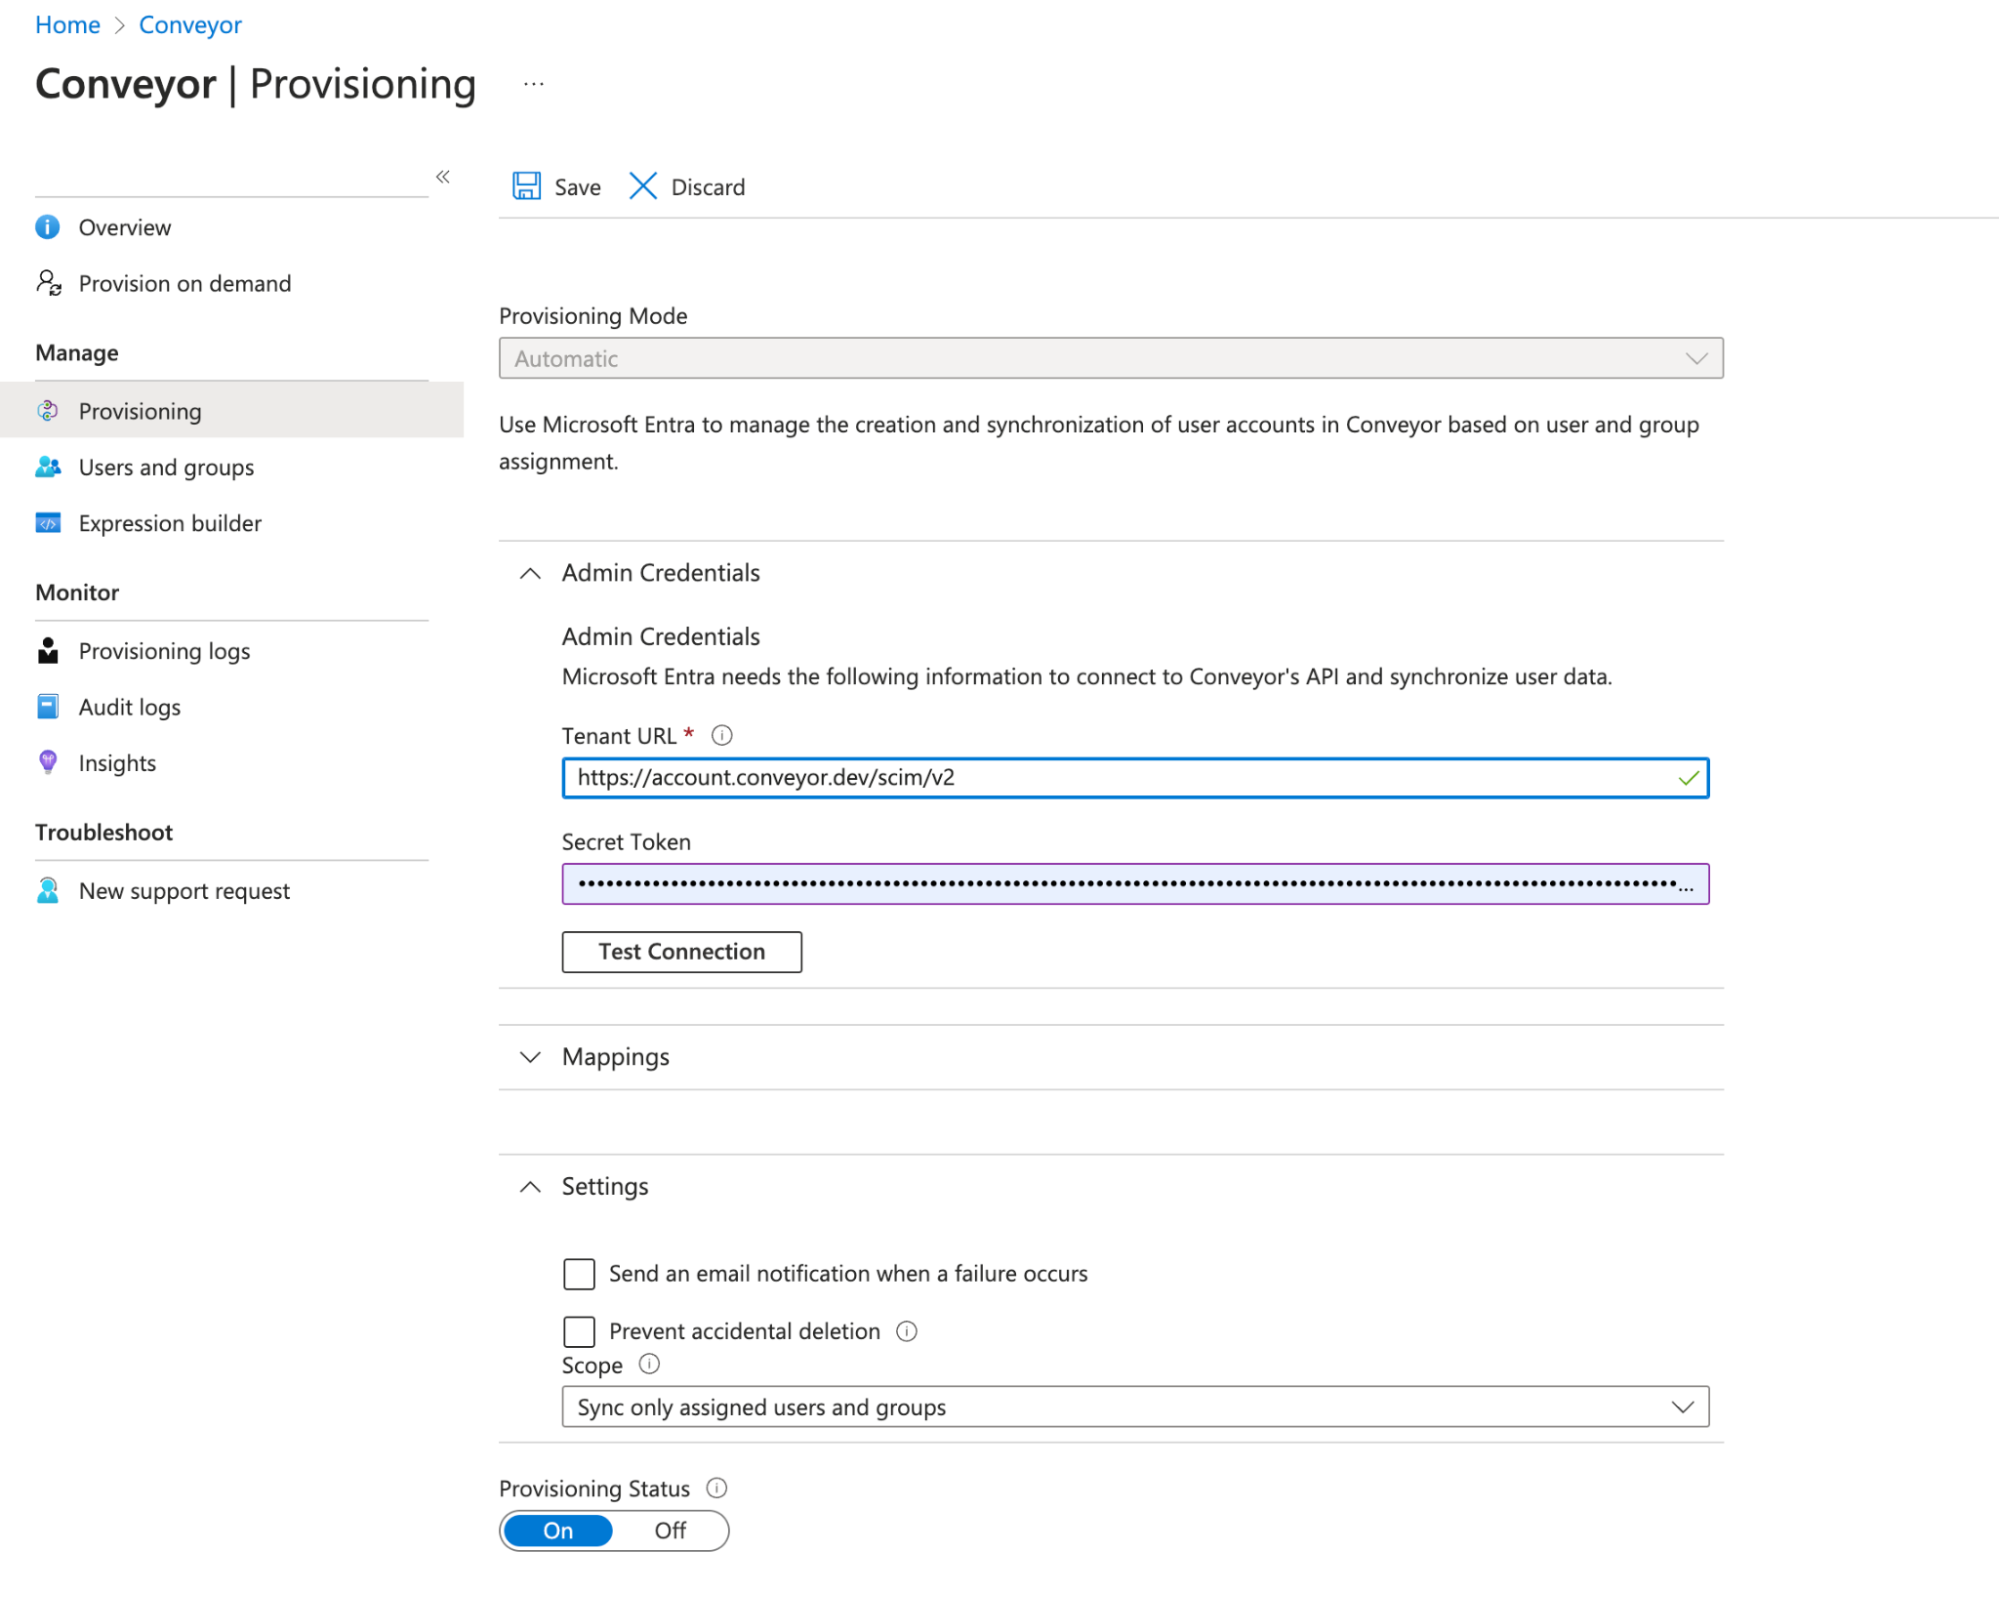
- Finally, click “Test Connection” and “Save”.
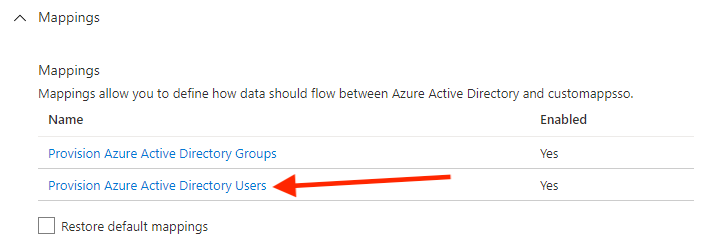
3 – Go to Provision Azure Active Directory User Mappings
4 – Setup table as pictured below and save
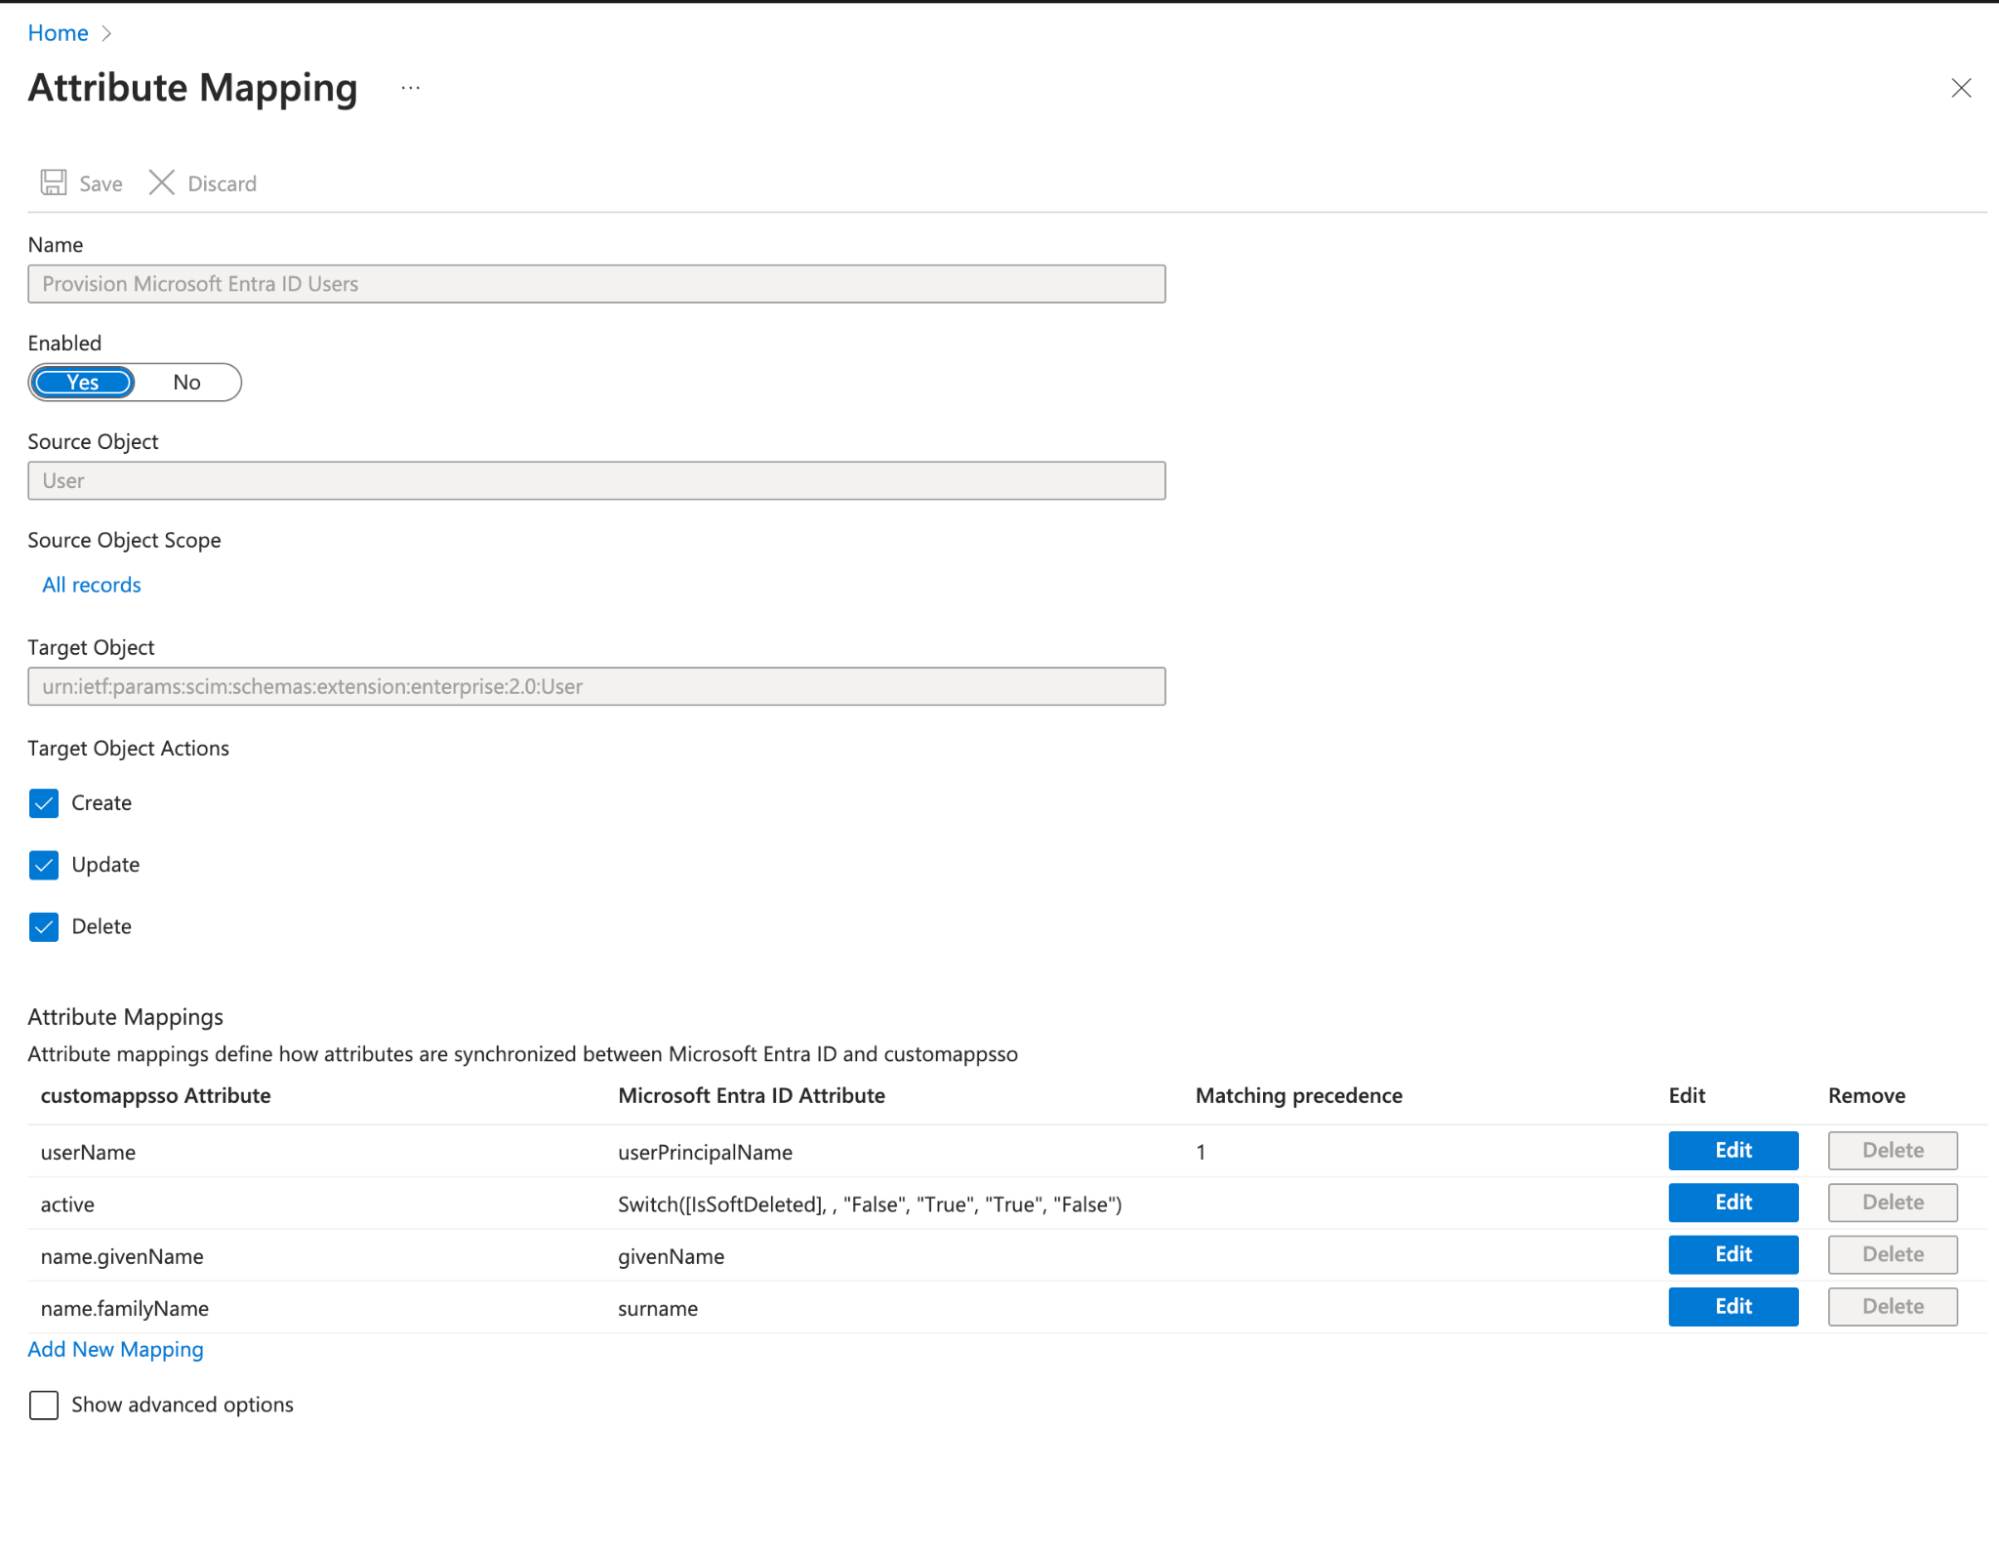
For active, the expression is Switch([IsSoftDeleted], , "False", "True", "True", "False")
Mapping table must matchYour mapping table must look exactly like the image above. If any of the rows are missing, the SCIM connection will not work. If some fields are missing you can use the advanced options to add them.
All your users should now be synced to the conveyor account. If users are added in Entra, they will be added on Conveyor, if they are removed, they will also be removed.
Updated 3 months ago