Setting up the Salesforce OAuth integration
Benefits
The first step to unlocking the many benefits of the Conveyor Salesforce integration is the easy-to-use OAuth integration.
Setup permissions
The Conveyor Salesforce integration uses OAuth to grant authorization for Conveyor's Salesforce Connected App. We then use that authorization to fetch your Salesforce data.
Whichever account you use to authenticate, Conveyor will get the permissions on that account when fetching your Salesforce data. That means if, for example, you authenticate using your Salesforce admin's account, Conveyor will likely get permissions to fetch more Salesforce data than we need. If that does not pose an issue for your organization, then authenticating Conveyor using your Salesforce admin's account is the quickest way to complete setup.
However, if scoping down to the minimum permissions is important to your organization, we recommend creating a new user that has only the minimum permissions Conveyor needs to make this integration work. See the Creating a scoped-down Salesforce account documentation to learn more.
Setting up the integration
As a reminder, setup for the Salesforce integration uses OAuth to authenticate. To get that setup:
- Make sure you're logged in as an account owner of your Conveyor app
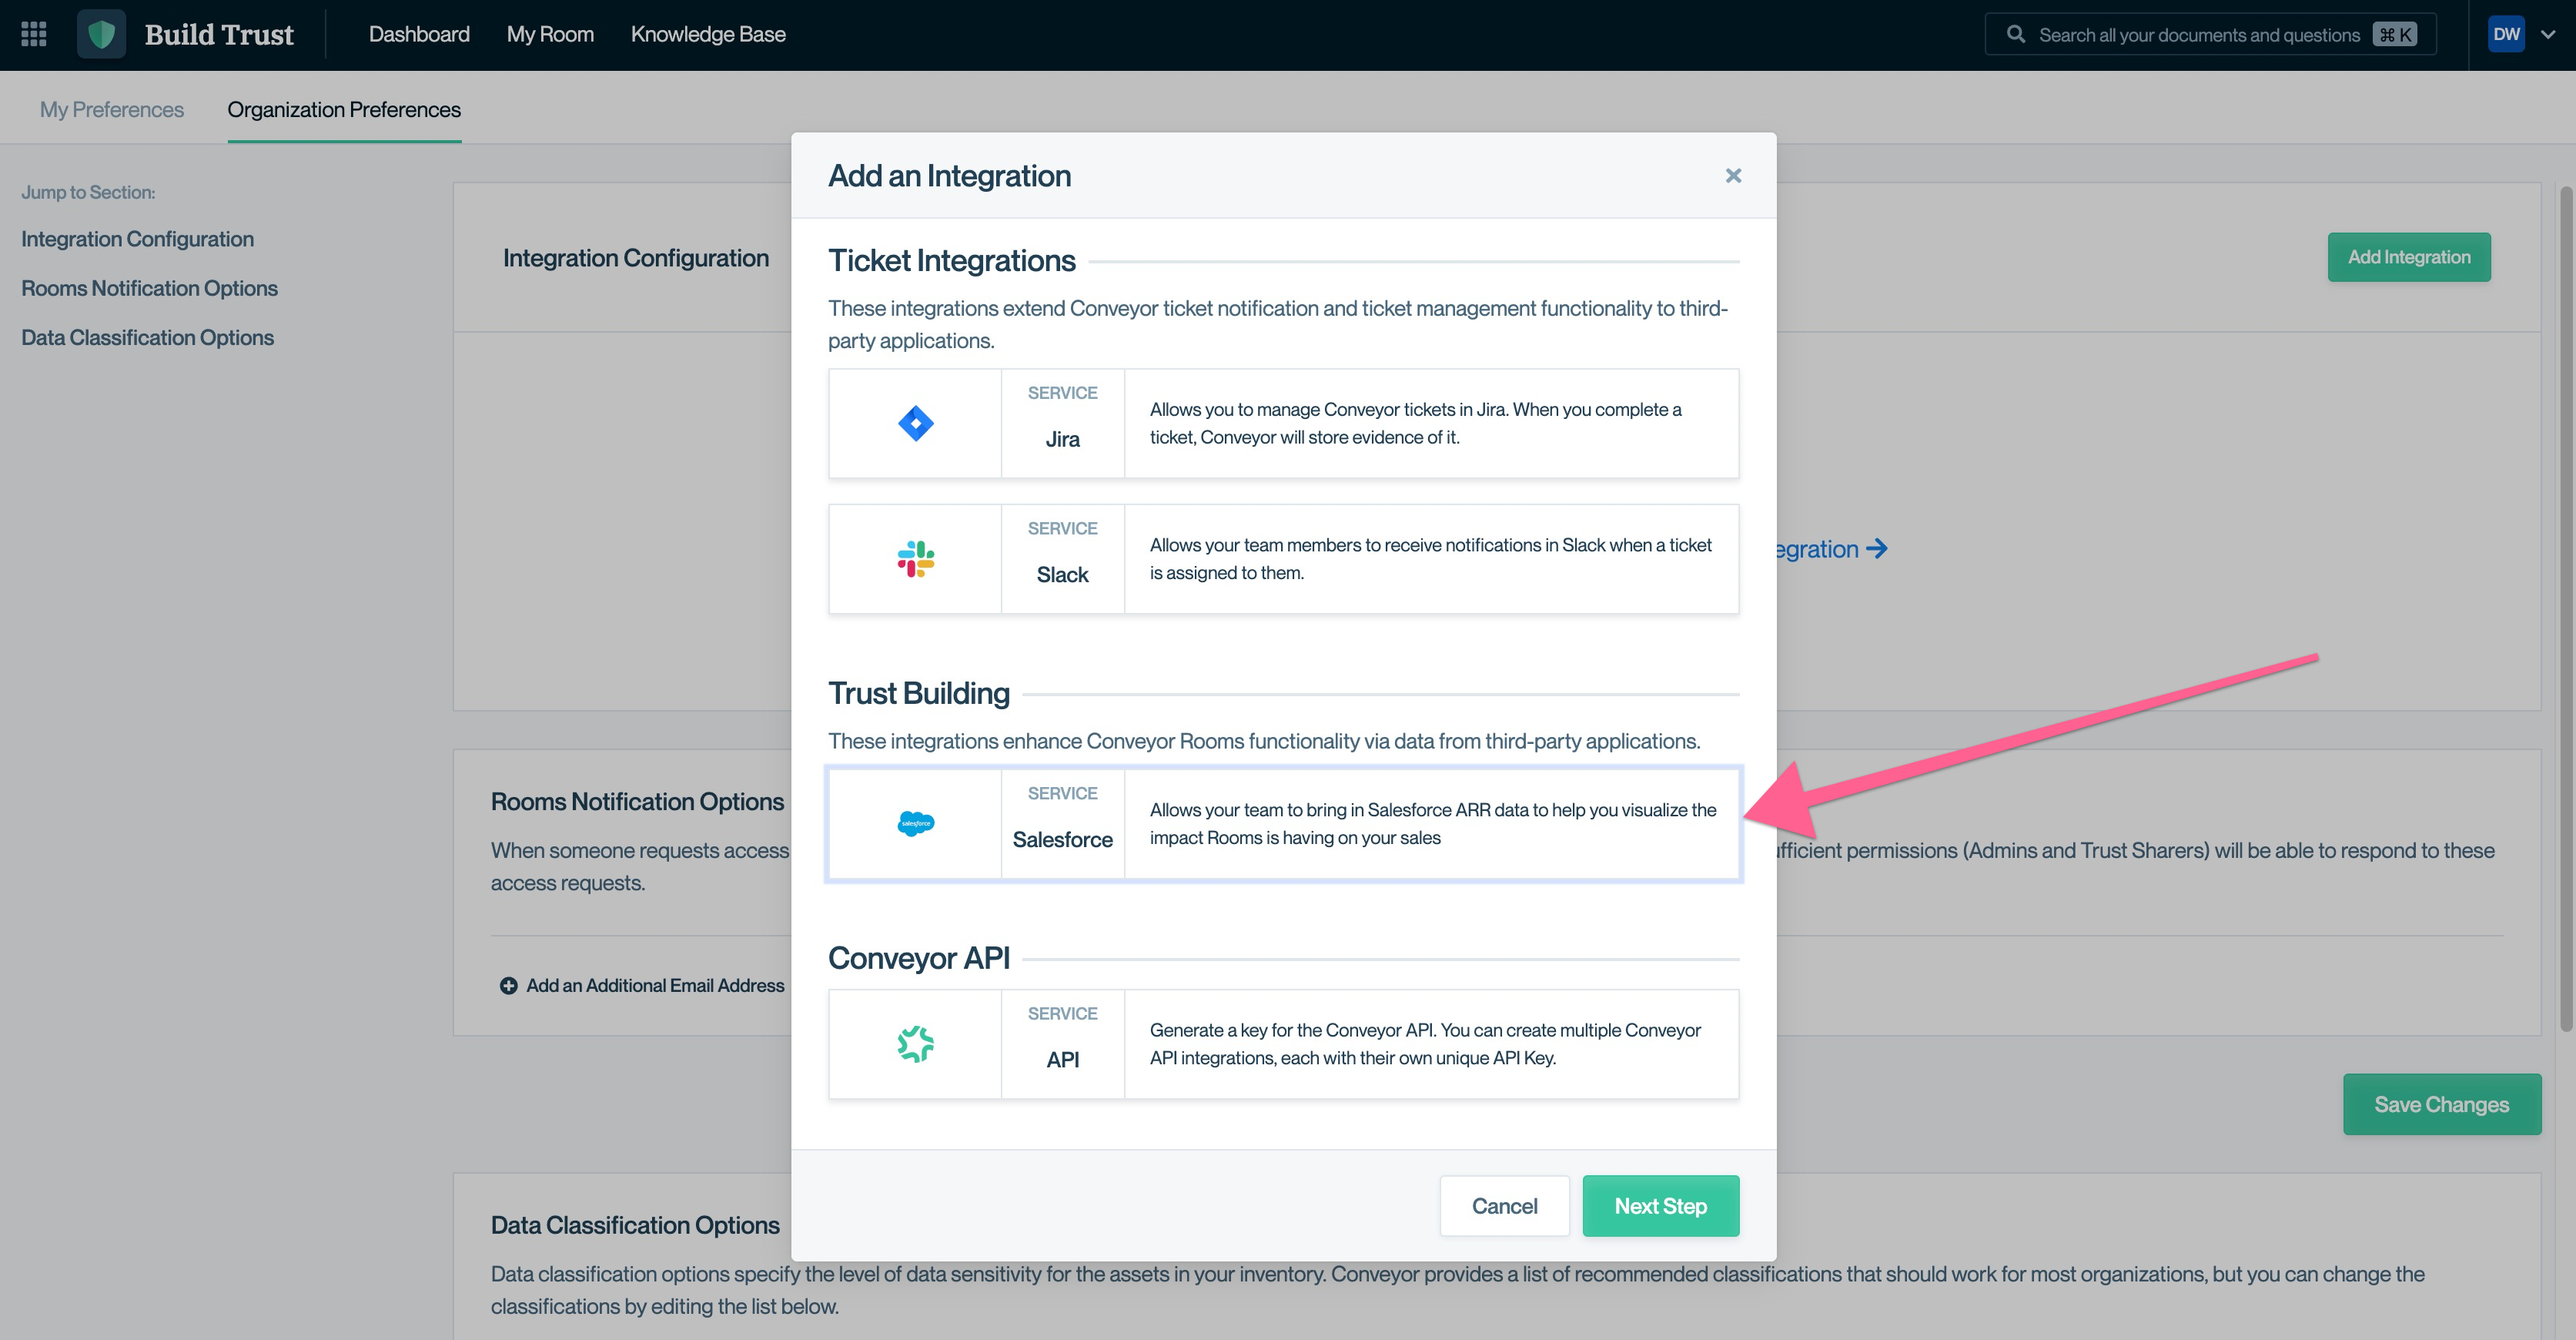
- Click on the "Organization Preferences" in the lower left of your screen
- Under the "Integration Configuration" section, click "Add Integration"
- Select the Salesforce integration and click "Next Step"
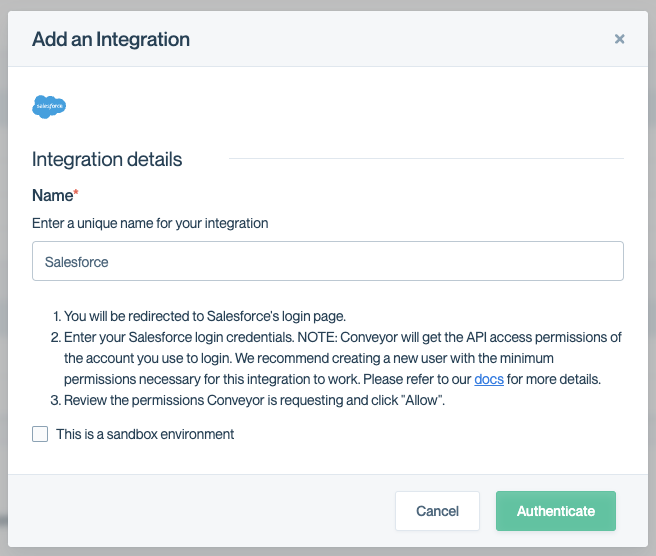
- If you're connecting to a Sandbox Salesforce instance, click the "This is a sandbox environment" checkbox
- Click "Authenticate"


- You will be redirected to Salesforce. Enter either a Salesforce admin credential or a scoped-down credential as described in Creating a scoped-down Salesforce account
- Review the permissions Conveyor is requesting and click "Allow"
And that's it! You will be redirected to Conveyor and you should see your integration successfully setup.
Updated 3 months ago
