Editing documents
Once your documents are uploaded, you have the ability to edit the documents. Simply click Update on the document card.

The following modal will appear, which contains the same fields as when you create a document:
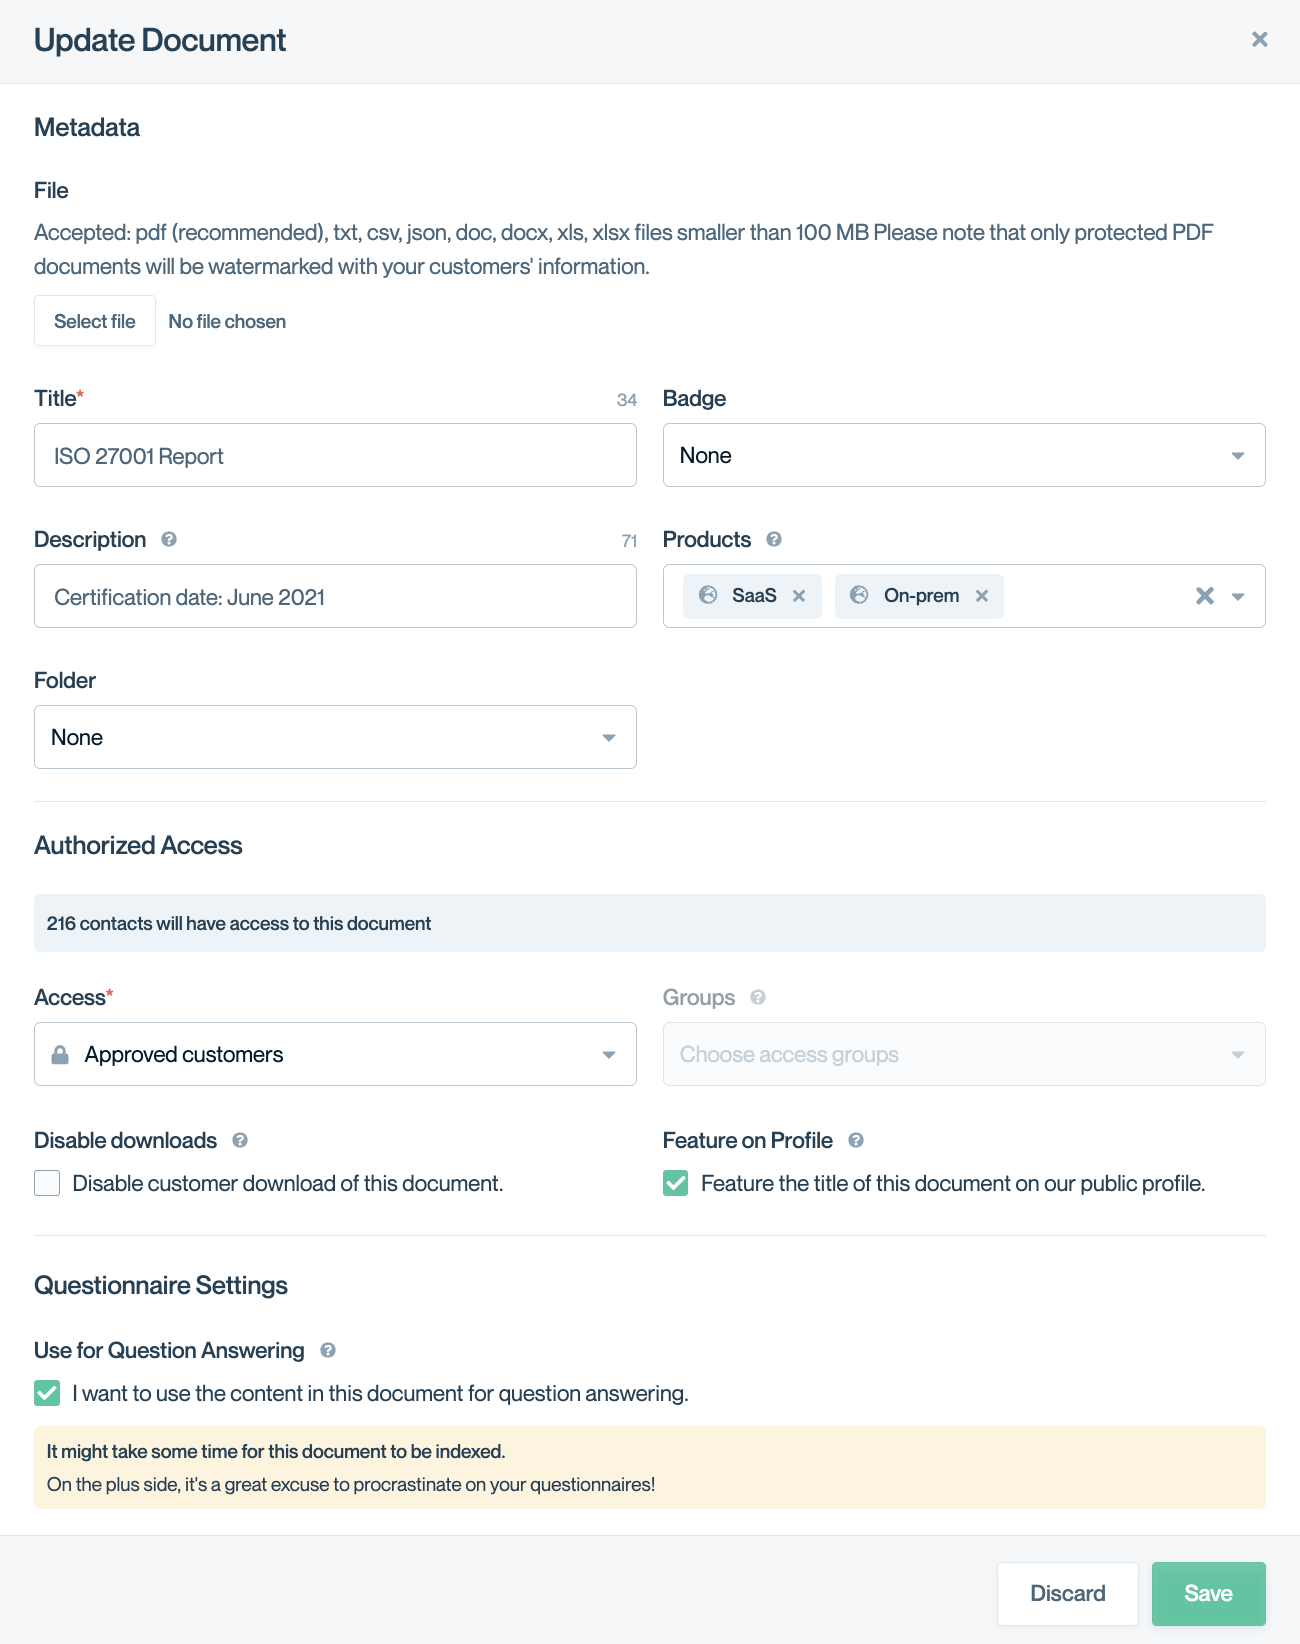
This modal contains the following fields:
Metadata
- File: Changes the underlying file (for example, if you have a new version of your SOC 2). ☝️Note: If you change the file, you will see an additional option to "announce" the updated document to any visitors who interacted with this document in the past.
- Title: The main title of the document.
- Description: Additional, optional information (such as the Reporting Period of a SOC 2 Type II report)
- Badge: If the document is one of several very common report types, you can select an icon to appear on the tile, making the document easier for your customers to recognize.
- Products: If the document is not relevant to all of your product lines (for example, a SOC 2 whose scope is limited to one of your products), you can apply a Product tag here. Please note, for your products to appear as options in this menu, you must first set up Product Lines in your Organization Preferences.
- Folder: Documents can be arranged in Folders in your Trust Center. To utilize this feature, first create the folder from the main Documents page, then select the folder from this dropdown.
- Curator: Assign a person to be responsible for this document. We'll send them a notification when the document expires.
- Expiration Date: Choose when the curator will be reminded to update the document. Please note: Expired documents are still used by Conveyor AI. The intent is for this feature to serve as a warning system, rather than a hard cutoff for document access.
Authorized Access
- Access: Determines who can interact with the document. By default, documents are added as "Internal only," meaning they are in your Trust Center and indexed by the internal search function, but they are not visible to your Trust Center visitors. See Document Access for more information.
- Groups: If you set "Access" to "Some approved customers," you can then specify which groups of customers should be able to access this document. See Document Access for more information.
- Disable Download: If you have the Disable Download feature available on your account, you can prevent customers from downloading any document of type PDF. When this field is checked, those customers will only be able to view the PDFs in Conveyor.
- Feature on Profile: You can feature the titles of certain documents on the public view of your Trust Center, even if those documents are only accessible after the visitor has been approved. This is a nice way of "previewing" the gated content that is available to your customers.
Questionnaire Settings
- Use for Question Answering: PDFs and CAIQ/HECVAT/SIG Excels are by default opted-in as a source of information for ConveyorAI. You can choose to opt any out by de-selecting this checkbox. (If you don't see this checkbox for a given document, it means the file type is not supported as a source of knowledge for ConveyorAI.)
Deleting a document
You can delete a document by selecting the three dots on the document tile, then selecting "Delete." Please note that deleting the document will remove all metrics associated with that document.
Sometimes, rather than deleting the document, it may be better to:
- If the document is no longer current, and you have a new version --> Just click "Edit", then change the file.
- If you are just looking to remove it from your customer experience of you Trust Center, but you want to retain the analytics --> Set the access to "Internal Only," and move it to a folder such as "Archive."
- If you want to exclude it from ConveyorAI --> disable "Use for Question Answering."
Updated about 1 month ago