ServiceNow

Description
ServiceNow is a cloud computing platform to help companies manage digital workflows for enterprise operations. Conveyor integrations with ServiceNow so you can automatically create reviews from your assessments and have issues and insights pushed back into ServiceNow to speed up your vendor assessments.
The Conveyor integration requires your ServiceNow instance to have the "Vendor Risk Management" module installed.
Benefits
The Conveyor ServiceNow integration allows users who have a current vendor assessment workflow in ServiceNow to speed up their vendor assessments by seamlessly sending all relevant information from ServiceNow to Conveyor. Receiving the issues flagged by Conveyor back in ServiceNow allows users to take the most pertinent information Conveyor provides and translate that into next steps in ServiceNow.
Setup permissions
The Conveyor ServiceNow integration uses OAuth to grant authorization to your instance of ServiceNow. We then use that authorization to fetch your ServiceNow data and push data back to ServiceNow.
Whichever account you use to authenticate, Conveyor will get the permissions on that account when fetching your ServiceNow data. That means if, for example, you authenticate using your ServiceNow admin's account, Conveyor will likely get permissions to fetch more ServiceNow data than we need. If that does not pose an issue for your organization, then authenticating Conveyor using your ServiceNow admin's account is the quickest way to complete setup.
However, if scoping down to the minimum permissions is important to your organization, we recommend creating a new user that has only the minimum permissions Conveyor needs to make this integration work. See the Creating a scoped-down ServiceNow account documentation to learn more.
Setting up the API token in Conveyor
This token authenticates to the Conveyor API. We need this for ServiceNow to create a review in Conveyor. This token must be included in the header of every request.
If the engineer setting up the integration is not a user of Conveyor, an existing user can generate the keys and securely share them using a password wallet.
It is best to create one key per integration you are looking to set up, although you are able to connect multiple integrations using the same key.
To create the token:
- Login to Conveyor as an Account Owner
- Go to: https://app.conveyor.com/organization-preferences
- In the "Integration Configuration" section, click "Add Integration" in the top right
- At the bottom of the list choose "Conveyor API" and click "Next Step"
- Enter a name for the API key and click "Save" (something like "ServiceNow Integration" should suffice)
You will need this key in the next section.
Setting up the integration in ServiceNow
We need to create an OAuth endpoint to grant Conveyor access to your ServiceNow instance. You can follow our guide, or the guide from ServiceNow.
You will likely need your ServiceNow admin to do the following:
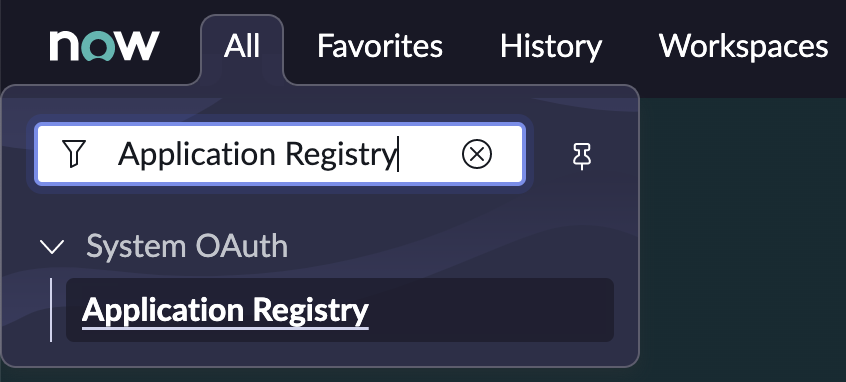
- Search in ServiceNow's nav for "Application Registry" and select the result under "System OAuth"
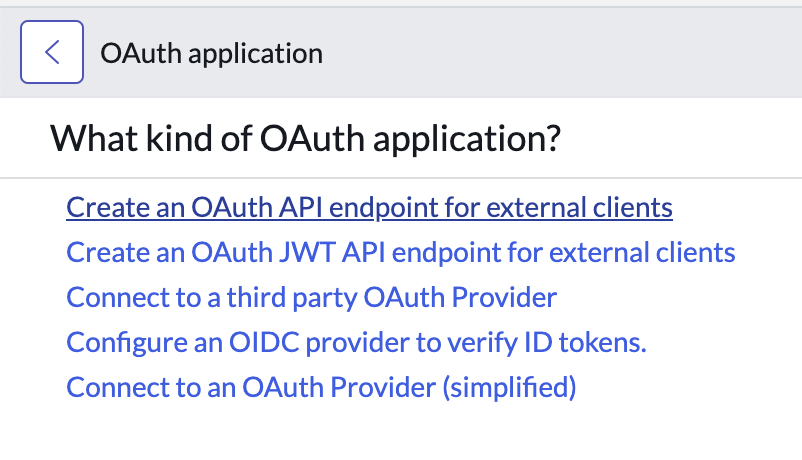
- Click the link "Create an OAuth API endpoint for external clients
- Click "New" in the top right
- Fill out the form to create a new OAuth API endpoint
The values to fill into the fields are:
Field | Instructions for value |
|---|---|
Name | Whatever you think is most descriptive. Something like "Conveyor Integration" should suffice. |
Client ID | This value is determined by ServiceNow and cannot be edited. |
Client Secret | We recommend you leave this blank to let ServiceNow automatically generate a secret for you. |
Redirect URL | Put the following exactly, after clicking the lock icon to unlock the field: |
Logo URL | You can leave this blank |
Comments | You can leave this blank, or add any comments you think might be helpful for others. |
For the remaining fields, leave the default values in there.
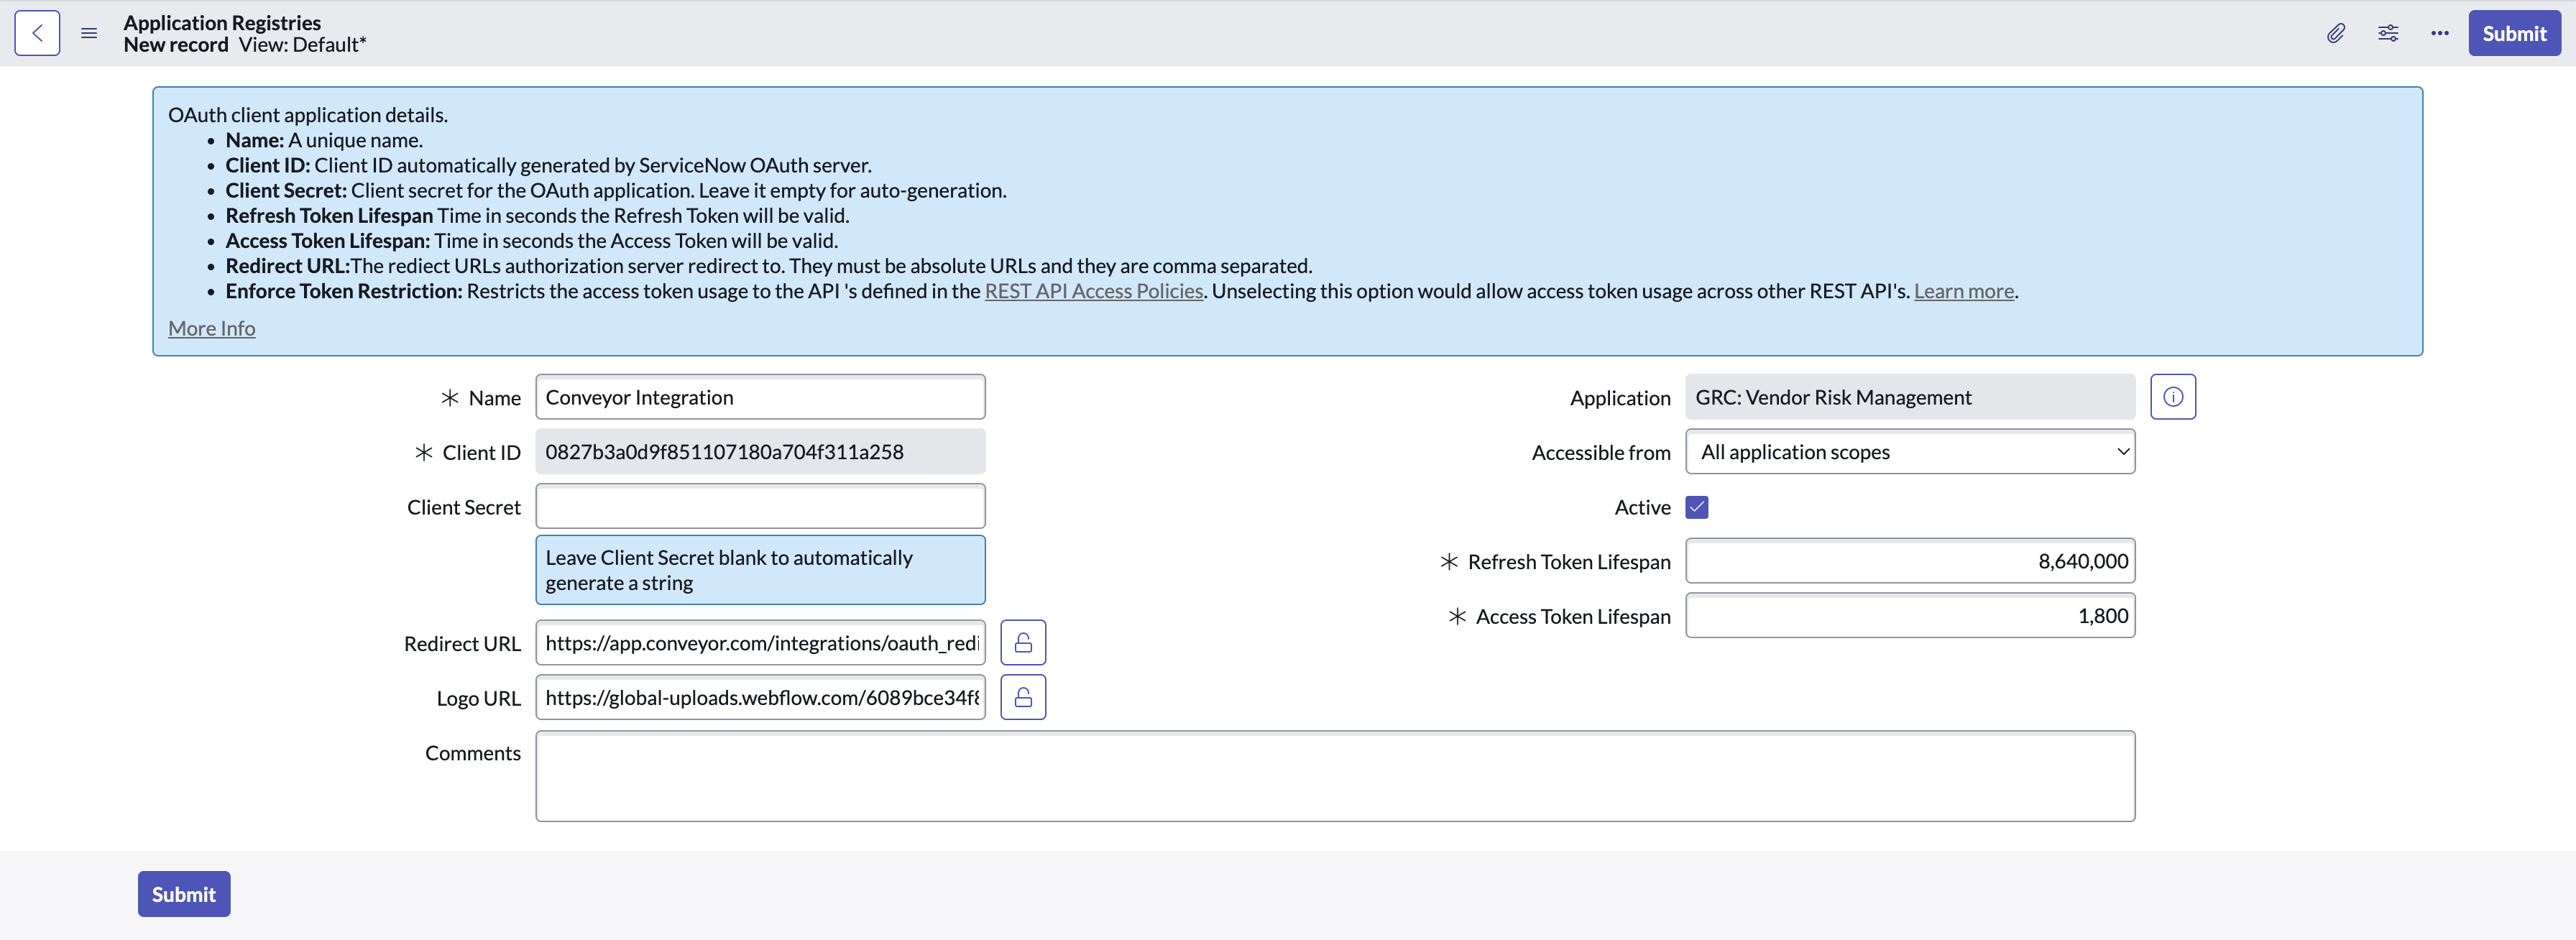
- Click "Submit"
After you have created the record, you will have the Client ID and Client Secret values that you need to complete the next section.
Setting up the OAuth integration in Conveyor
As a reminder, setup for the ServiceNow integration uses OAuth to authenticate. To get that setup:
- Make sure you're logged in as an account owner of your Conveyor app
- Go to "Organization Preferences" here: https://app.conveyor.com/organization-preferences
- In the "Integration Configuration" section, click "Add Integration"
- Select the ServiceNow integration and click "Next Step"
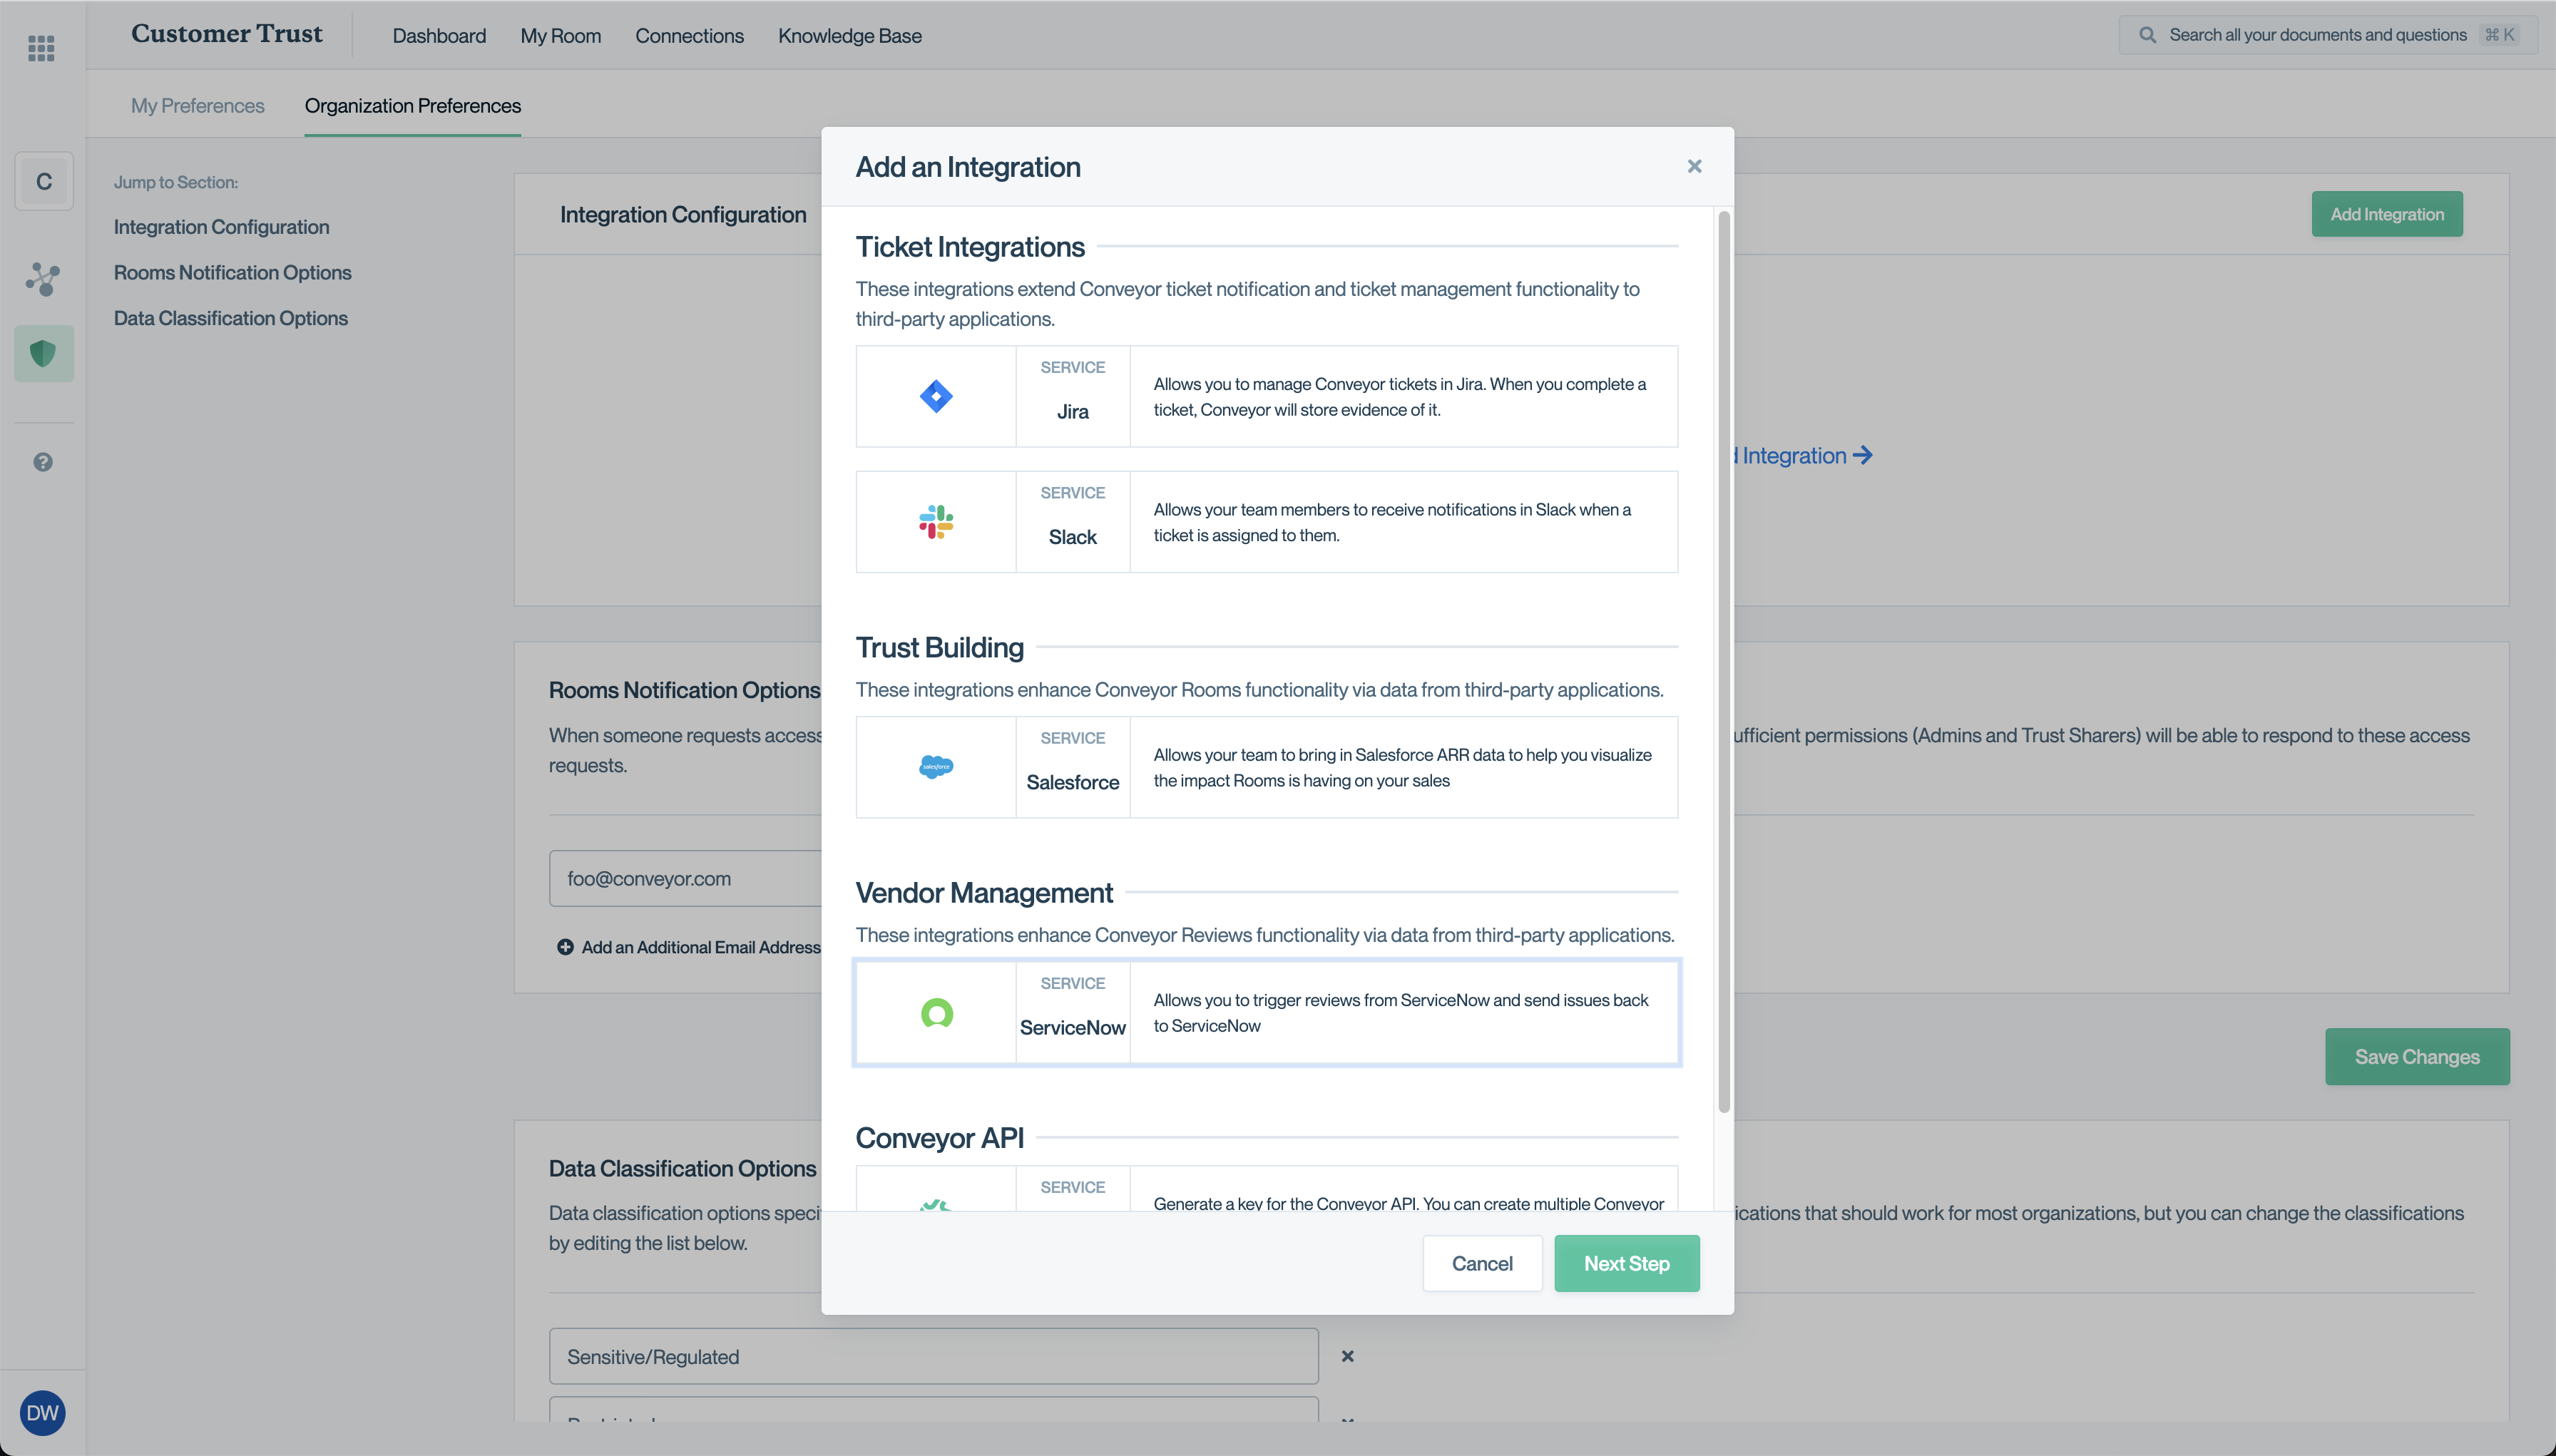
- Enter a name for your integration (or accept the suggested name)
- Enter the Client ID and Client Secret, which you would have gotten from the above "Setting up the integration in ServiceNow" section
- Enter the Base URL of your ServiceNow instance, which will look something like "https://your-instance.service-now.com". Make sure to not include any slashes at the end.
- Click "Authenticate"
- You will be redirected to ServiceNow. Login as either a ServiceNow admin or a scoped-down user as described in Creating a scoped-down ServiceNow account
- Click "Allow"
And that's it! You will be redirected to Conveyor and you should see your integration successfully setup.
Usage
Creating a Conveyor review from ServiceNow
To create a review in Conveyor from ServiceNow, we need to setup a Business Rule. This allows us to trigger a custom action (that is, calling the Conveyor API) when something happens in ServiceNow.
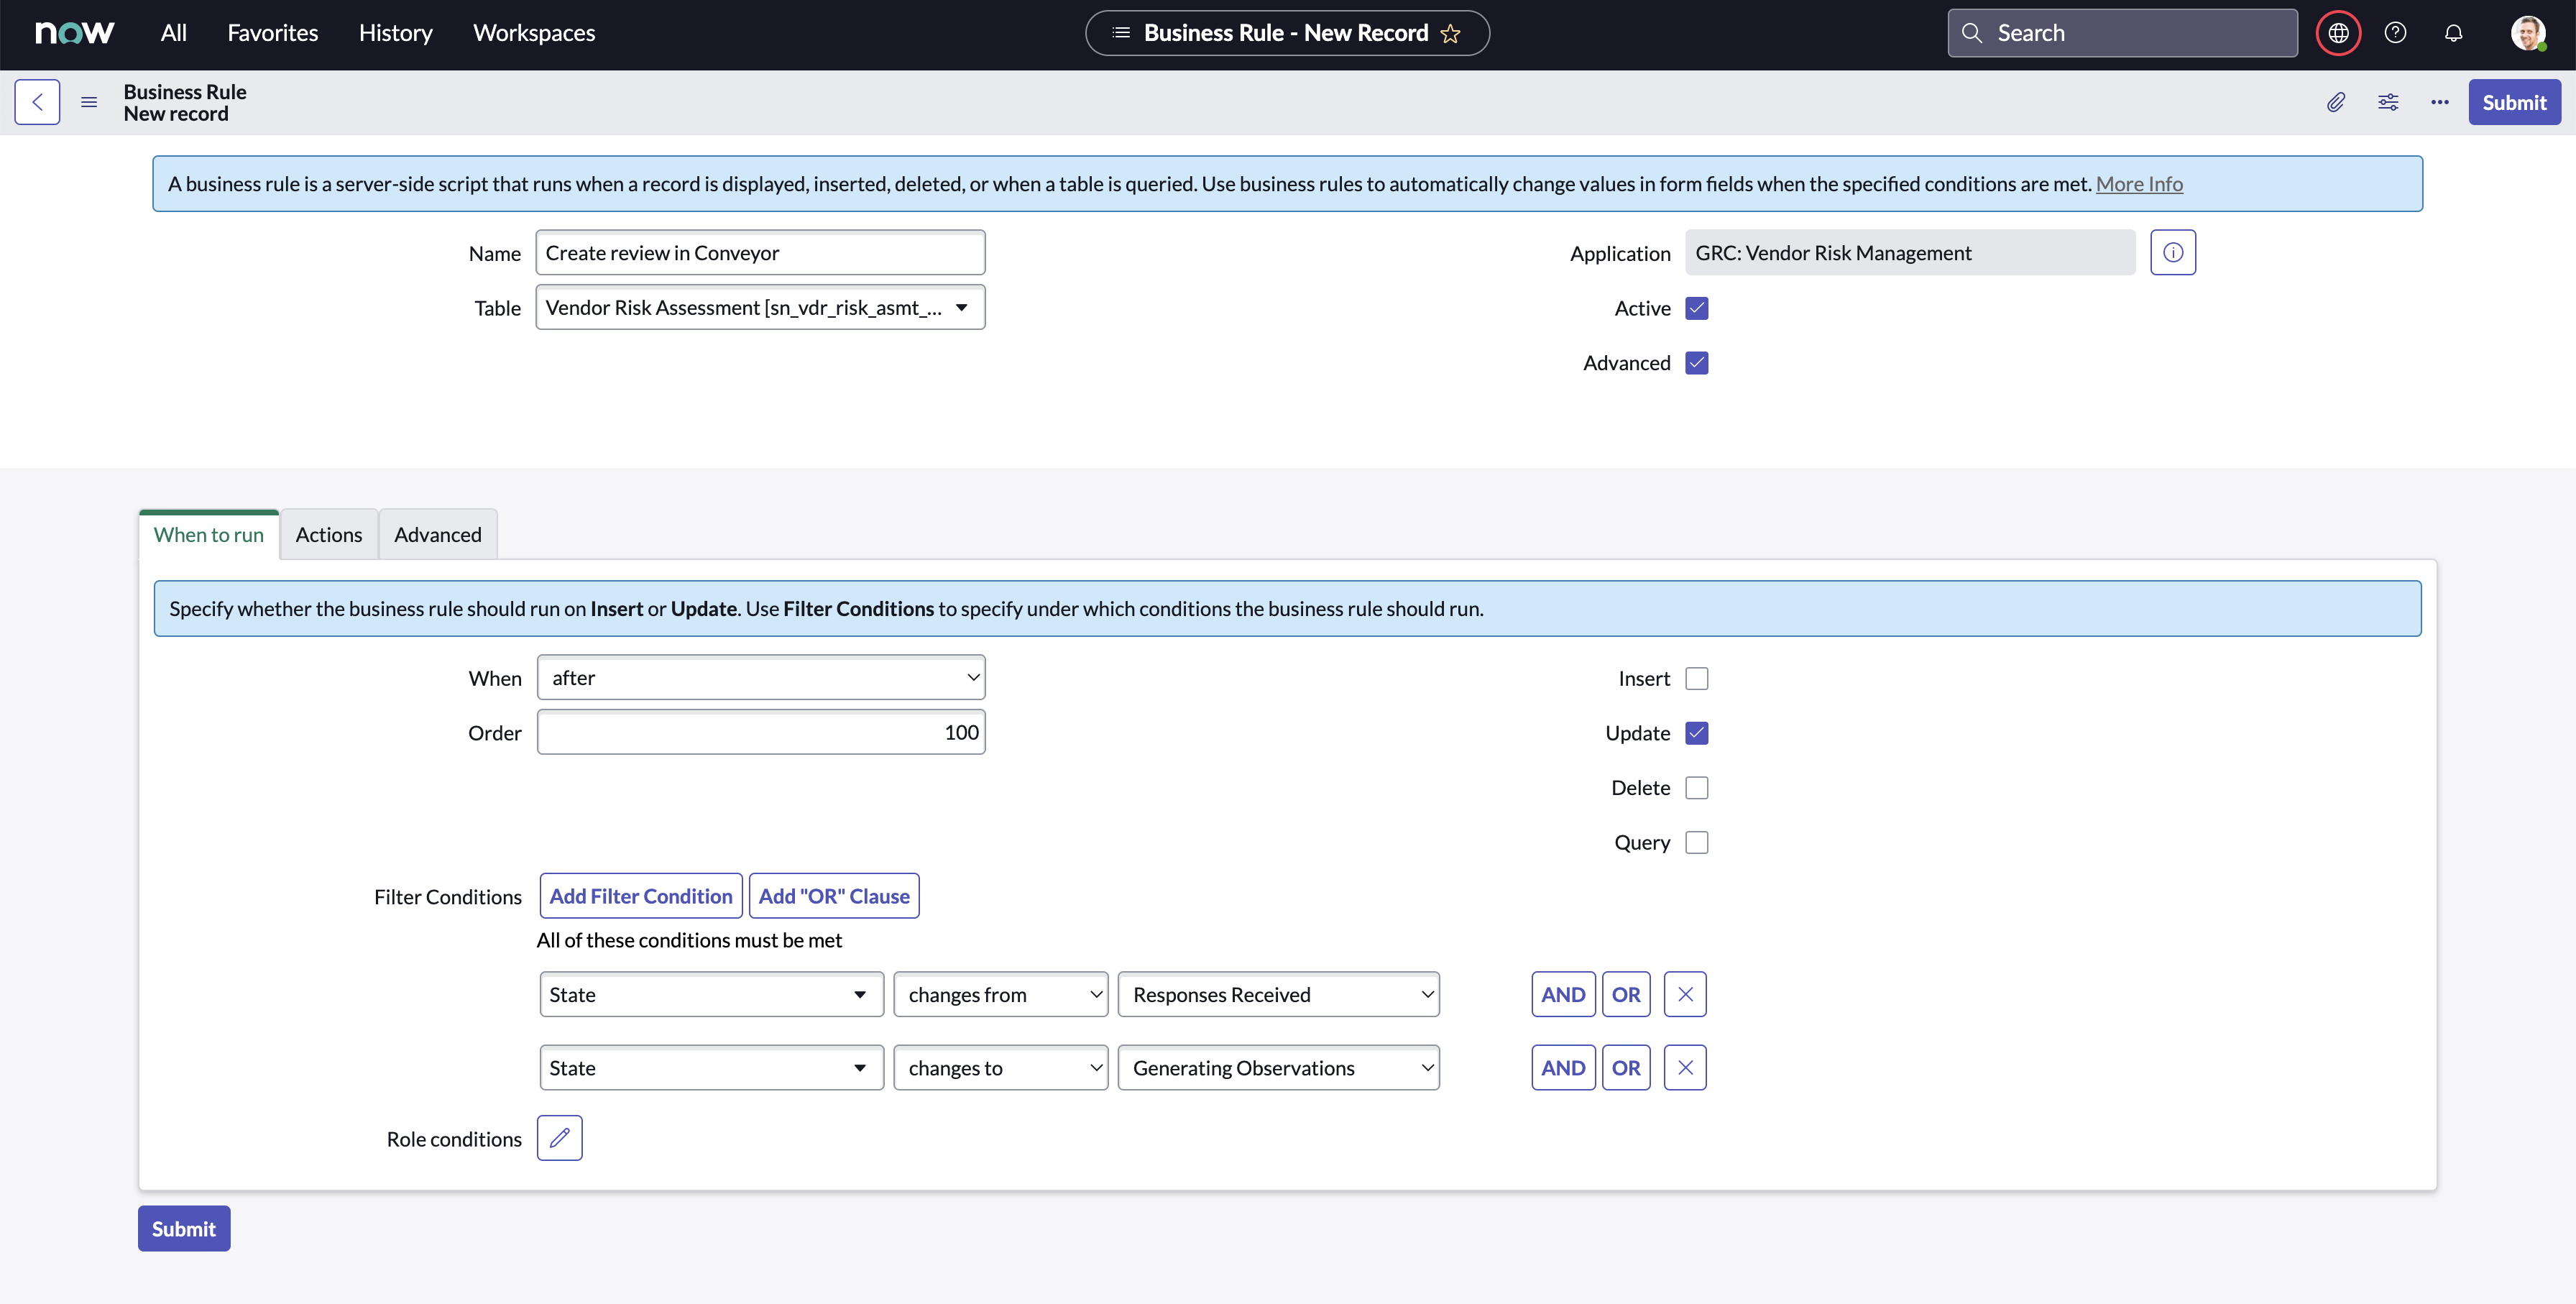
The example below will trigger creating a review in Conveyor when an Assessment goes from the state "Responses Received" to the state "Generating Observations". You might want to trigger your review creation based on other rules. That is ok, and your ServiceNow admin or our support team should be able to help you modify the below instructions to suit your needs.
- Search in ServiceNow's nav for "Business Rules" and select the result under "System Definition"
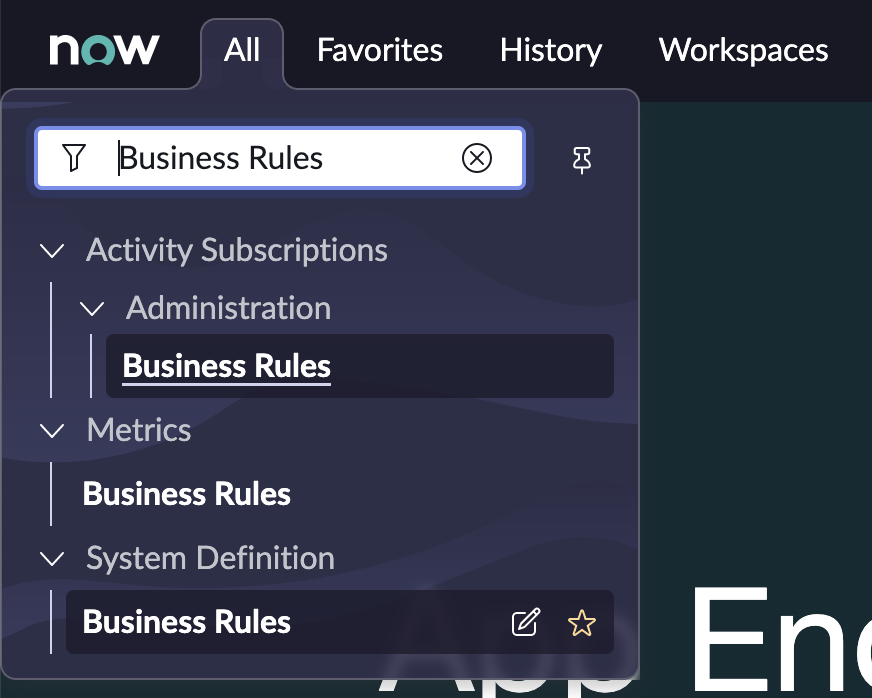
- Click "New" in the top right
- Fill out the form to create a new Business Rule
The values to fill into the fields in the top section are:
Field | Instructions for value |
|---|---|
Name | This can be whatever you think is most appropriate, but something like "Create review in Conveyor" should suffice. |
Table | Search for "Vendor Risk Assessment" and select the returning result. The table selected should be "sn_vdr_risk_asmt_assessment". |
Active (checkbox) | Make sure this box is checked (it should be checked by default) |
Advanced (checkbox) | Make sure this box is checked (it might not be checked by default) |
At the bottom, there are three tabs. The first tab is "When to run". The values to fill into the fields in this "When to run" tab are:
Field | Instructions for value |
|---|---|
When | after |
Order | 100 |
Filter conditions | Make it so that the condition reads as follows: state | changes from | Responses Received Then click the "AND" button and add another condition that reads as follows: state | changes to | Generating Observations |
Righthand side checkboxes | Make sure only "Update" is checked. |
Then, go to the "Advanced" tab (which will only show up if you checked the "Advanced" checkbox at the top). In the "Script" section, paste the following code, remembering to put in your own Conveyor API key where it says "INSERT YOUR CONVEYOR API KEY HERE". Note that this is leveraging our Conveyor Reviews API.
(function executeRule(current, previous) {

	try {
    var r = new sn_ws.RESTMessageV2();

		r.setRequestHeader("X-API-KEY", "INSERT YOUR CONVEYOR API KEY HERE");
		r.setEndpoint("https://api.conveyor.com/api/v2/reviews");

		r.setRequestHeader("Accept", "application/json");
		r.setRequestHeader("Content-Type", "application/json");

		r.setHttpMethod("post");

    var usr = new GlideRecord('sys_user');
    usr.get('sys_id', current.getValue("opened_by"));
    var email = usr.getValue('email');

		var assessment_sys_id = current.getValue("sys_id");
    var vendor_sys_id = current.getValue("vendor");
		var vendor_name = current.vendor.getDisplayValue();

    var obj = {
      "iteration_vm_id": assessment_sys_id,
			"email": email,
			"vendor_vm_id": vendor_sys_id,
			"vendor_name": vendor_name
    };

    var body = JSON.stringify(obj);
    gs.info("Webhook body: " + body);
    r.setRequestBody(body);

    var response = r.executeAsync();
		gs.info(response.getBody());
    var httpStatus = response.getStatusCode();
  } catch (ex) {
    var message = ex.message;
		gs.error("Error message: " + message);
  }

  gs.info("Webhook target HTTP status response: " + httpStatus);

})(current, previous);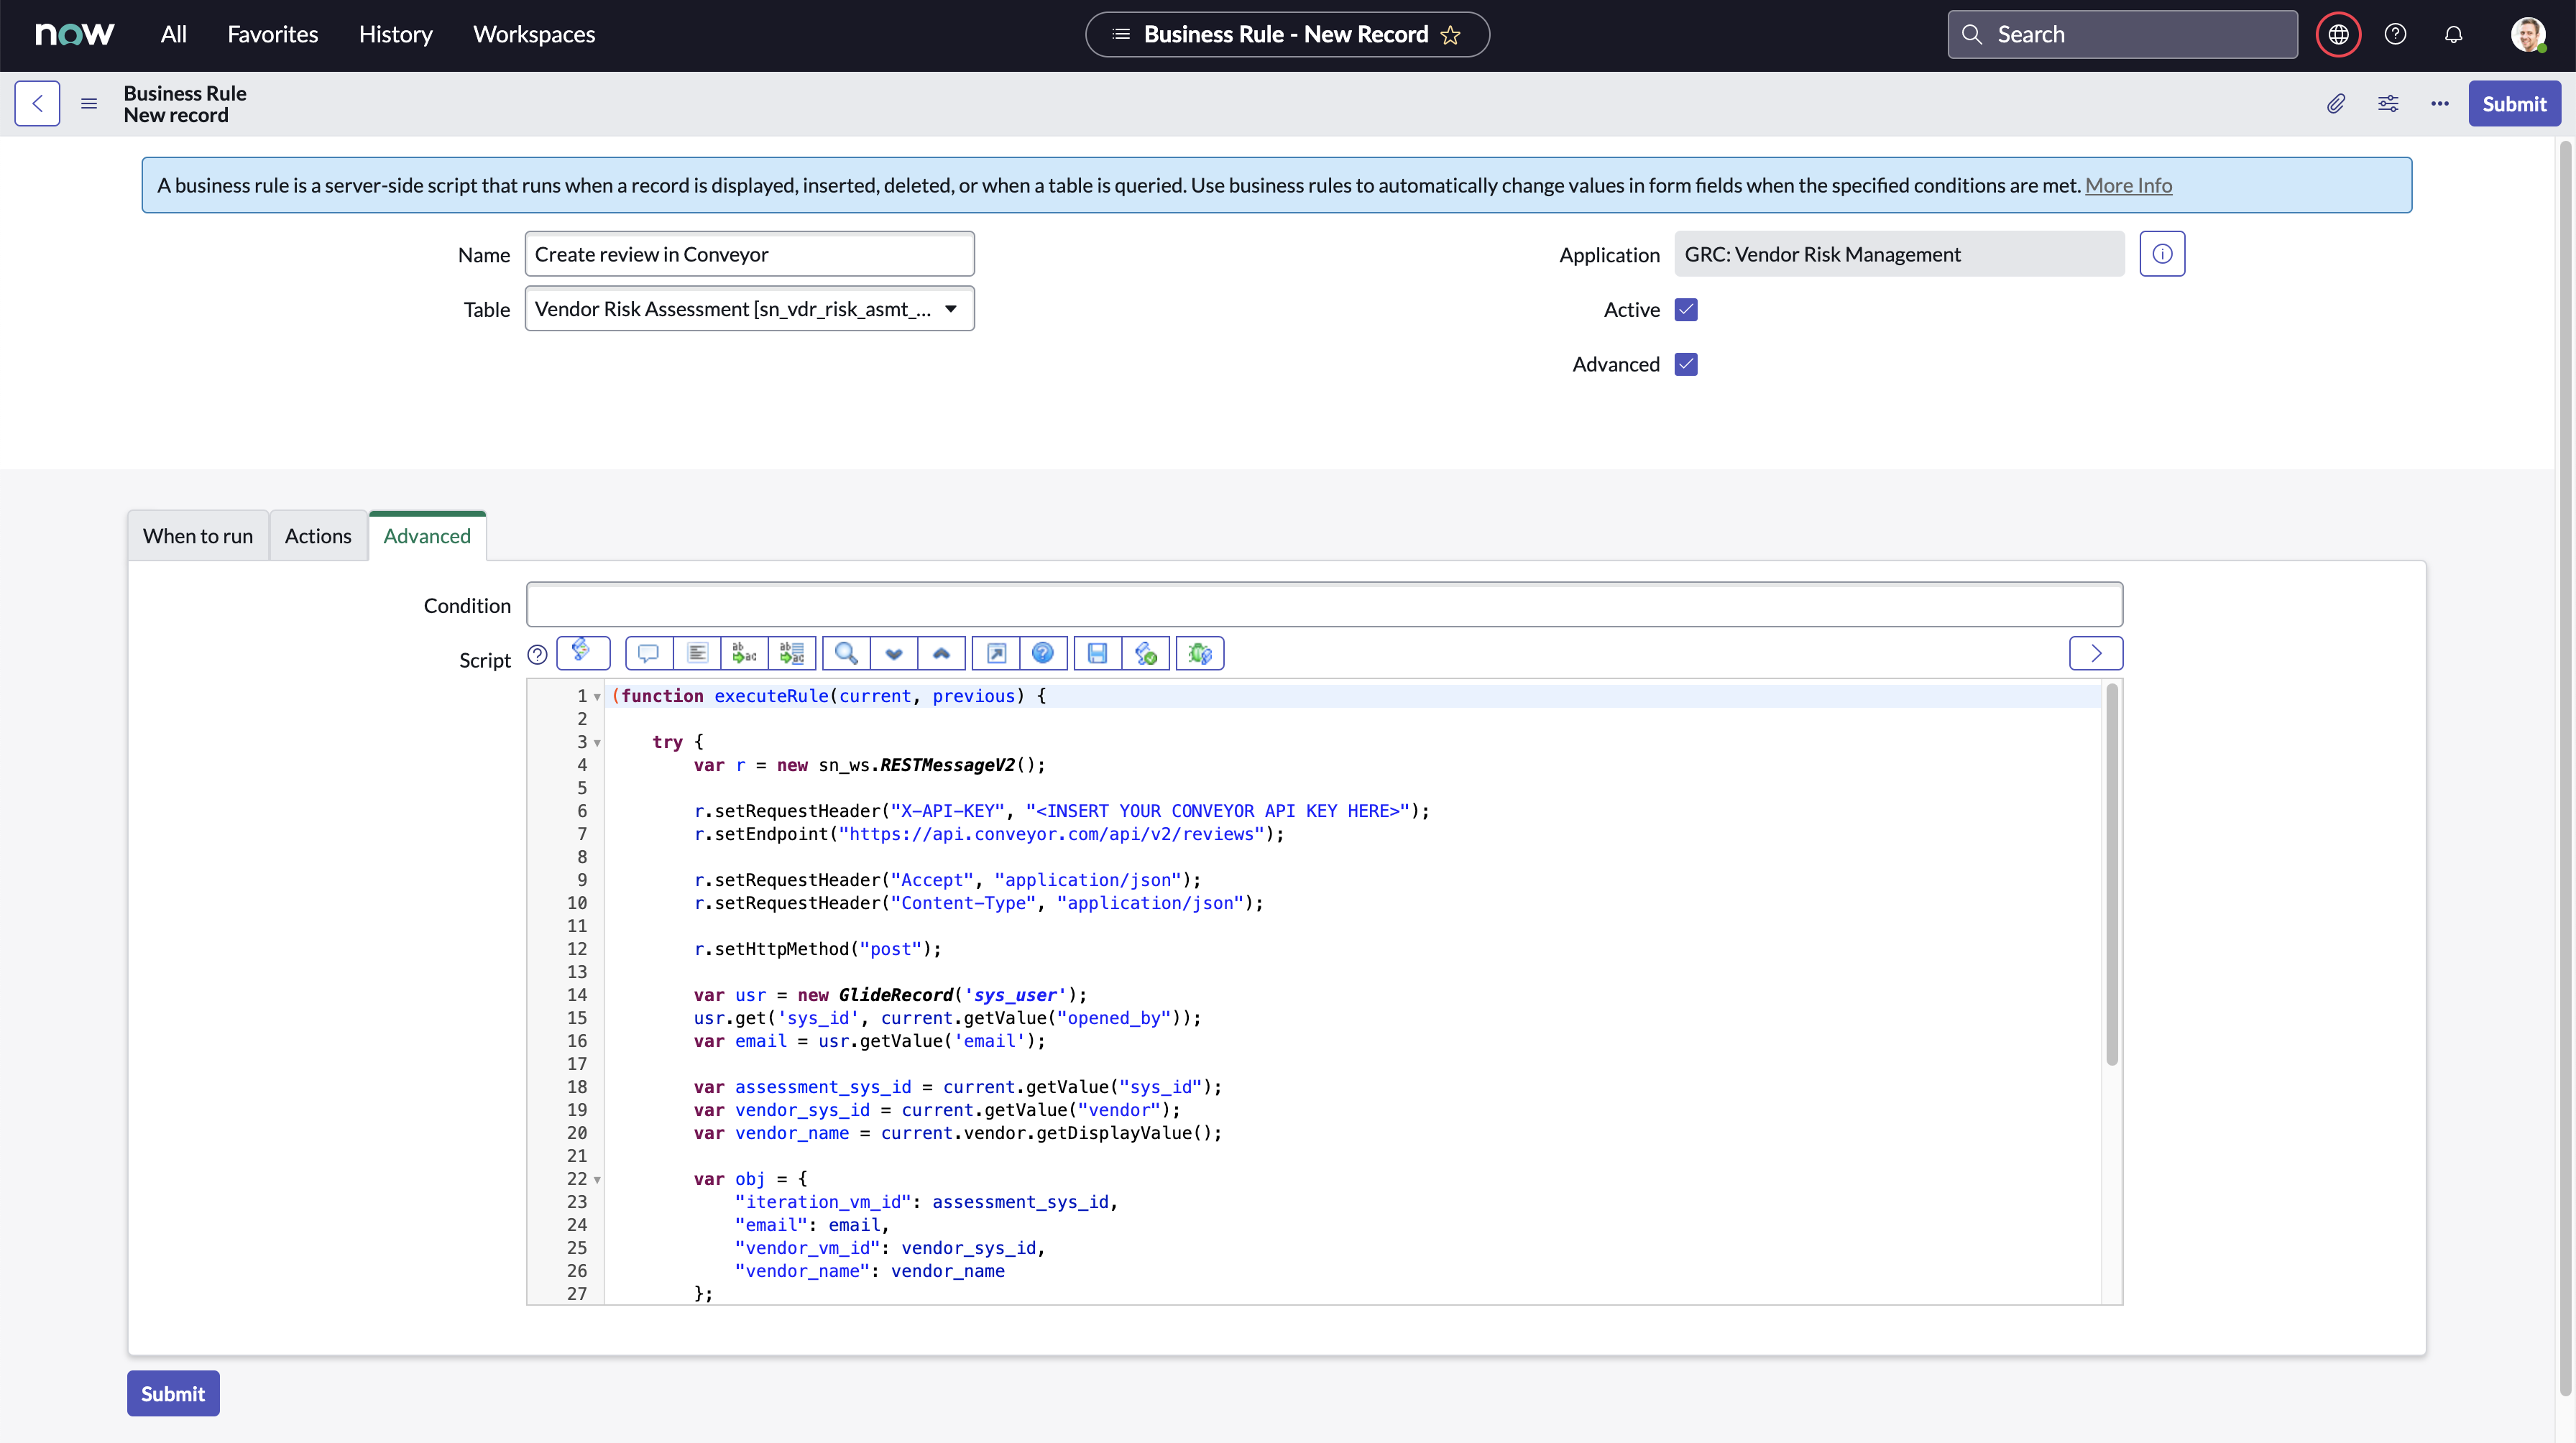
- Click "Submit"
Now, whenever a Vendor Assessment moves from the state "Responses Received" to "Generating Observations", your Business Rule will make a call to Conveyor's API to create a review in Conveyor for your vendor. It will pull in any attachments your vendor may have uploaded to your Vendor Portal, as well as pull in all the questions and answers your vendor may have answered in your Vendor Portal.
Sending data back to ServiceNow
Once you are satisfied with your review in Conveyor, you can push data back to ServiceNow by clicking the "Send to VM System" button:
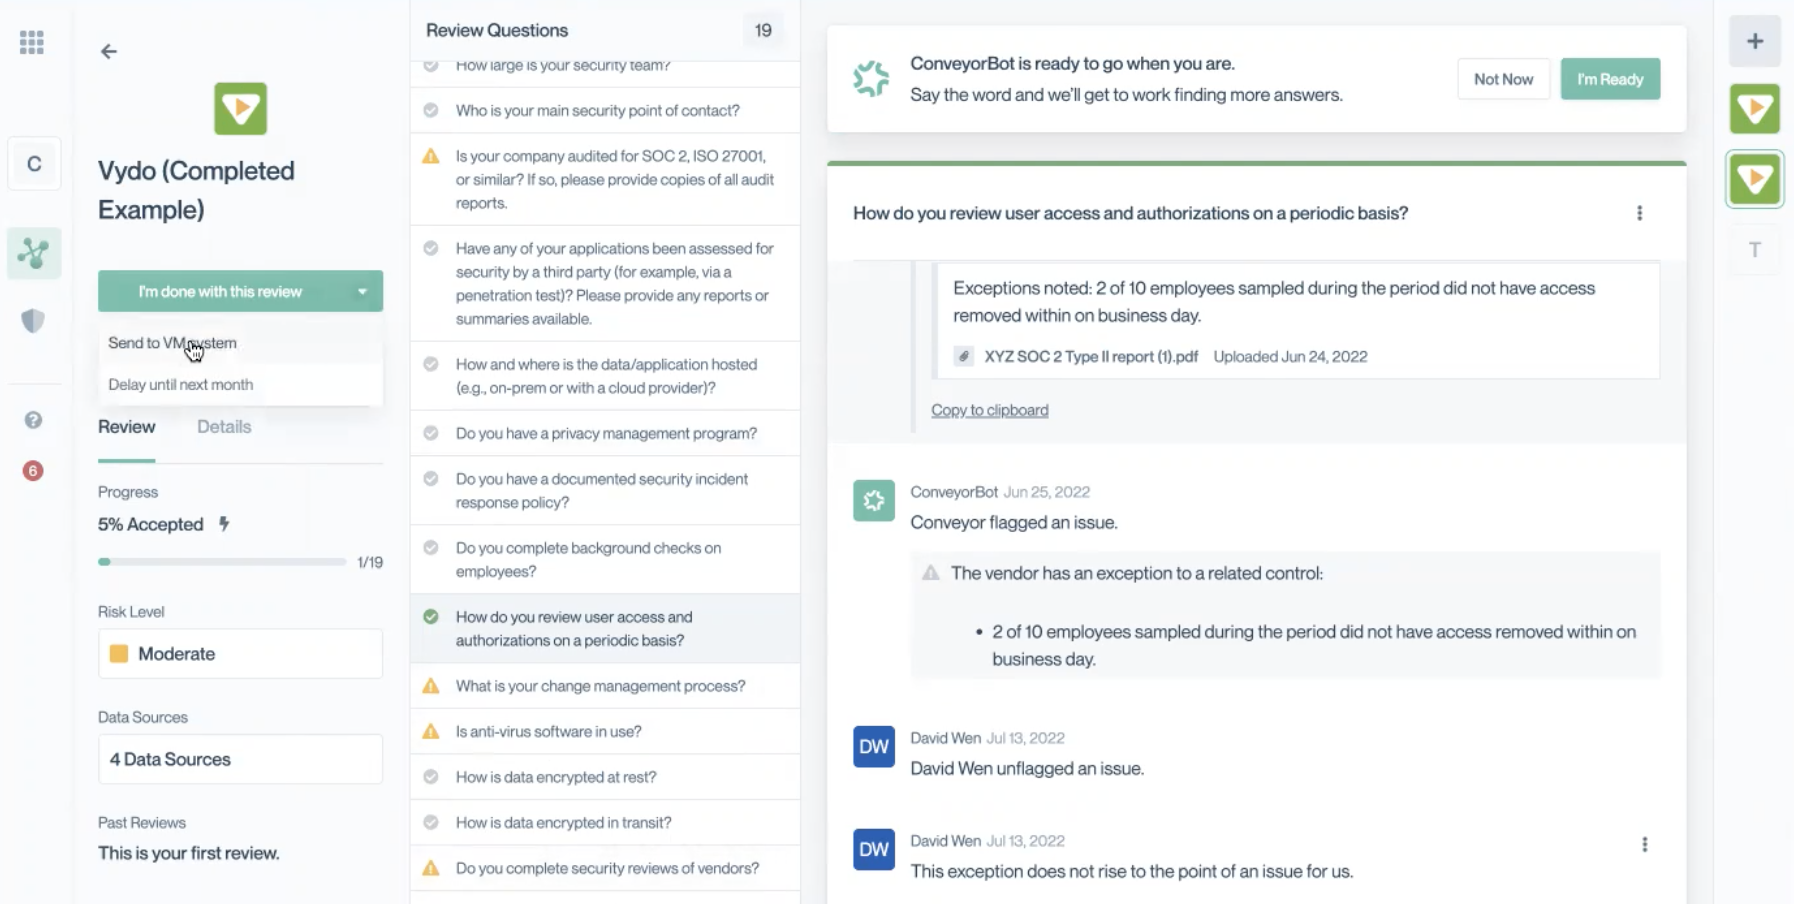
You will receive a notification when the data has been sent to ServiceNow. Then, when you check your ServiceNow Assessment of the vendor, you will see the issues table populated with the issues that were flagged in Conveyor:
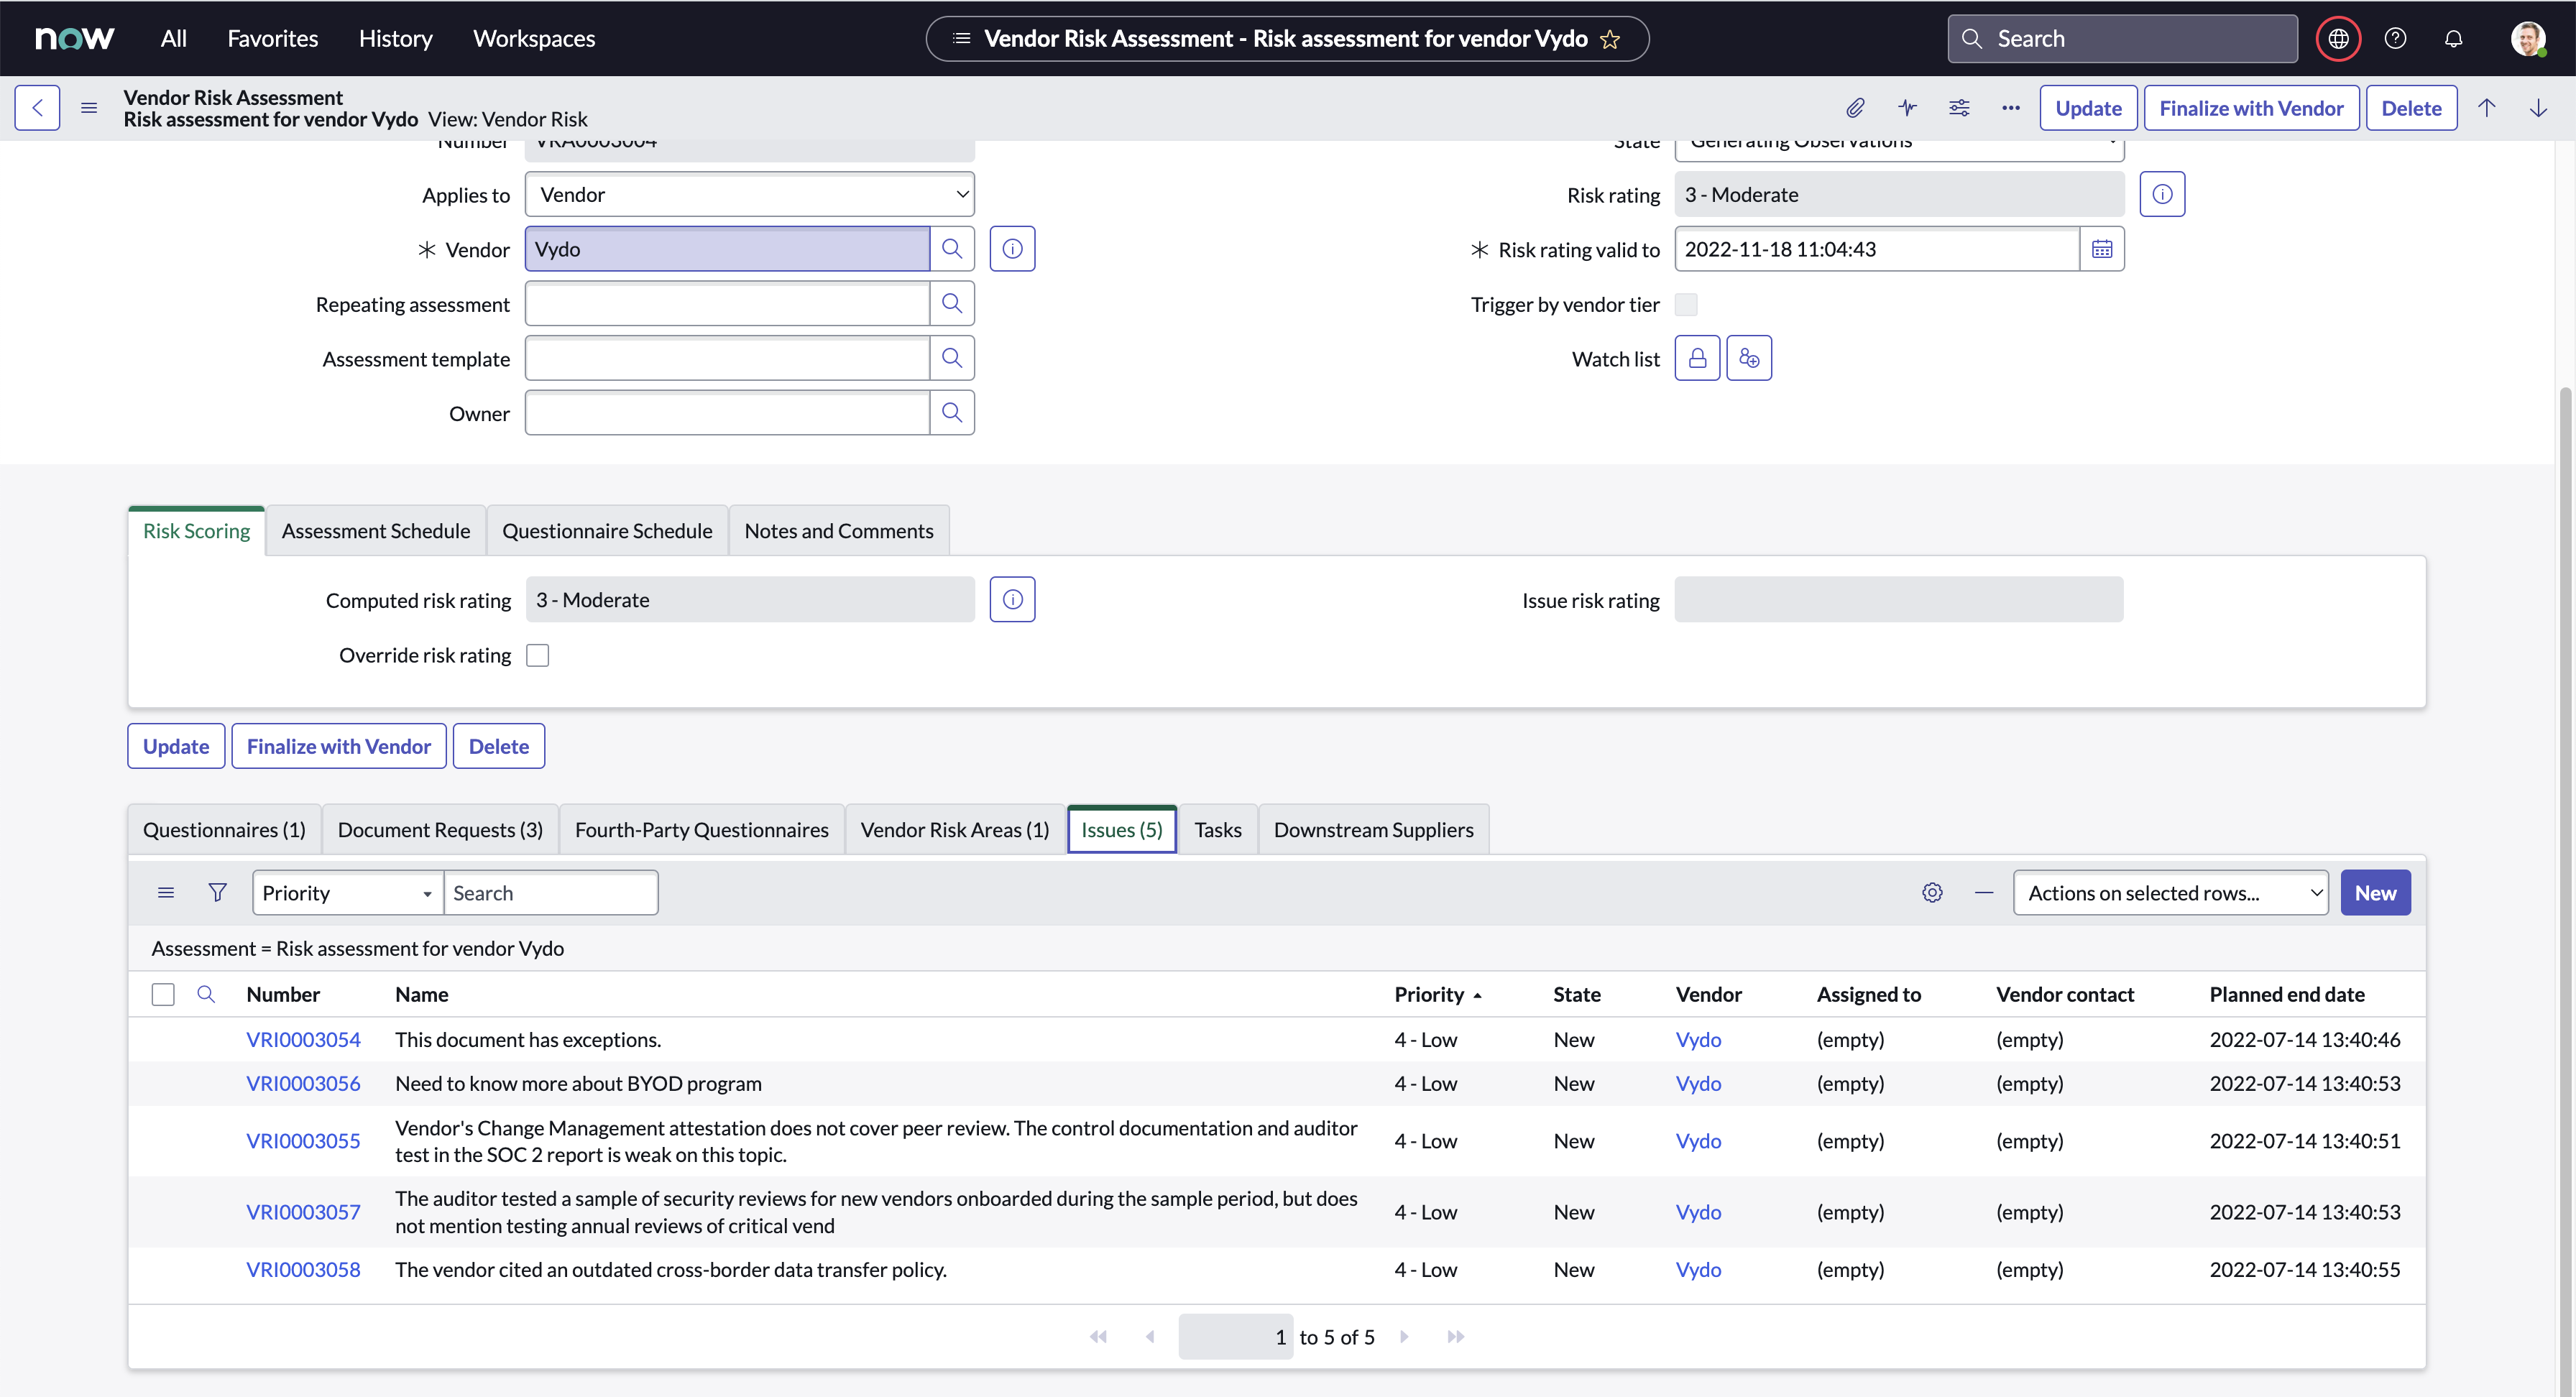
Under the "Notes and Comments" tab on your Assessment, you will also see a link to download a snapshot of all the artifacts of your review, including the questions, answers, and any referenced documents. This same snapshot is available in Conveyor, but is sent to ServiceNow for convenience and future reference.

Updated about 1 month ago
