Adding Connections to access groups
Time to complete: 5 minutes per customer
Prerequisites: You’ve set up access groups and assigned them to documents.
How it works
Once you've created access groups and assigned them to documents, you can grant those groups to specific customers when you share your Trust Center.
Customers will see:
- All Anyone content (public)
- All Approved customers content
- Content from their assigned access groups
- Nothing from groups they don’t have
Customers don’t see which access groups they’re assigned to - they simply see the content available to them based on their permissions.
Granting groups when inviting
When you invite someone to your Trust Center:
- Open the Share dialog.
- Enter their email.
- Select which access groups to grant using the dropdown menu.
- Click Send invitation.
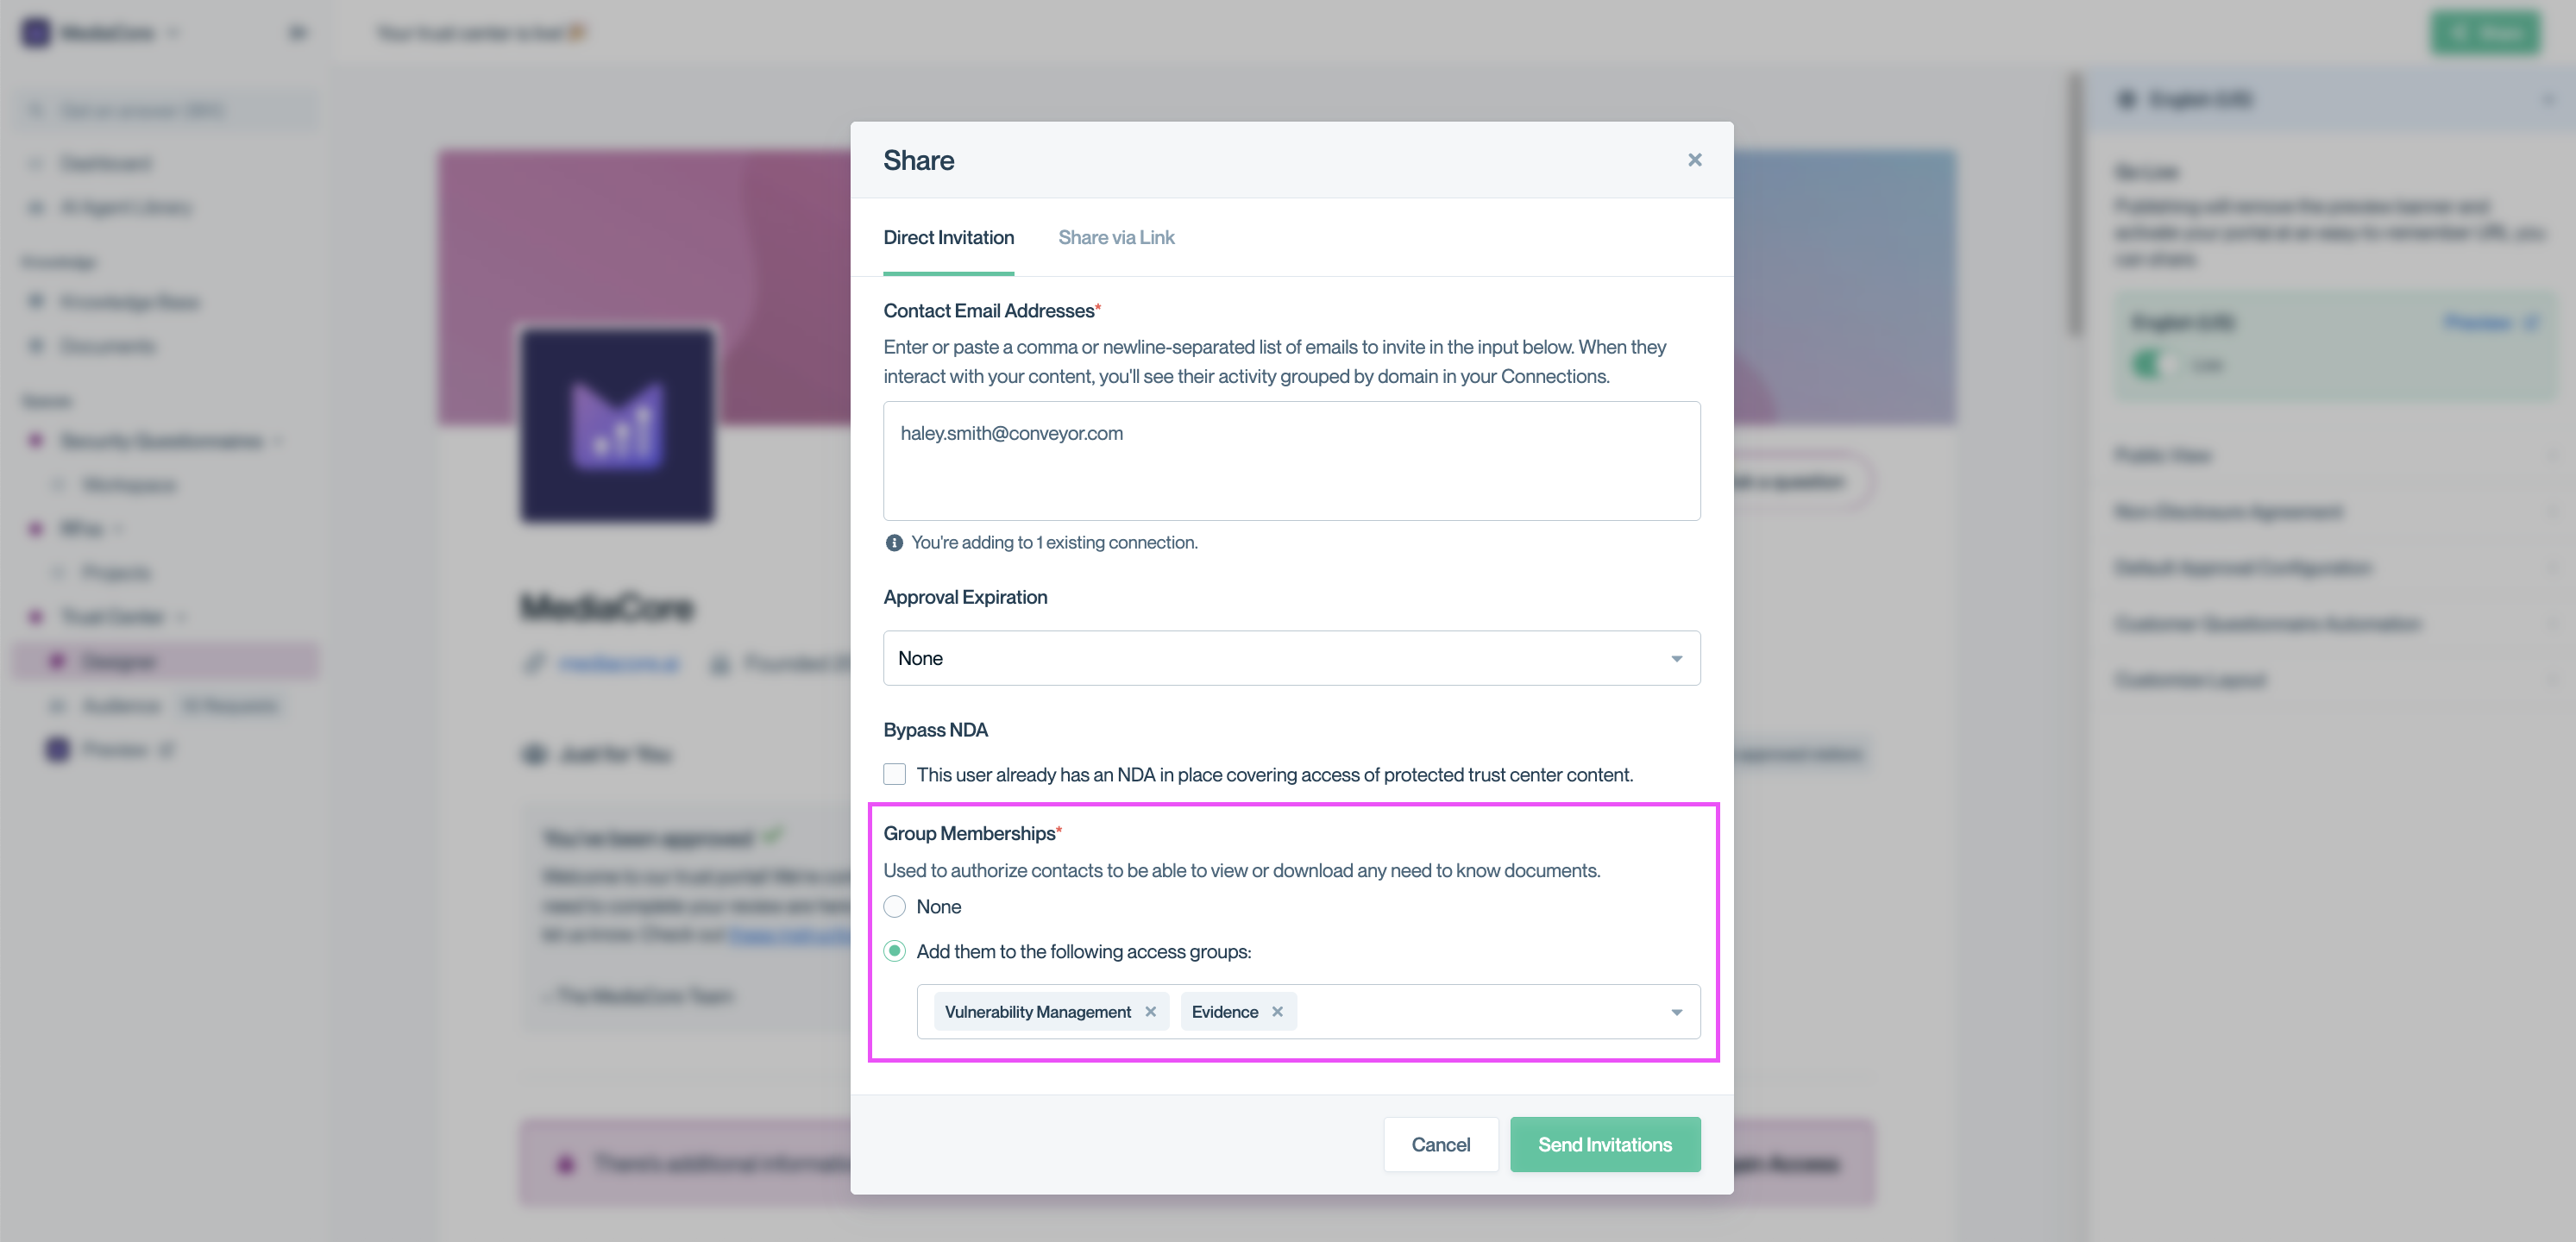
Grant access groups when inviting new users so they immediately see the right content after approval.
Once the invitation is sent and the connection is approved, the user will automatically see content based on their assigned groups.
See Manually sharing your Trust Center for full invitation instructions.
Adding groups to existing contacts
Need to add or change access groups for someone who’s already invited?
- Go to Audience → Connections → Contacts.
- Find the customer.
- Select the pencil icon in the Access Groups column.

Click the pencil icon in the Access Groups column to edit a contact’s group assignments.
- Select the necessary access groups. Your changes will be saved automatically.
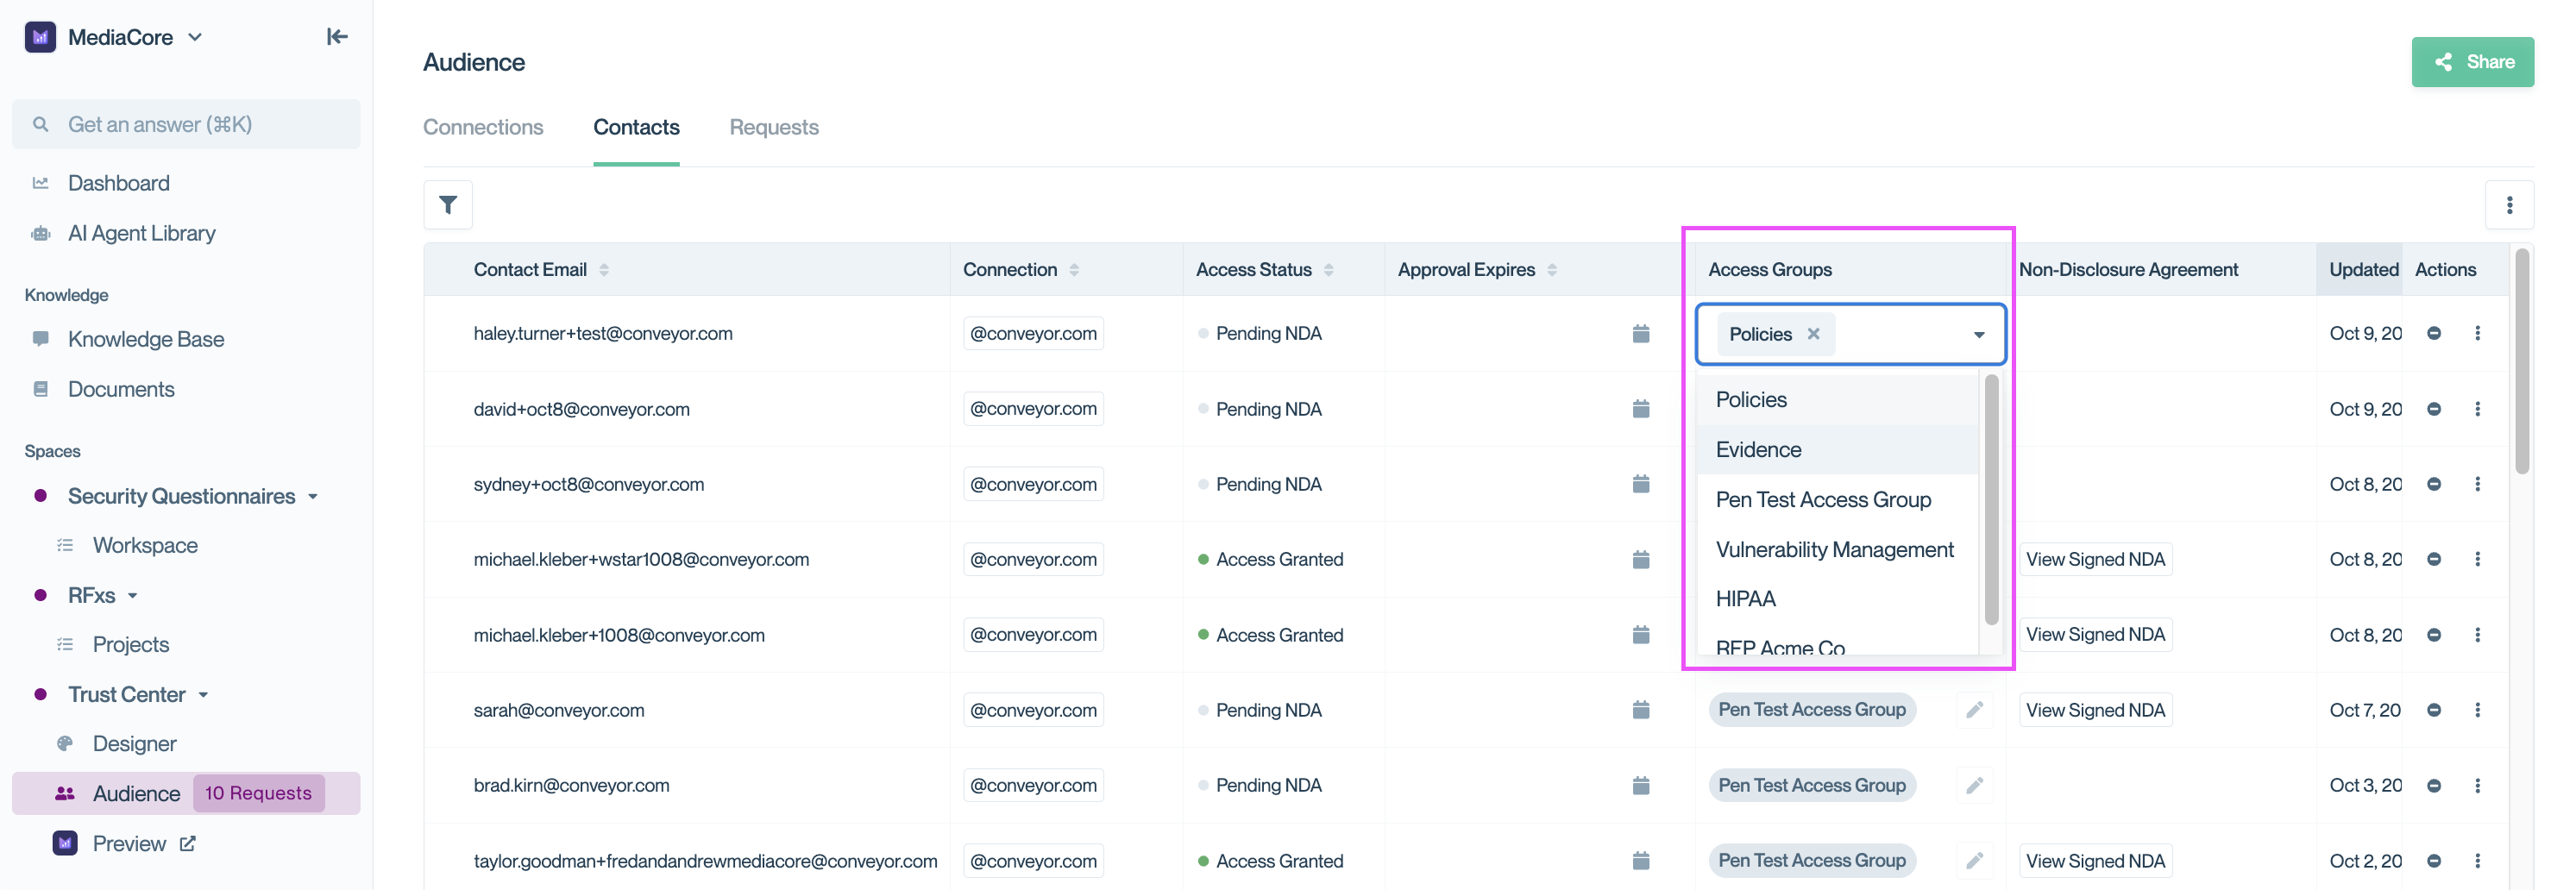
Edit access groups for existing contacts at any time. Changes are saved automatically and take effect immediately.
Granting groups by Connection
You can set default access groups for your Connections allowing anyone approved from that domain to automatically receive those group permissions.
- Go to Audience → Connections.
- Search for your desired domain.
- Select the pencil icon under Auto-Apply Groups
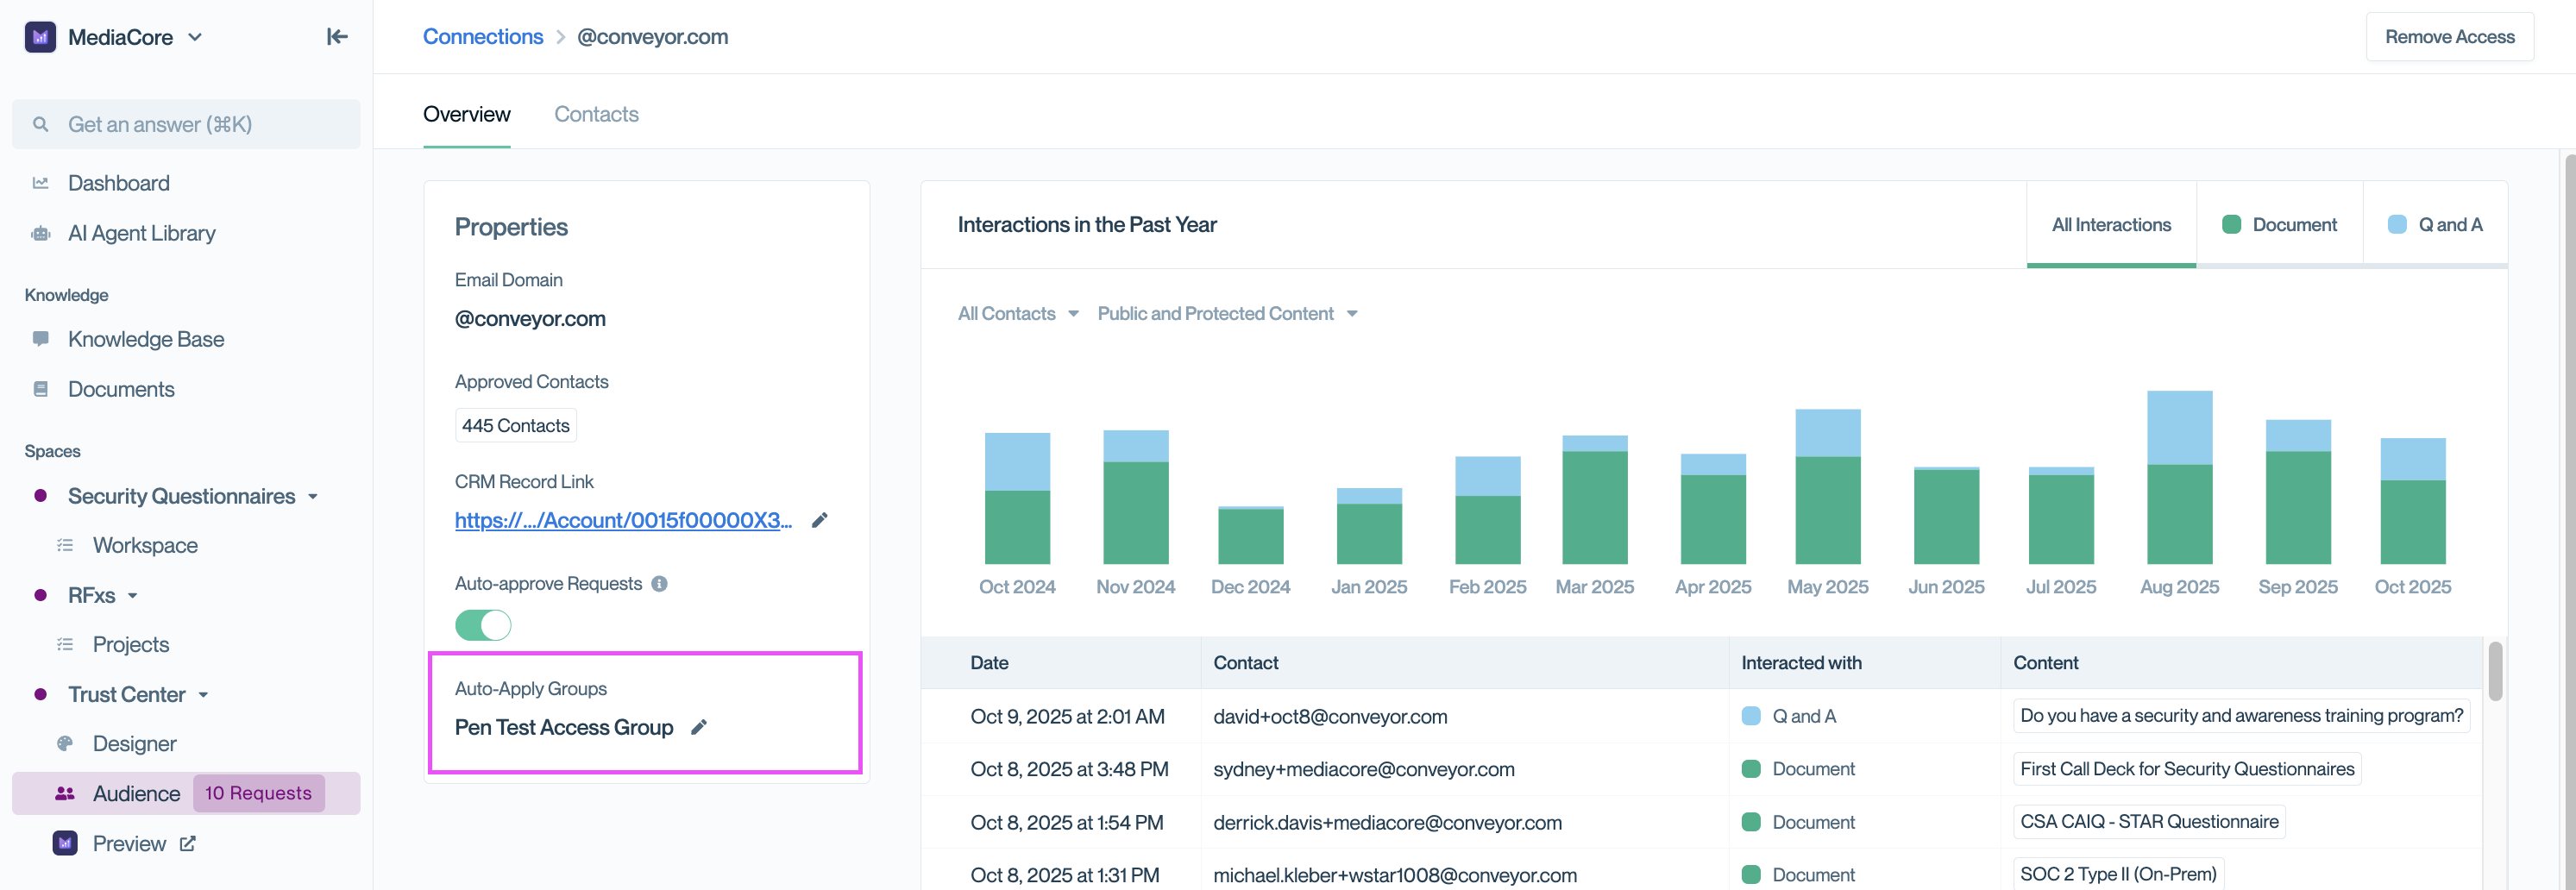
Select the pencil icon to configure which access groups should be automatically applied for that domain.
- Choose default access groups for the domain.
- Choose how you want these settings to apply to existing users within that domain.
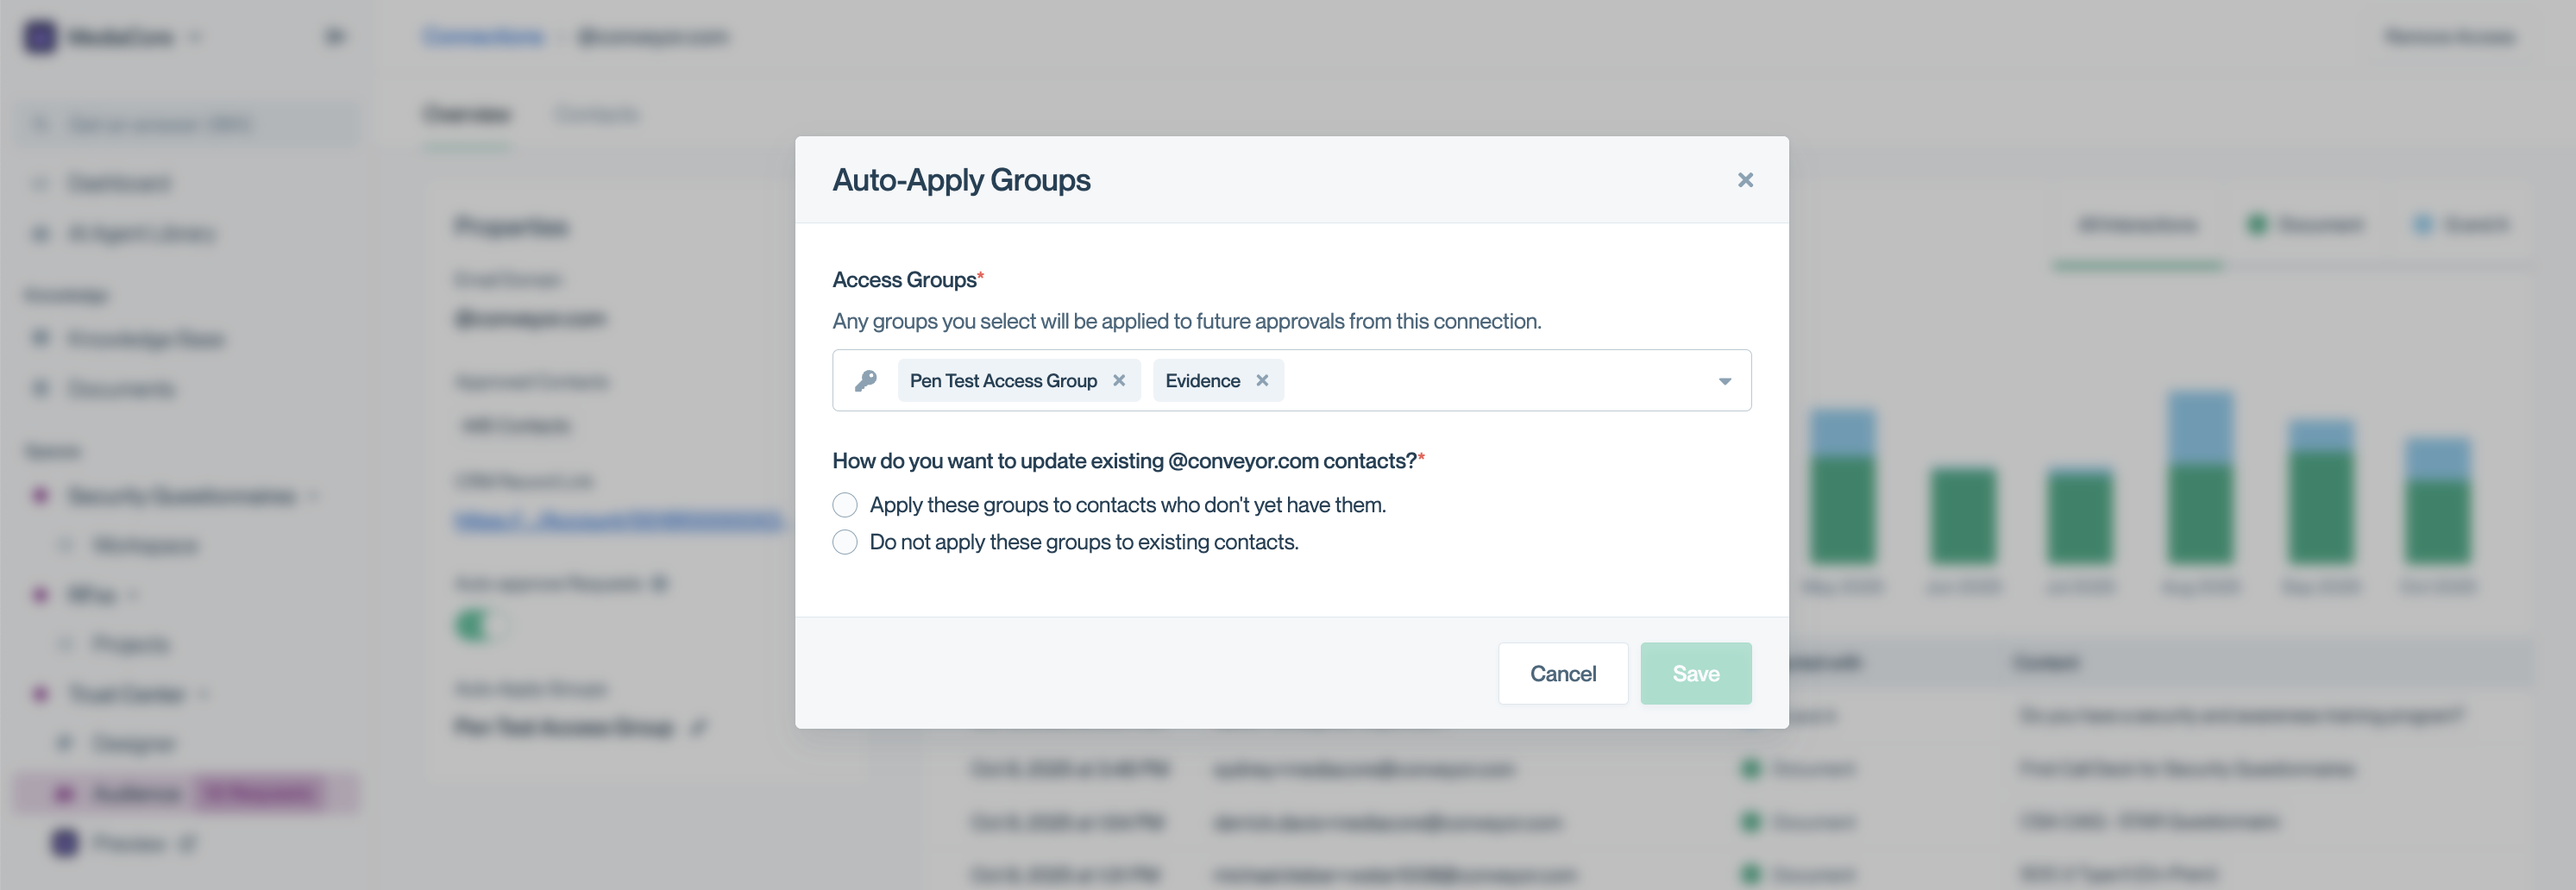
Domain-level group assignment saves time by applying consistent permissions to all users from the same organization.
📚 Want to learn more? Check out Understanding connections to learn about how domain grouping works across your Trust Center.
Common questions
Can I assign multiple access groups to one customer?
Yes. You can assign multiple groups, and they’ll see content from all of them.
What happens if I remove a group from a customer?
They immediately lose access to all content associated with that group.
Can customers see which groups they have?
No. The group structure is invisible to them. They only see the content available.
What happens if I grant a group that has no documents?
Nothing changes for the customer. It won’t give them extra access, but you may want to assign documents to that group later.
What's next?
- Test what customers see: Previewing your Trust Center
- Manage ongoing access: Connections overview
Need help? Start with Troubleshooting → Trust Center issues or email [email protected].
Updated 9 months ago