Google Drive Service Account Setup
Overview
Bring your Google Drive Documents into Conveyor AI. This integration makes it a breeze to keep your documentation up to date. Documents will automatically be pulled from Google Drive into Conveyor AI.
Prerequisites
This setup process involves two different roles with different responsibilities:
For IT Administrators
- Access to your organization's Google Cloud Platform console
- Permissions to enable APIs and create service accounts in GCP
- Ability to generate and distribute service account credentials securely
For Conveyor Administrators
- Access to a Conveyor Admin account
- Ability to configure integrations in Conveyor
- Coordination with IT team to obtain service account credentials
Time to Complete:
- IT Administrator tasks: 10-15 minutes
- Conveyor Administrator tasks: 5 minutes
- End User file sharing: Ongoing as needed
Important: If someone else in your organization manages Google Cloud Platform, share the "IT Administrator Steps" section with them and coordinate to obtain the service account credentials.
Security Considerations
What Conveyor Can Access
- Only Explicitly Shared Content: Conveyor can only access files and folders that you specifically share with your service account or Google Group
- No Drive-Wide Access: Unlike OAuth integrations, there's no risk of accidental access to your entire Google Drive
What Conveyor Cannot Access
- Private files and folders not shared with the service account
- Other Google Workspace applications (Gmail, Calendar, etc.)
- Administrative functions in Google Drive
- Files owned by other users unless explicitly shared
IT Administrator Steps
Step 1: Enable the Google Drive API
-
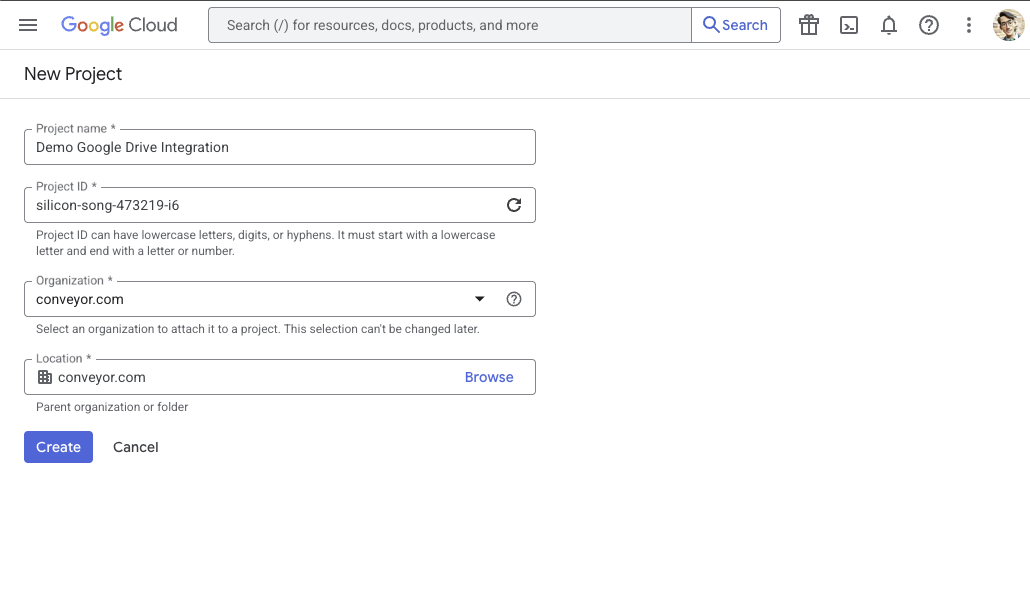
Open Google Cloud Console
- Navigate to the Google Cloud Console
- Ensure you're working in the correct project, or create a new project for this integration
-
Navigate to APIs & Services
- From the left navigation menu, click on "APIs & Services"
- Select "Library" from the submenu

-
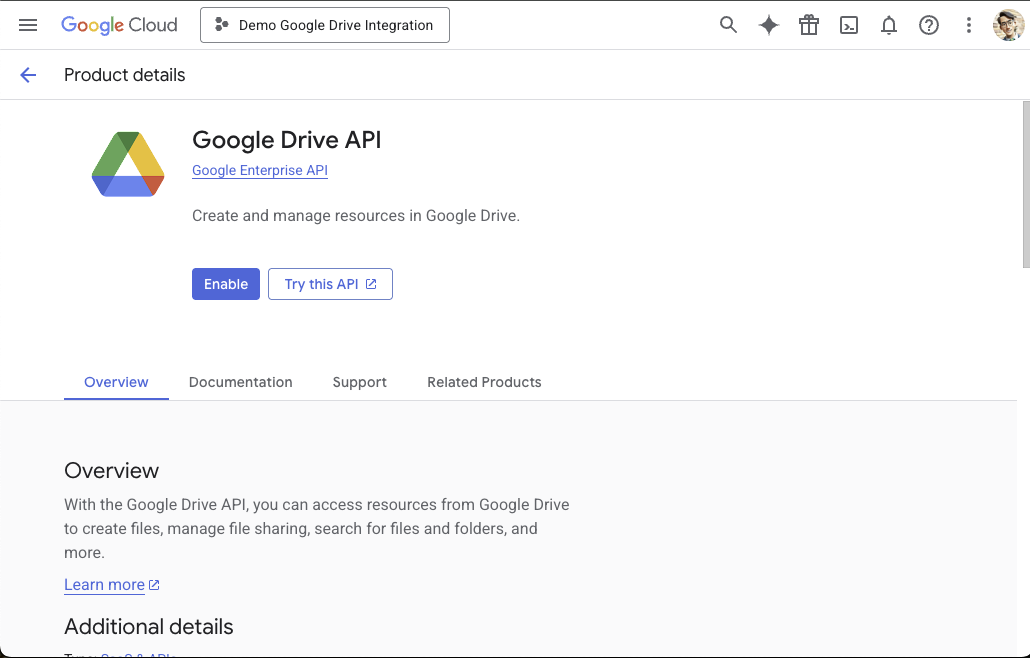
Enable Google Drive API
- In the API library search box, type "Google Drive API"
- Click on "Google Drive API" from the search results
- Click the "ENABLE" button
- If the API is already enabled, you can proceed to the next step

Step 2: Create a Service Account
-
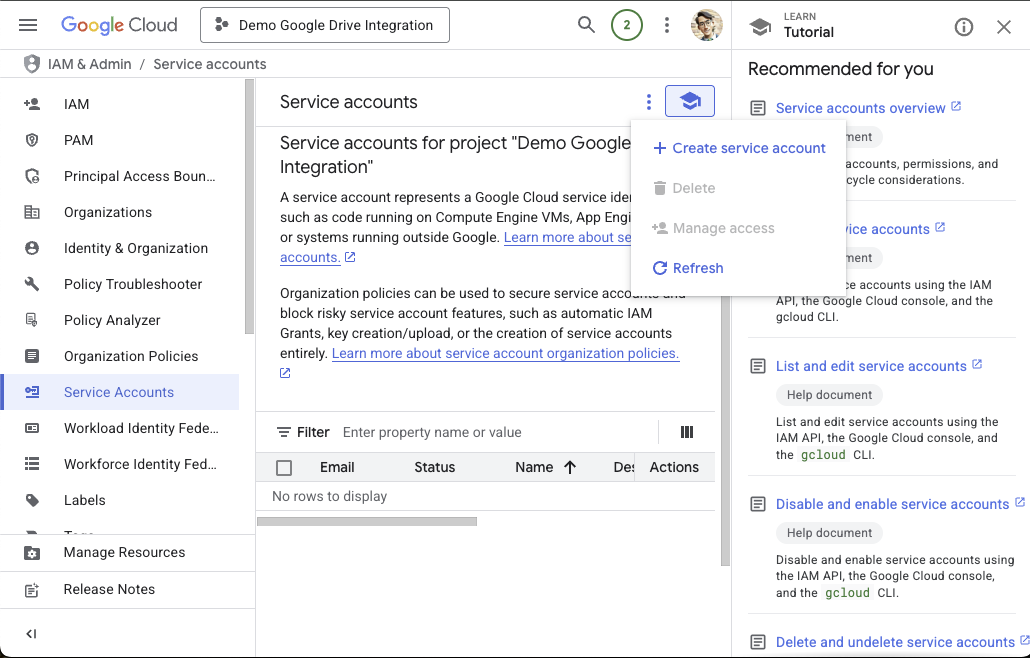
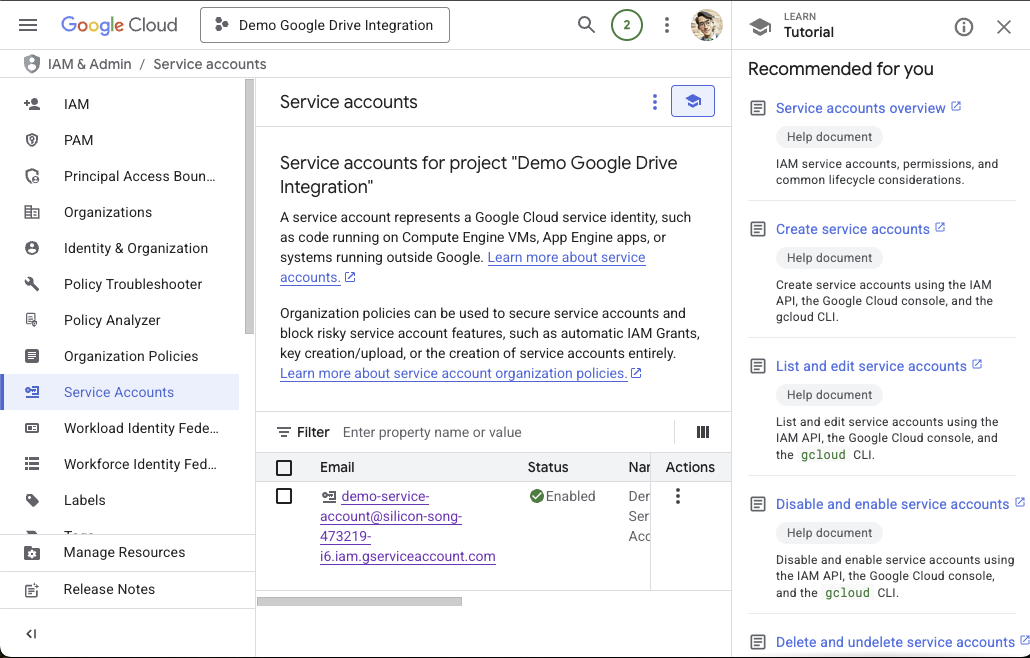
Navigate to Service Accounts
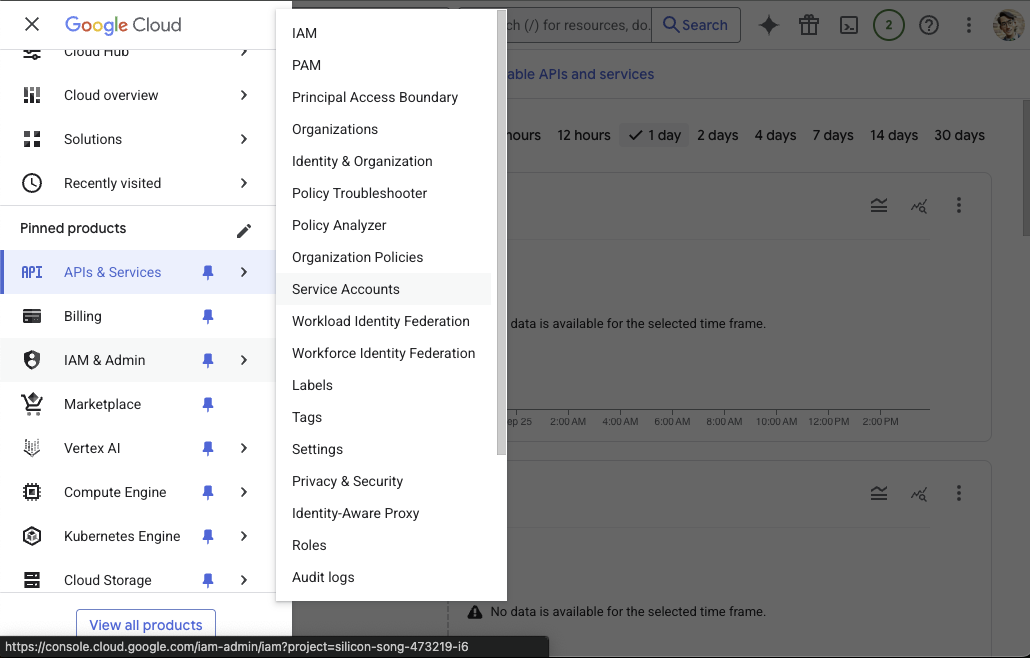
- In the Google Cloud Console, go to "IAM & Admin" > "Service Accounts"
-
Create New Service Account
-
Click "CREATE SERVICE ACCOUNT"
-
Fill in the service account details:
- Service account name: Choose a descriptive name like "Conveyor Google Drive Access"
- Service account ID: This will auto-populate based on your name
- Description: Optional, but helpful for team members (e.g., "Service account for Conveyor integration")
-
Click "CREATE AND CONTINUE"
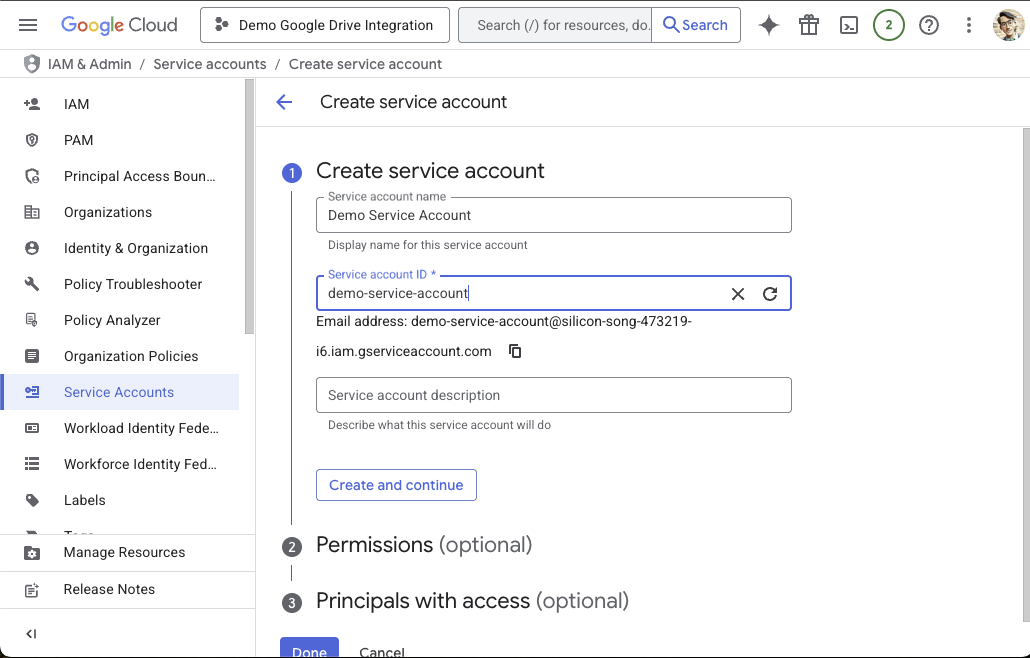
- Skip "Permissions and" "Principals with access"
- Click "DONE"
-
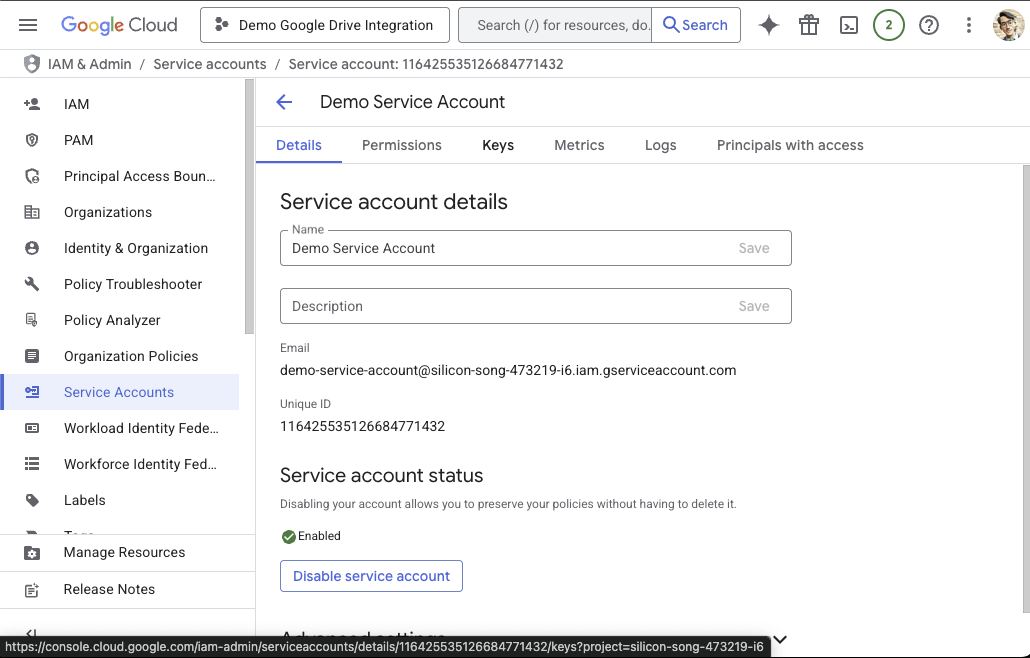
Step 3: Generate Service Account Keys
-
Access Your Service Account
- From the Service Accounts list, click on the service account you just created
-
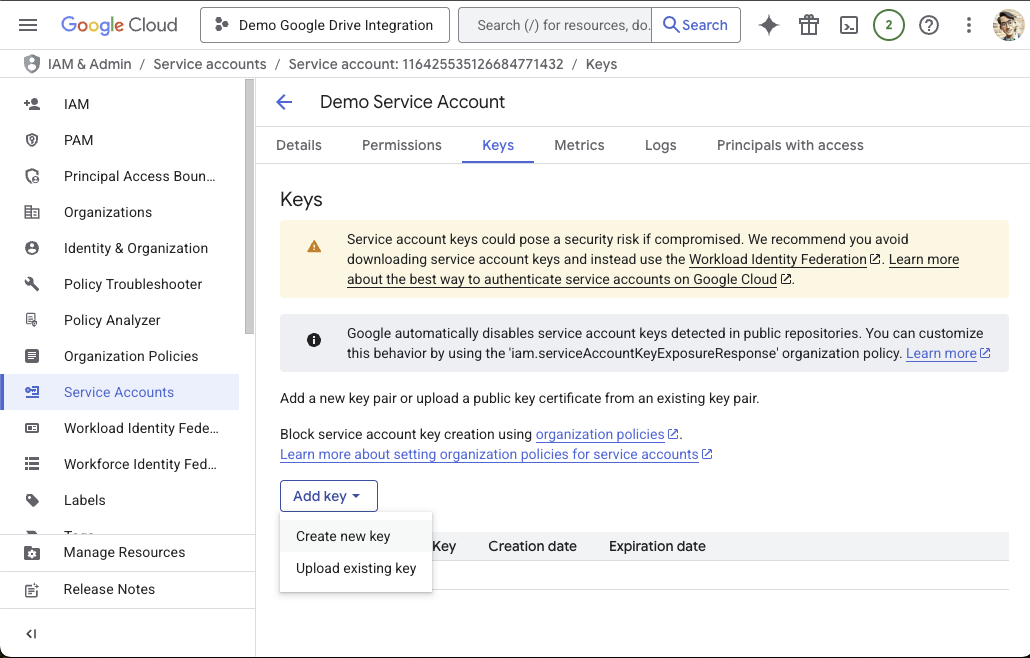
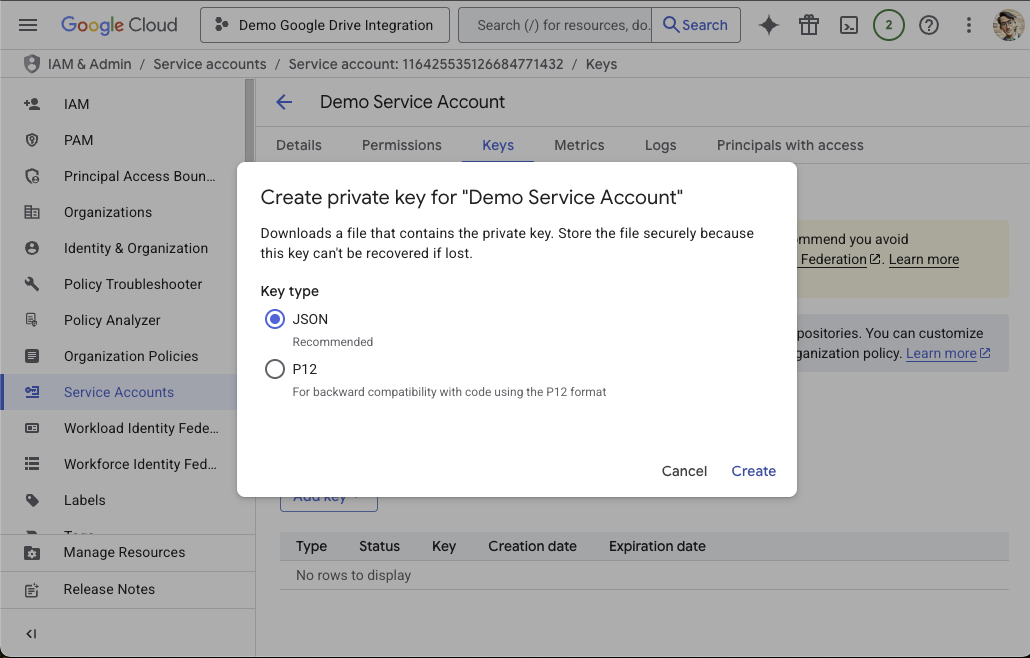
Create a JSON Key
- Navigate to the "KEYS" tab
- Click "ADD KEY" > "Create new key"
- Select "JSON" as the key type
- Click "CREATE"
-
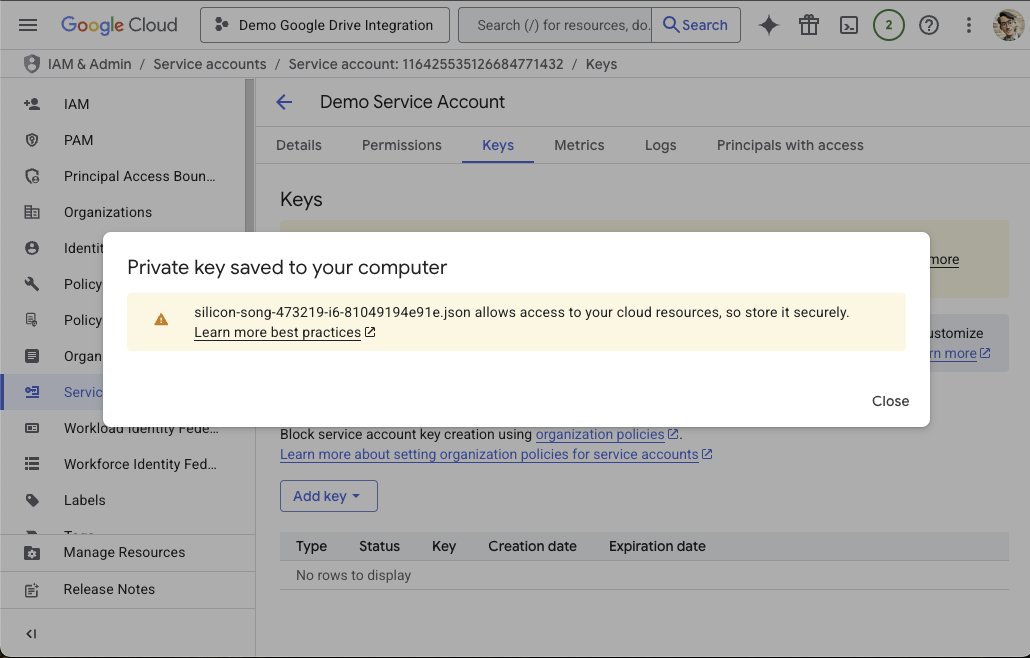
Secure Your Key File
- A JSON file will automatically download to your computer
- Important: Store this file securely - it contains sensitive credentials
- Do not share this file or commit it to version control
- Consider storing it in a password manager or secure file storage
-
Provide Credentials to Conveyor Administrator
- Securely transfer the JSON key file to your Conveyor Administrator
- Also provide the service account email address (visible in the service account details)
- Security Note: Use secure file transfer methods (encrypted email, secure file sharing, etc.)
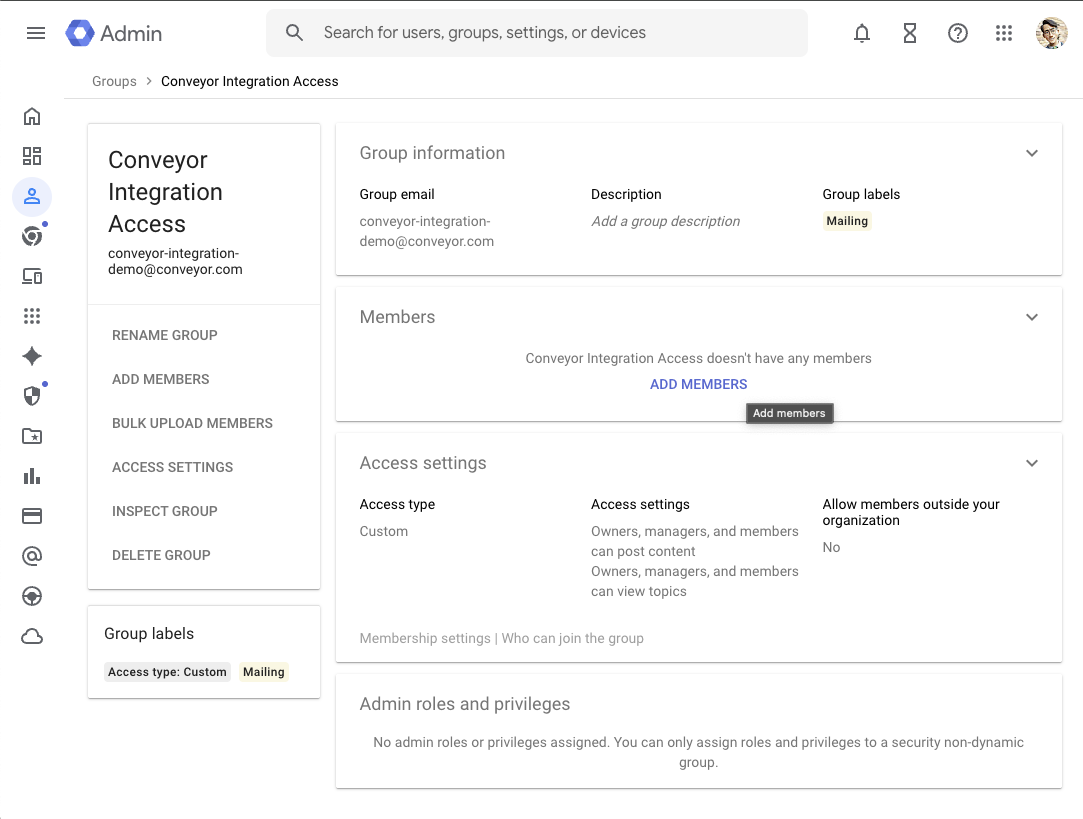
Step 4: Set Up Google Groups (Recommended)
Service accounts don't have pretty names and are hard for humans to remember. While you can't change the name of the service account, you can put it in a Google Group with a pretty name and use that group for sharing.
Important: Service accounts are considered external to your organization, so you must use the Google Workspace Admin Console (not the regular Google Groups interface) to add them to groups.
-
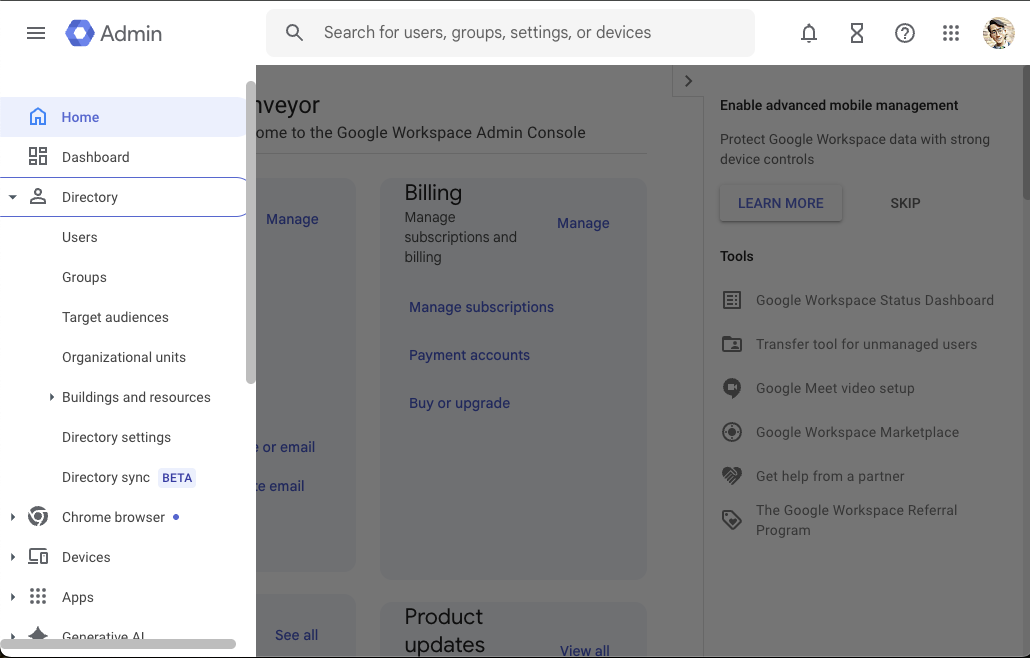
Create a Google Group via Admin Console
- Go to Google Admin Console
- Navigate to "Directory" > "Groups"
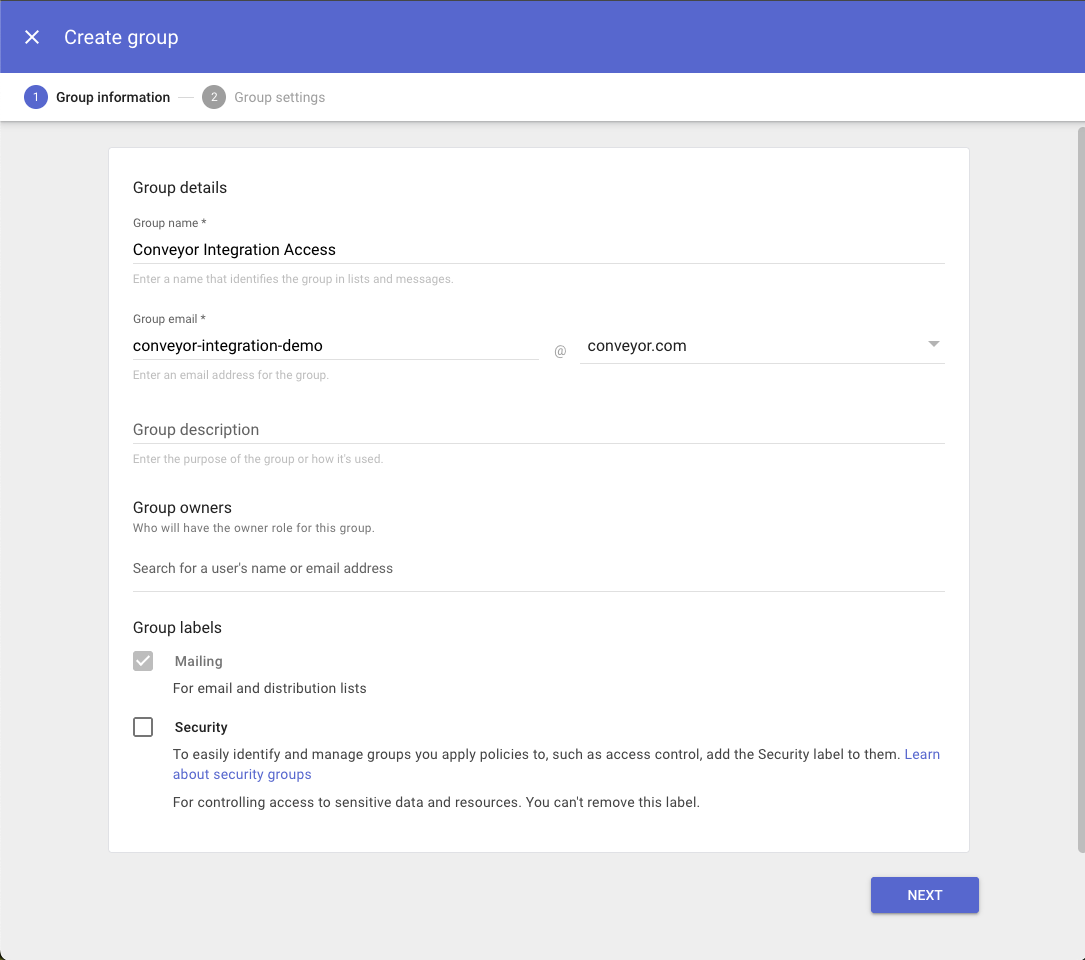
- Click "Create group"
- Choose a descriptive name like "Conveyor Integration Access"
- Set the group email (e.g.,
[email protected])

-
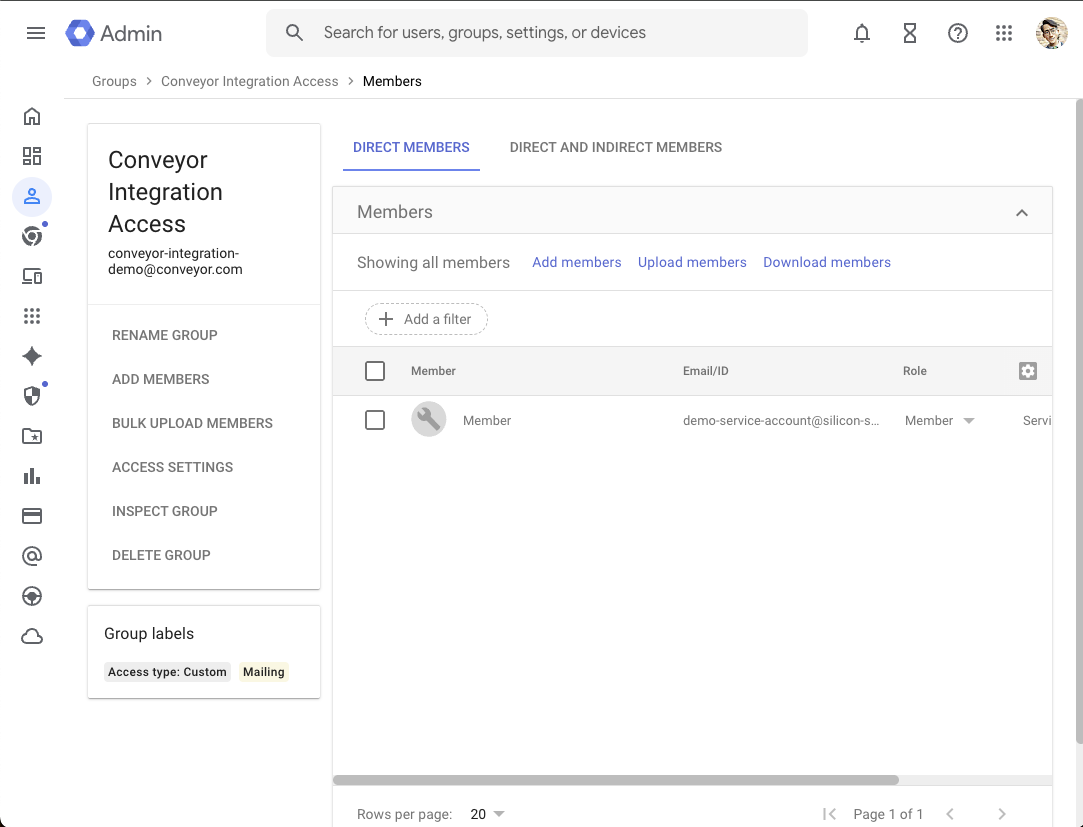
Add Your Service Account to the Group
- In the Admin Console, open your newly created group
- Click "Add members" or "Members" tab
- Click "Add members" button
- Add your service account email address (found in the GCP Console under Service Accounts)
- Important: The service account will be treated as an external member
- Click "Add to Group"
-
Share Group Information
- Provide the Google Group email to your end users for file sharing
Conveyor Administrator Steps
Step 5: Configure Conveyor Integration
-
Obtain Service Account Credentials
- Coordinate with your IT Administrator to obtain the JSON key file
- Ensure you also know the service account email address or Google Group
-
Access Integration Settings
- Log into your Conveyor admin account
- Navigate to Organization Settings > Integrations
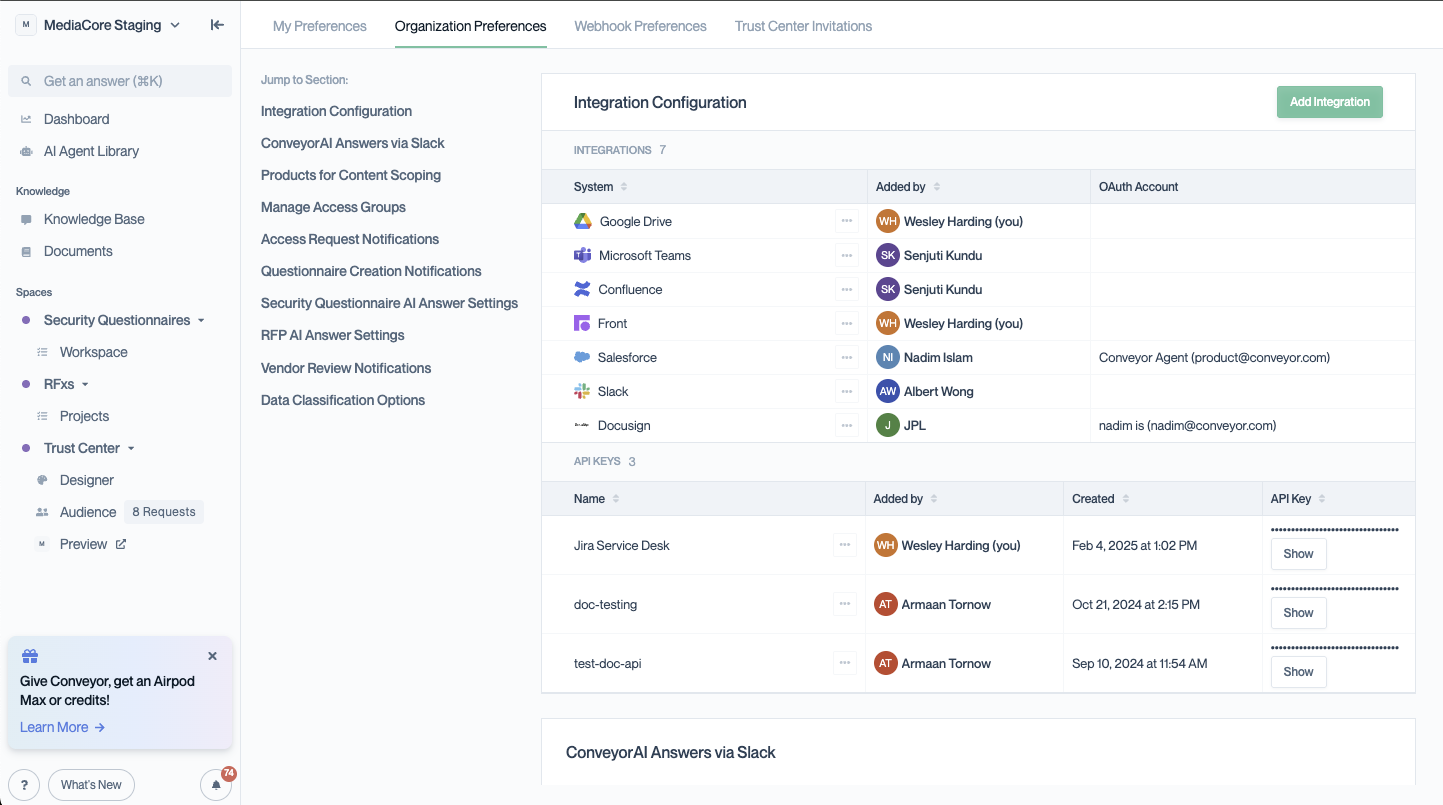
-
Add Google Drive Integration
- Click "Add Integration"
- Select "Google Drive"
-
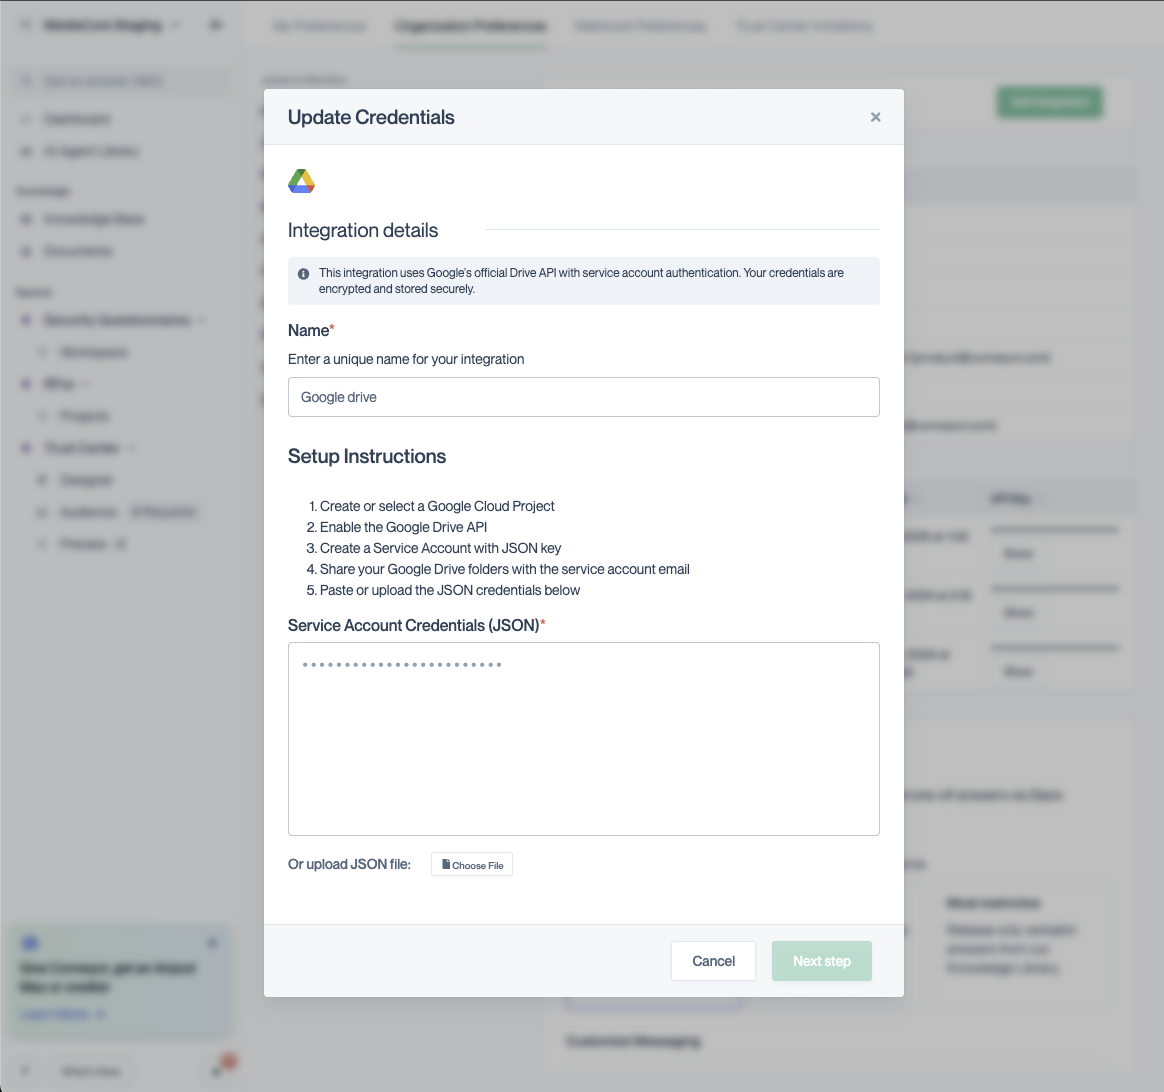
Upload Service Account Credentials
- Upload the JSON key file provided by your IT Administrator
- Conveyor will validate the credentials and confirm the setup
- Enter any additional configuration details as required
Next Steps
Once your integration is configured, you'll need to share your Google Drive files and folders with your service account. See our Sharing Files with Your Service Account guide for detailed instructions.
Related Documentation
Updated 8 months ago