Creating and managing access groups
Time to complete: 10–15 minutes
Prerequisites: Decide how you want to segment your customers and content (e.g., by tier, region, or partner type).
Table of contents
- Creating access groups
- Naming best practices
- Editing access groups
- Deleting access groups
- Common questions
Creating access groups
You can create access groups in two places, depending on your workflow.
Option 1: While editing a document
- Open any document for editing.
- Set Access to “Some approved customers.”
- Type your new access group name and press Enter.
- The group is created and immediately assigned to that document.
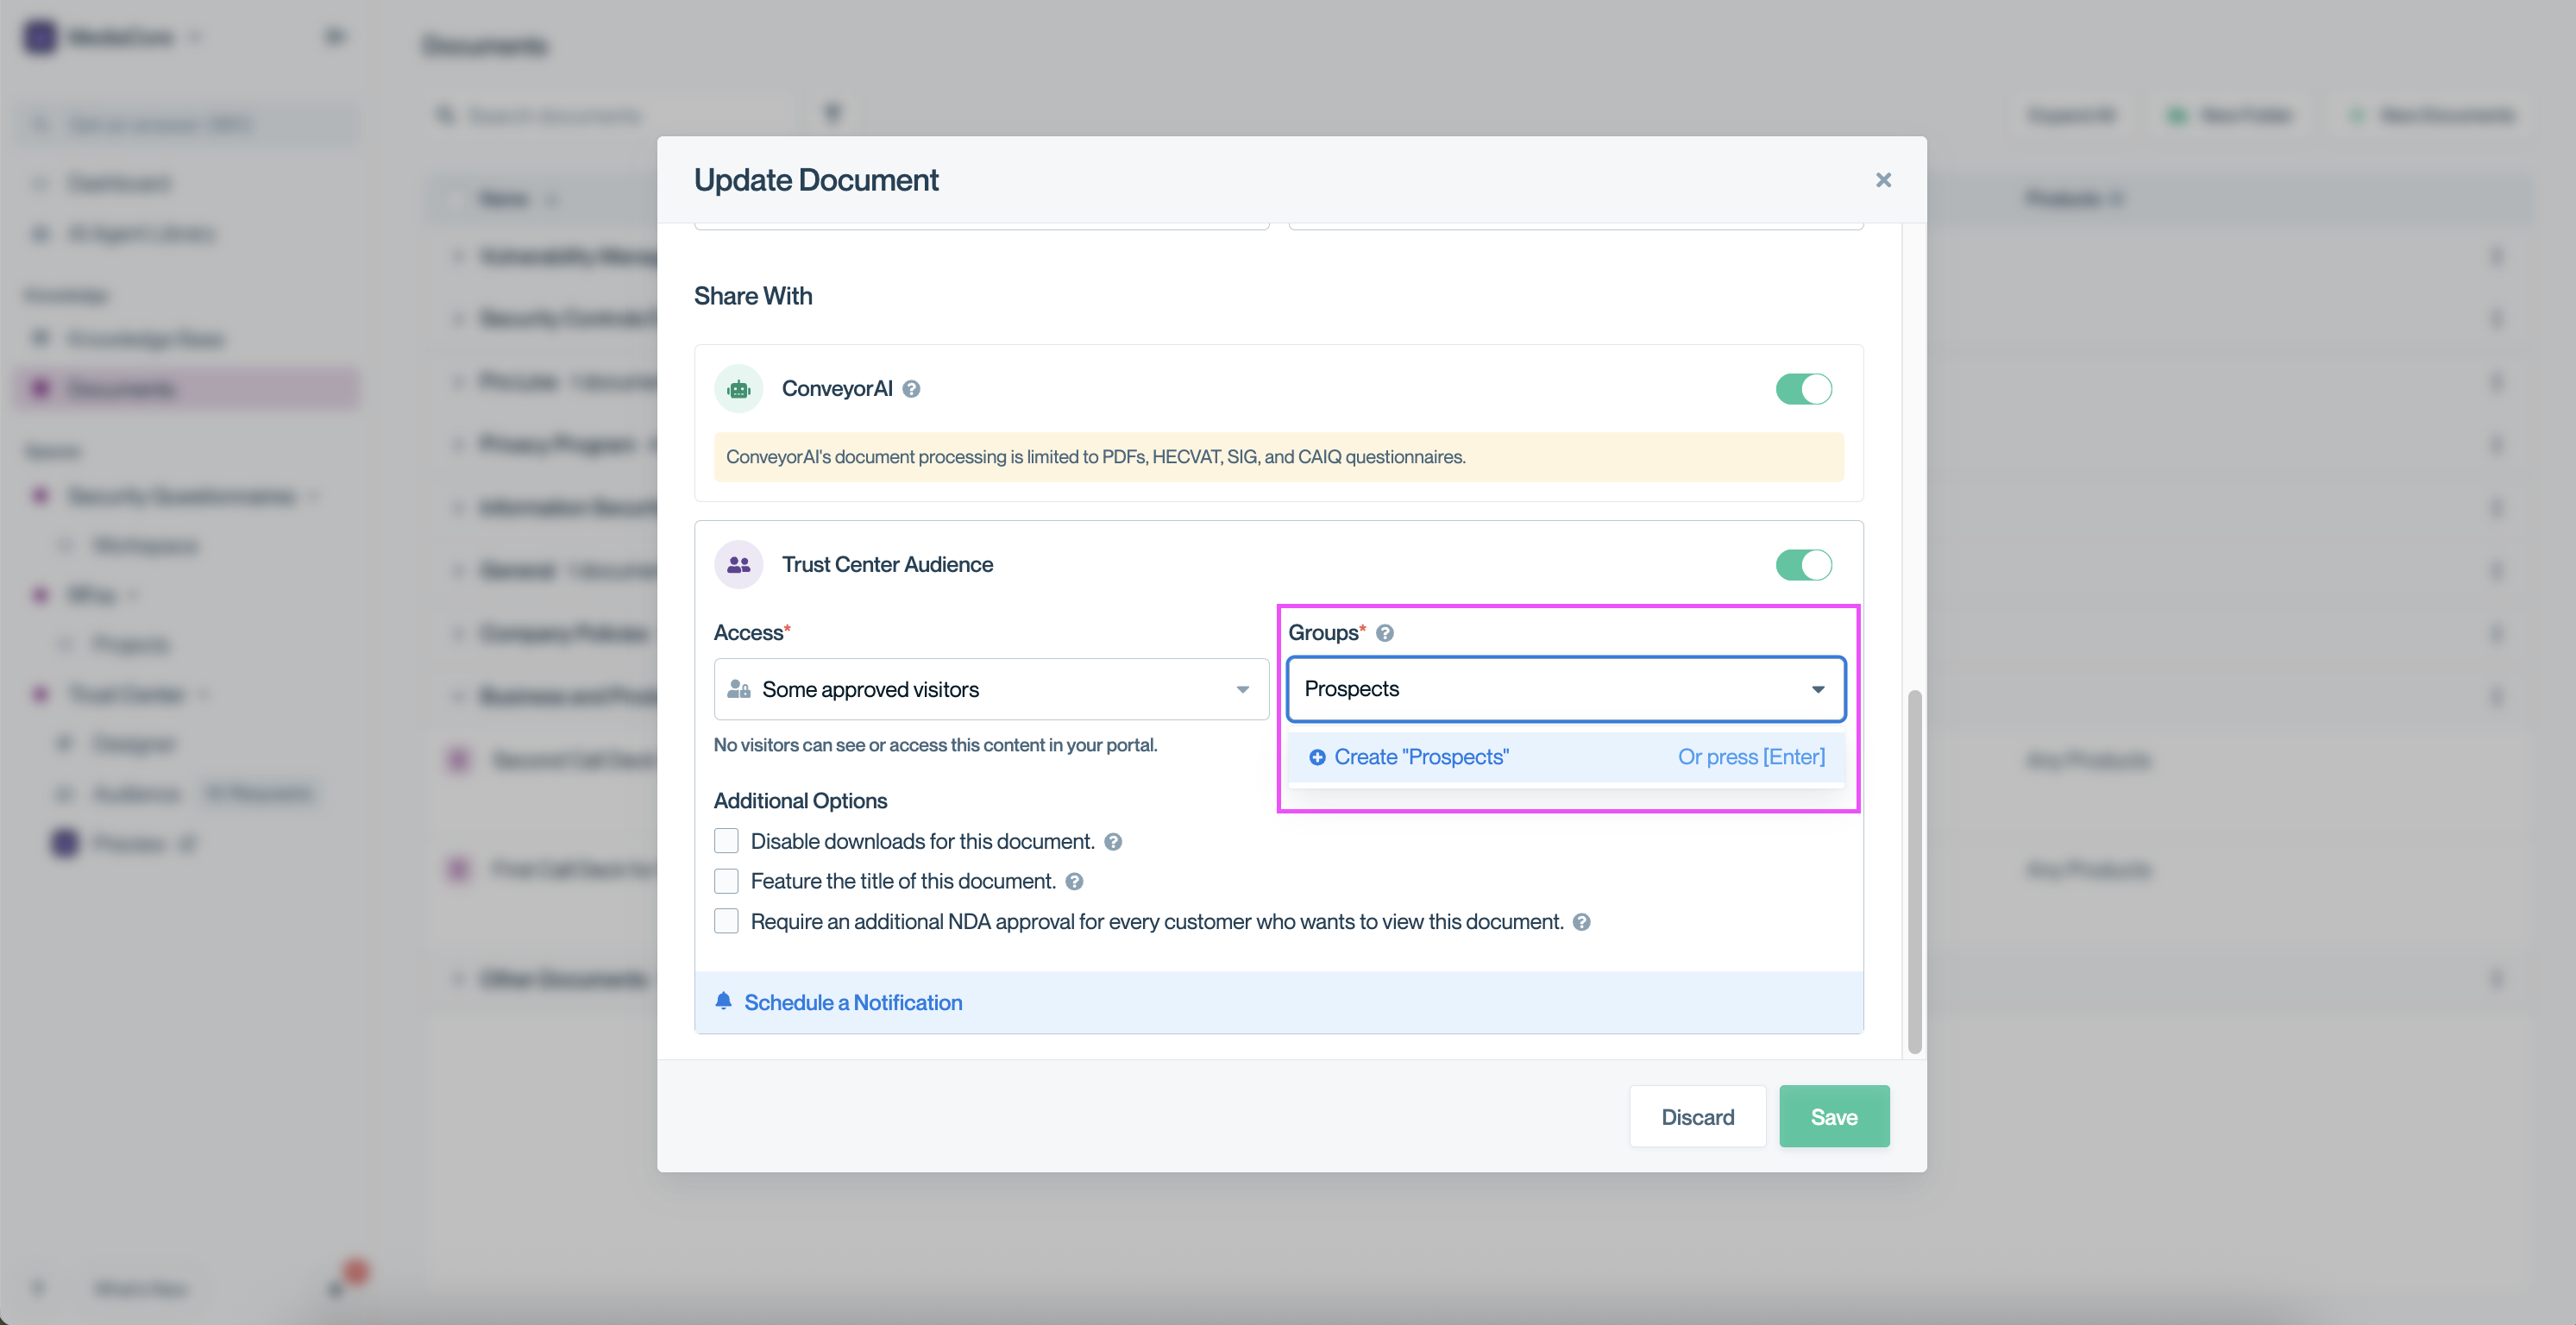
Create new access groups inline while editing a document.
Best for: Creating groups as you go while organizing documents.
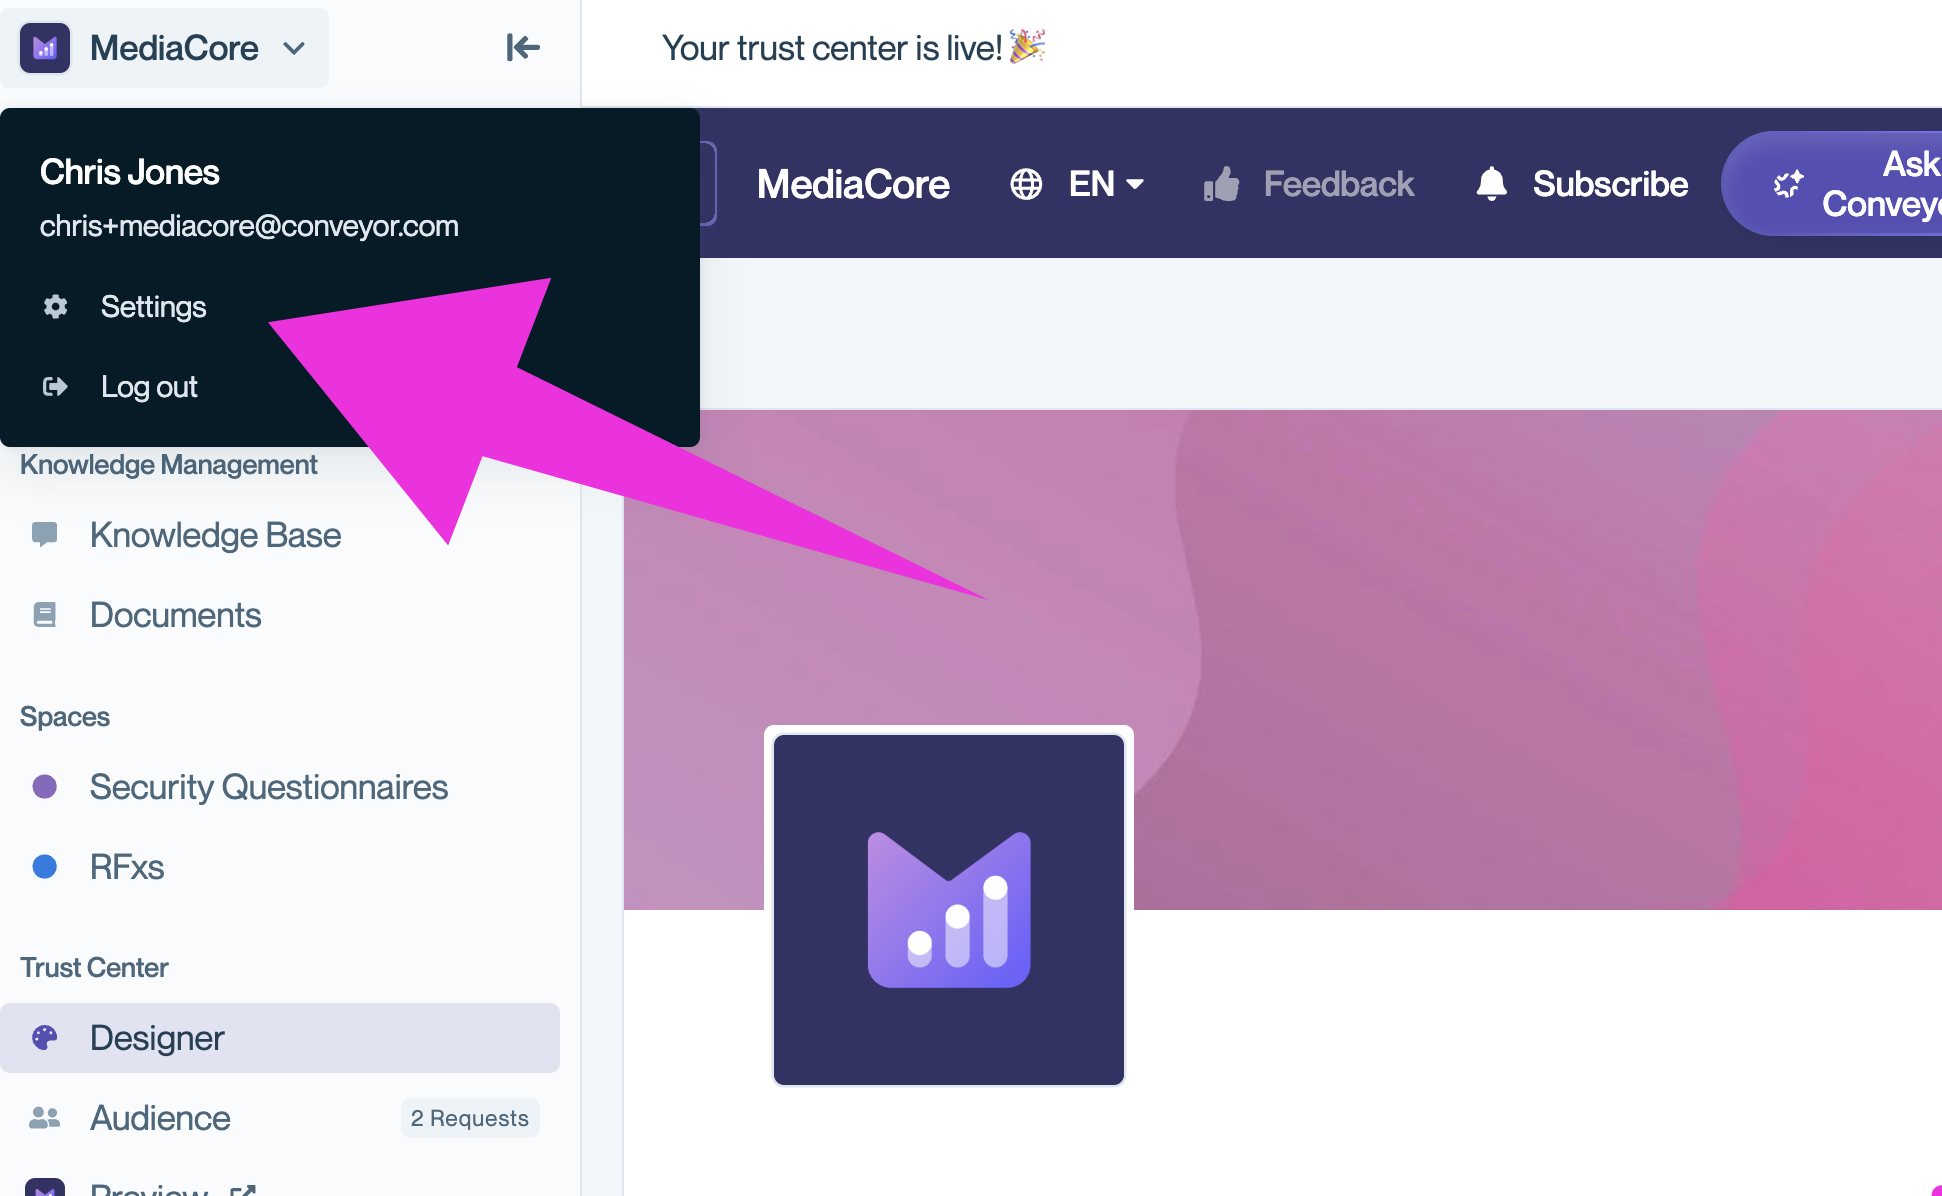
Option 2: In Organization Preferences
- Click your organization name (top left) → Settings.
- Go to "NDA & Access" under "Trust Center", and scroll to "Manage Access Groups."
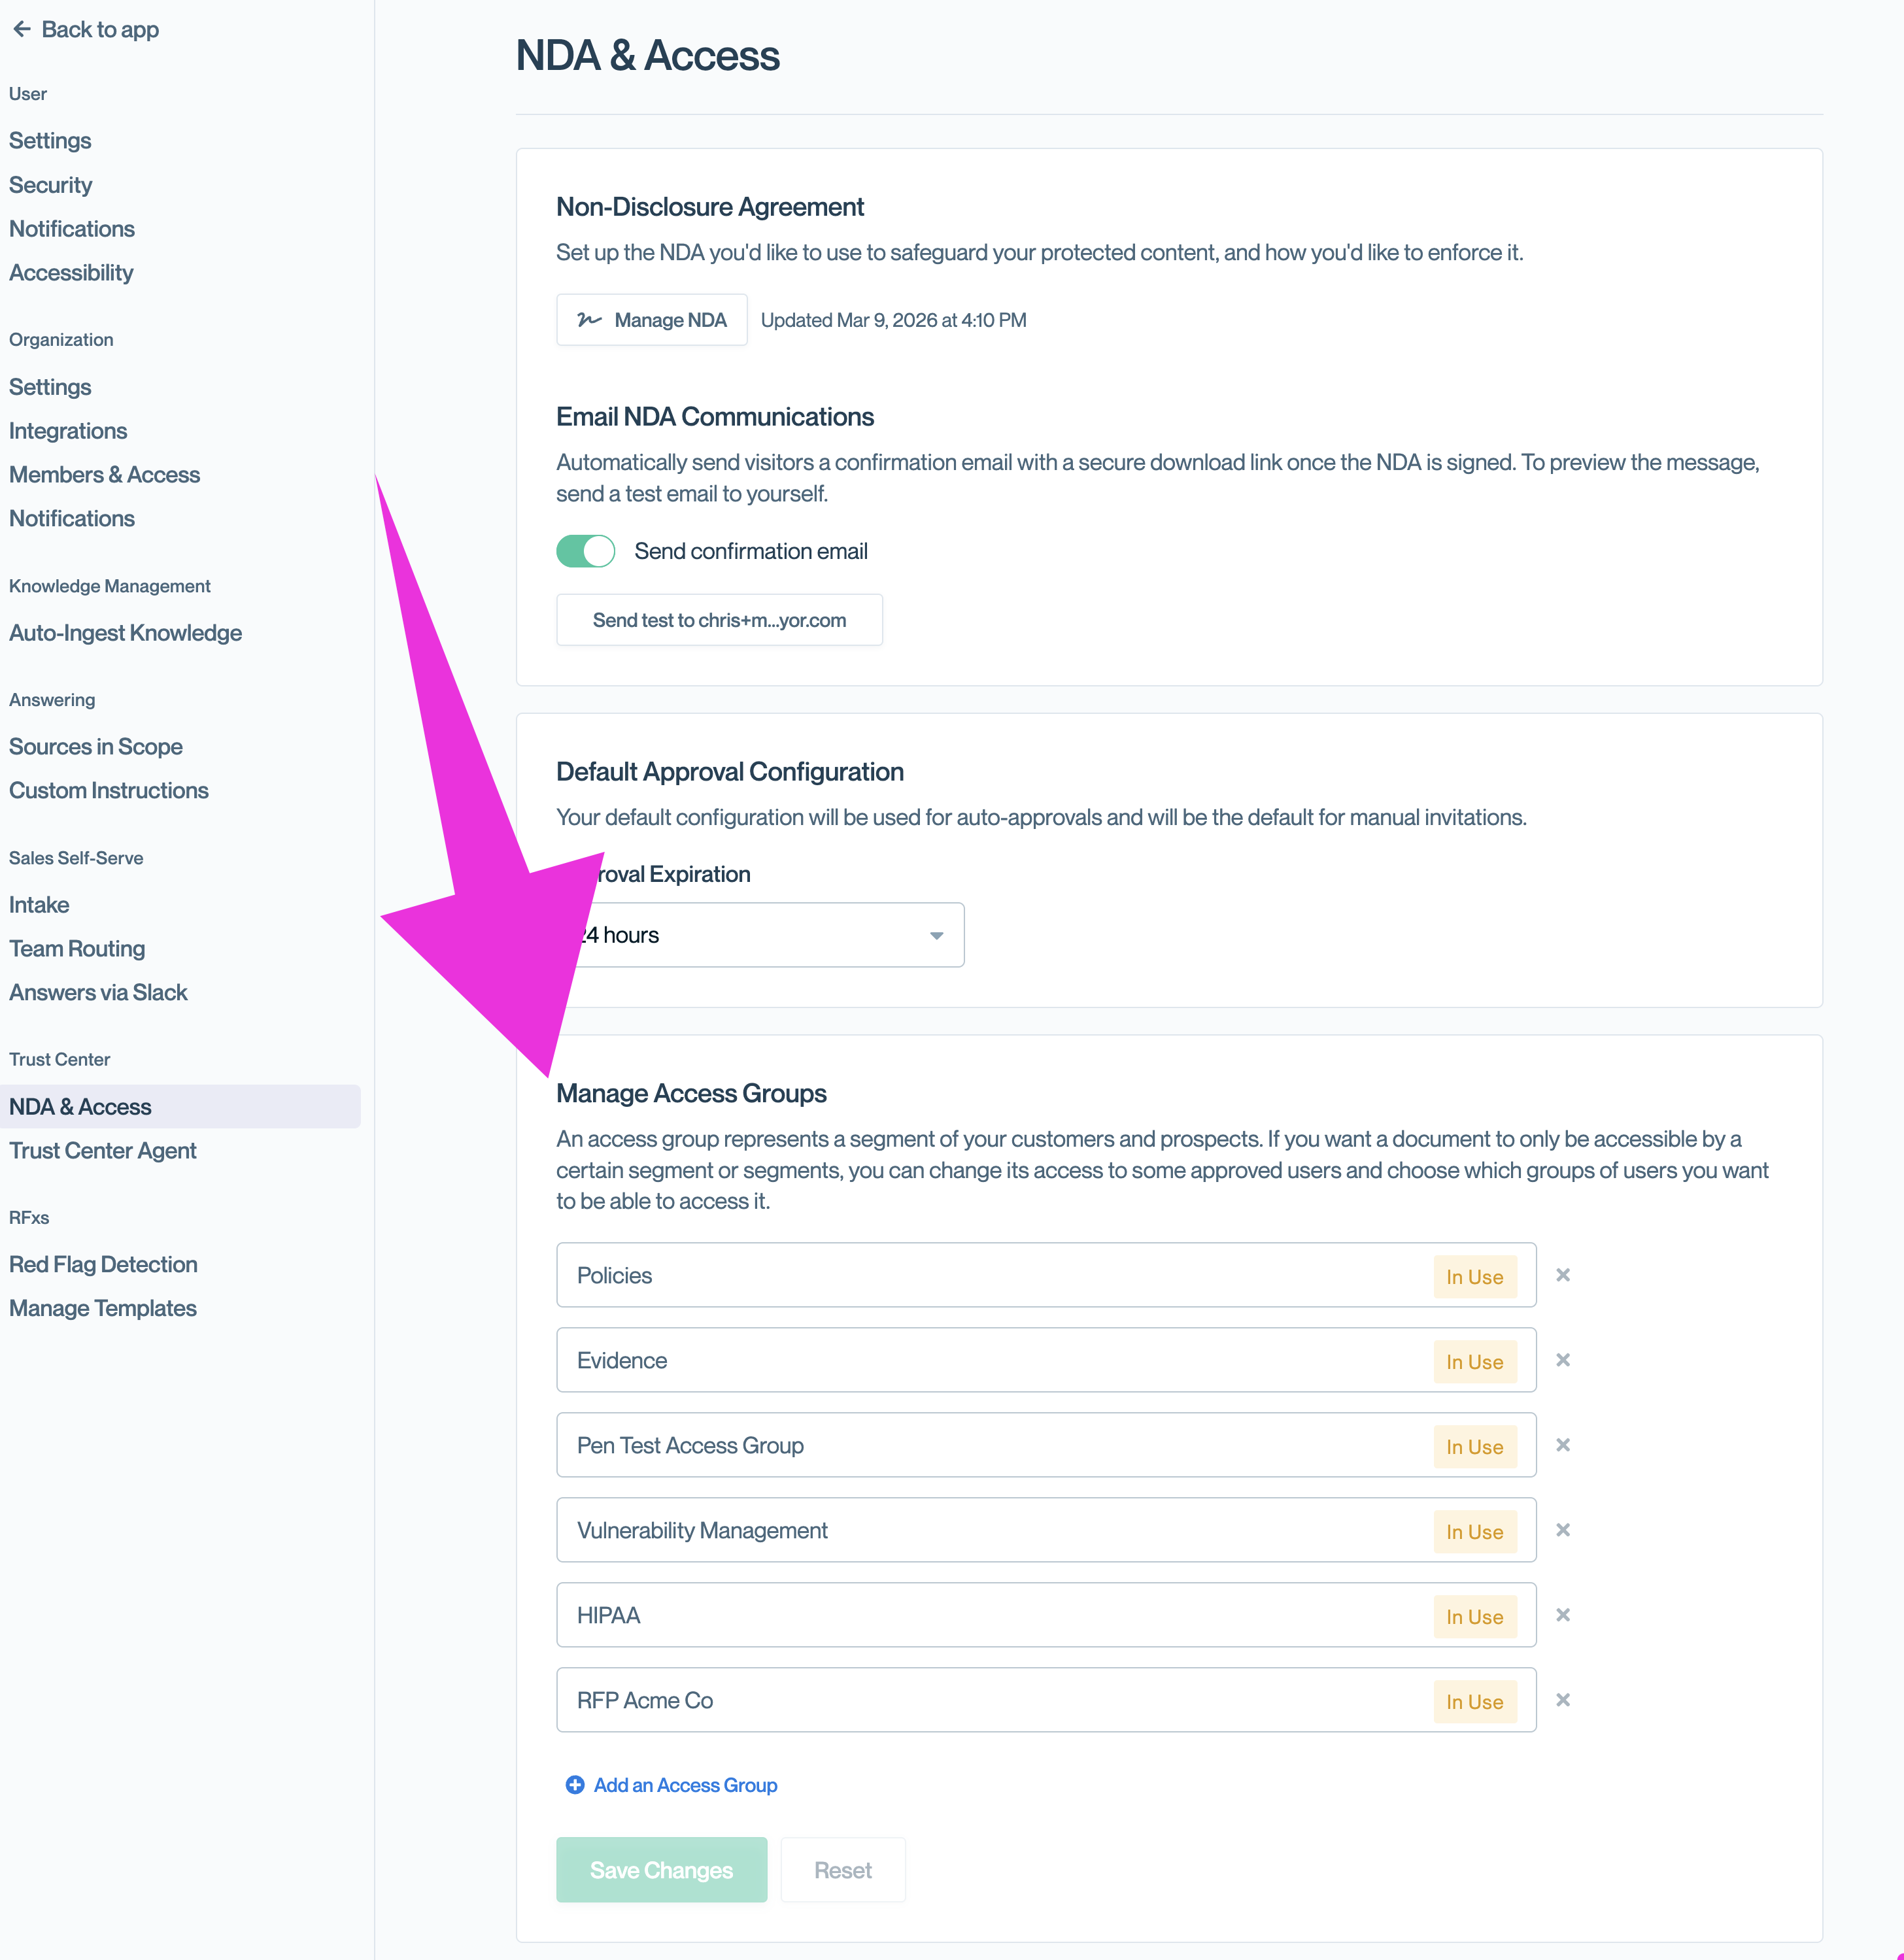
- Click Add Access Group.
- Enter a name and save.
Create access groups ahead of time in Organization Preferences.
Best for: Planning your access group structure before assigning them to documents.
Naming best practices
Good names:
- Prospects
- Pen Test Results
- EU Customers
Avoid:
- “Group 1,” “Group A” ⬅️ not descriptive
- “Special” ⬅️ unclear meaning
- Overly long names (keep under 25 characters)
Pro tipChoose names your sales or customer-facing teams will understand as they’ll often be assigning users to these groups.
Editing access groups
- Click your organization name (top left) → Settings.
- Go to "NDA & Access" under "Trust Center", and scroll to "Manage Access Groups."
- Click Add Access Group.
- Edit any name and click "Save."
Create access groups ahead of time in Organization Preferences.
Note: When you edit a name, it updates everywhere and all documents and connections using that group are automatically updated.
Deleting access groups
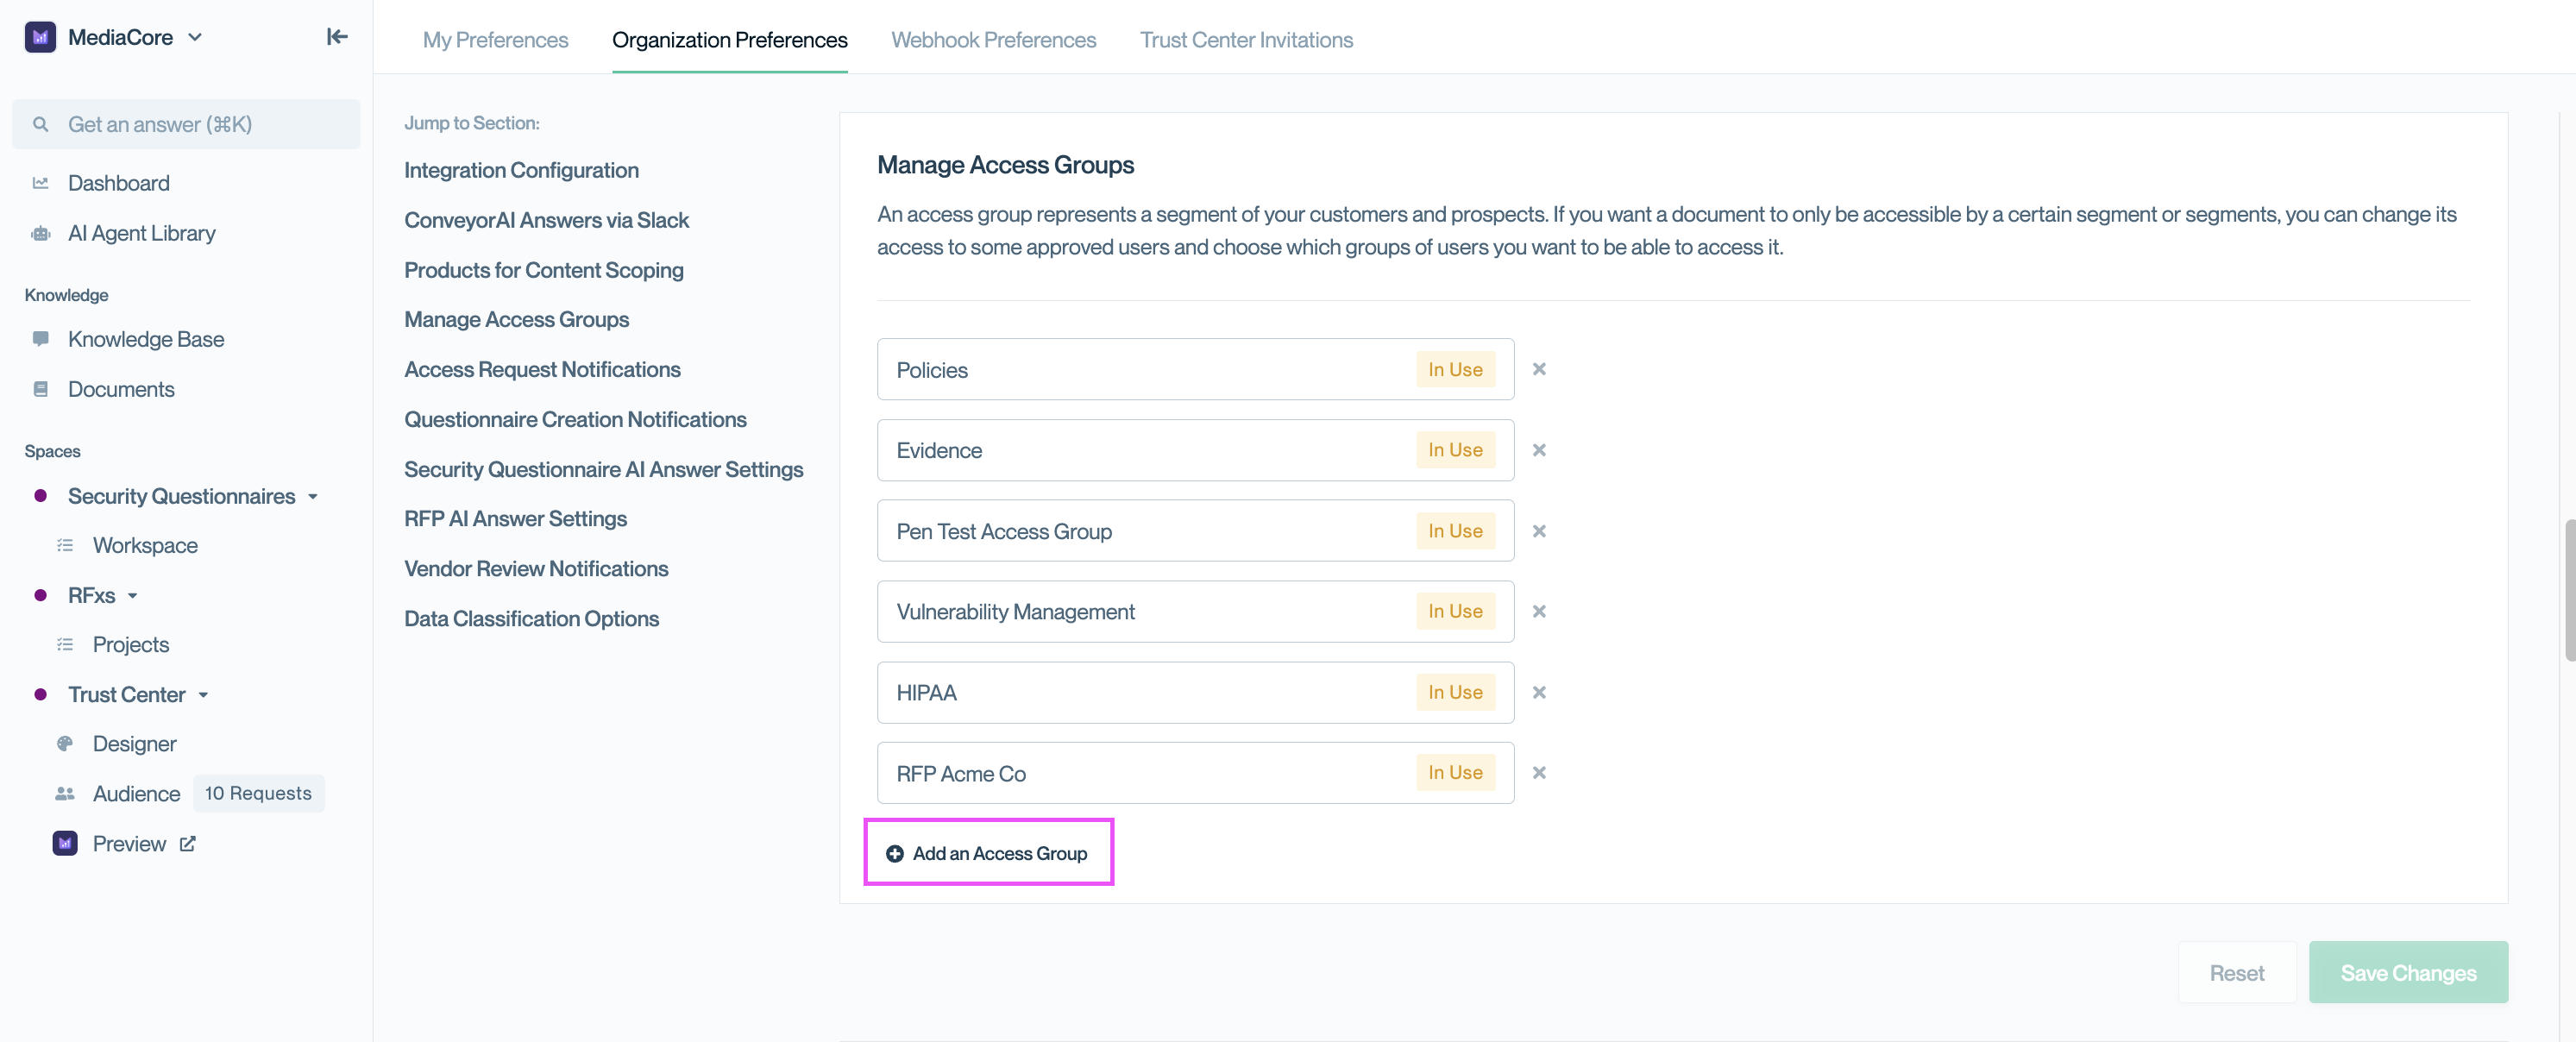
- Click your organization name → Organization Preferences.
- Scroll to Access Groups.
- Click the ✕ (delete) icon next to the group.
- If the group is still in use, a tooltip will show where it’s currently assigned (e.g. to documents or contacts).
- Remove the group from all listed places first, then return to delete it.
- Click Save Changes to confirm.
Common questions
How many access groups should I create?
Start with 2–3. Most companies never need more than 5.
Can I rename a group after creating it?
Yes, renaming updates it everywhere automatically.
What's next?
- Assign groups to documents: Managing document access
- Grant groups to customers: Adding Connections to access groups
Need help? Start with Troubleshooting → Trust Center issues or email [email protected].
Updated 4 months ago