Using DocuSign templates
Time to complete: 10–15 minutes
Prerequisites:
- Access to the Designer
- A DocuSign account with an NDA template created and pre-signed on your side
Using DocuSign templates allows you to require a formal, legally executed NDA before customers access sensitive Trust Center content. This method is ideal for organizations with established legal workflows or customers who expect DocuSign agreements.
Step 1: Create a DocuSign NDA template
The integration uses templates stored in your DocuSign account. If you don’t already have one, you’ll need to create an NDA template first.
TipWhen creating the template, make sure it’s already signed by your organization so only the customer’s signature is required during execution.
- Log in to DocuSign and navigate to Templates.
- Click Start → Envelope Templates → Create a Template.

Create a new DocuSign template from the Templates tab to start setting up your NDA workflow.
- Upload your NDA file and add a name and description.

Name and describe your template, then upload your NDA file.
- Add a Recipient Role (e.g. “Customer”) and leave the name and email fields blank - Conveyor will auto-populate these when sending to your customer.
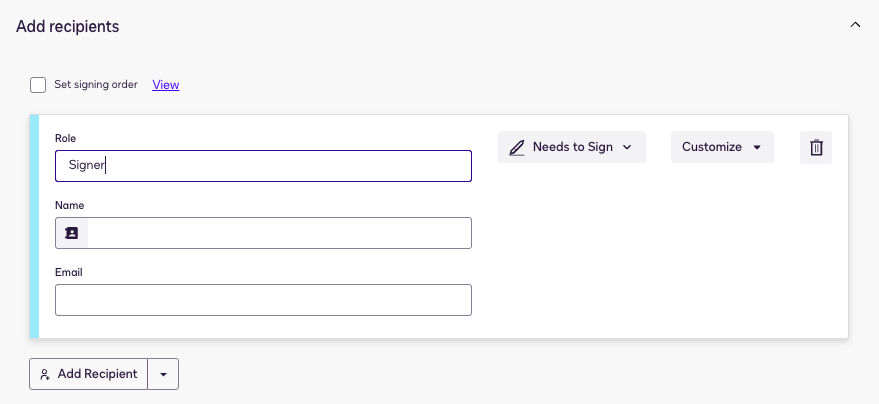
Add a recipient roles in your DocuSign template but leave the name and email blank for Conveyor to populate with customer details.
- Place the signature field where you want the recipient to sign.
- Save the template.
Step 2: Open NDA settings in Conveyor
- Go to Designer in the left navigation.
- In the right panel, find Non-Disclosure Agreement.
- Click Manage NDA.
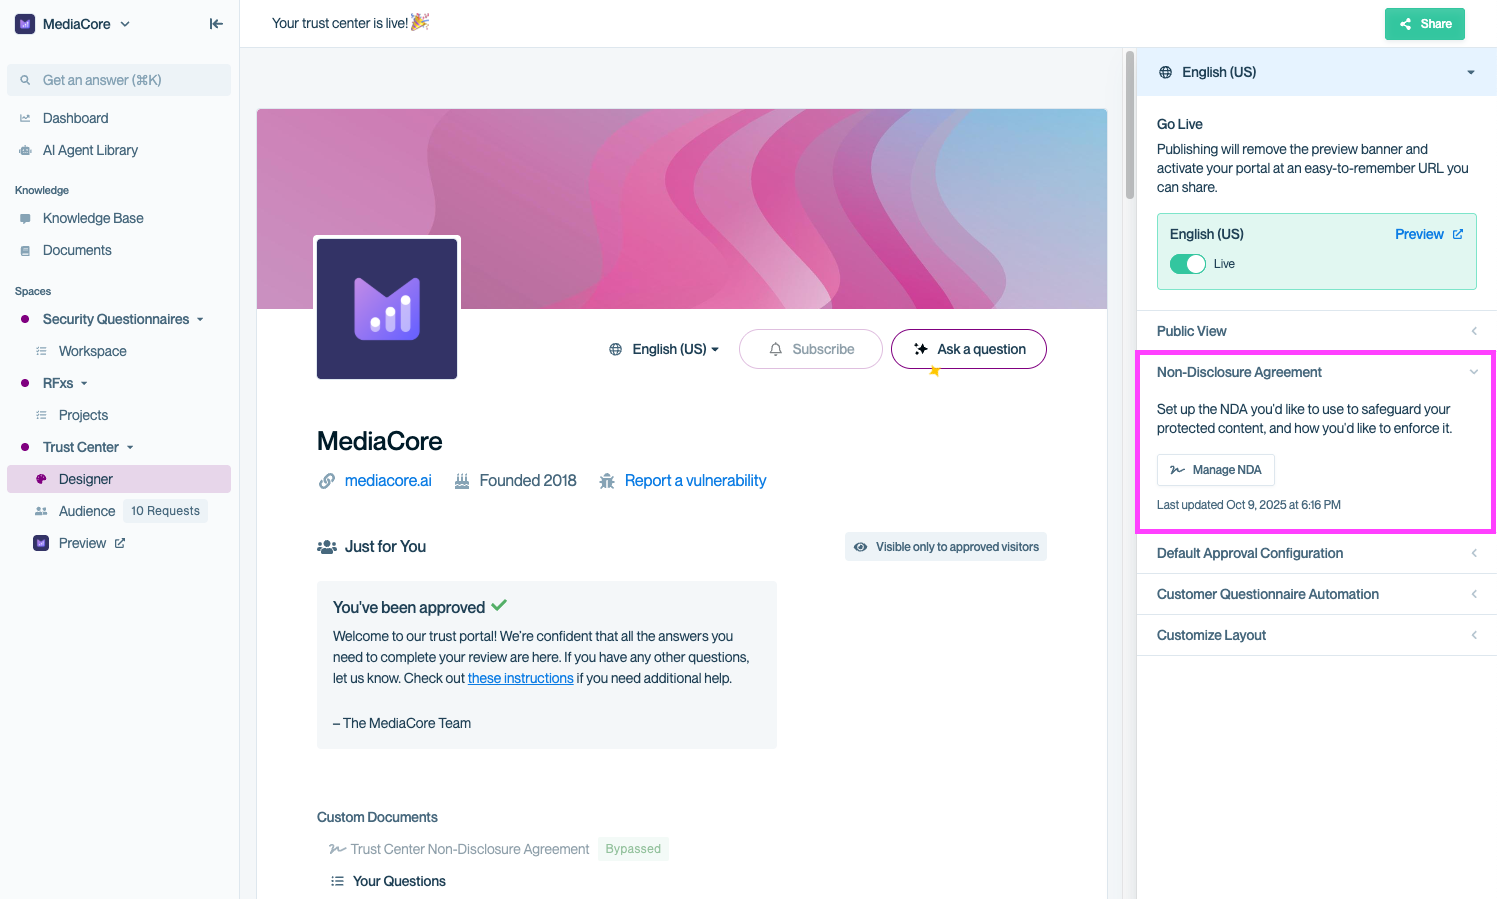
Access NDA settings from the Designer panel to configure your DocuSign integration.
Step 3: Install the DocuSign integration
In the NDA configuration modal, select DocuSign Template, then click Install Integration.
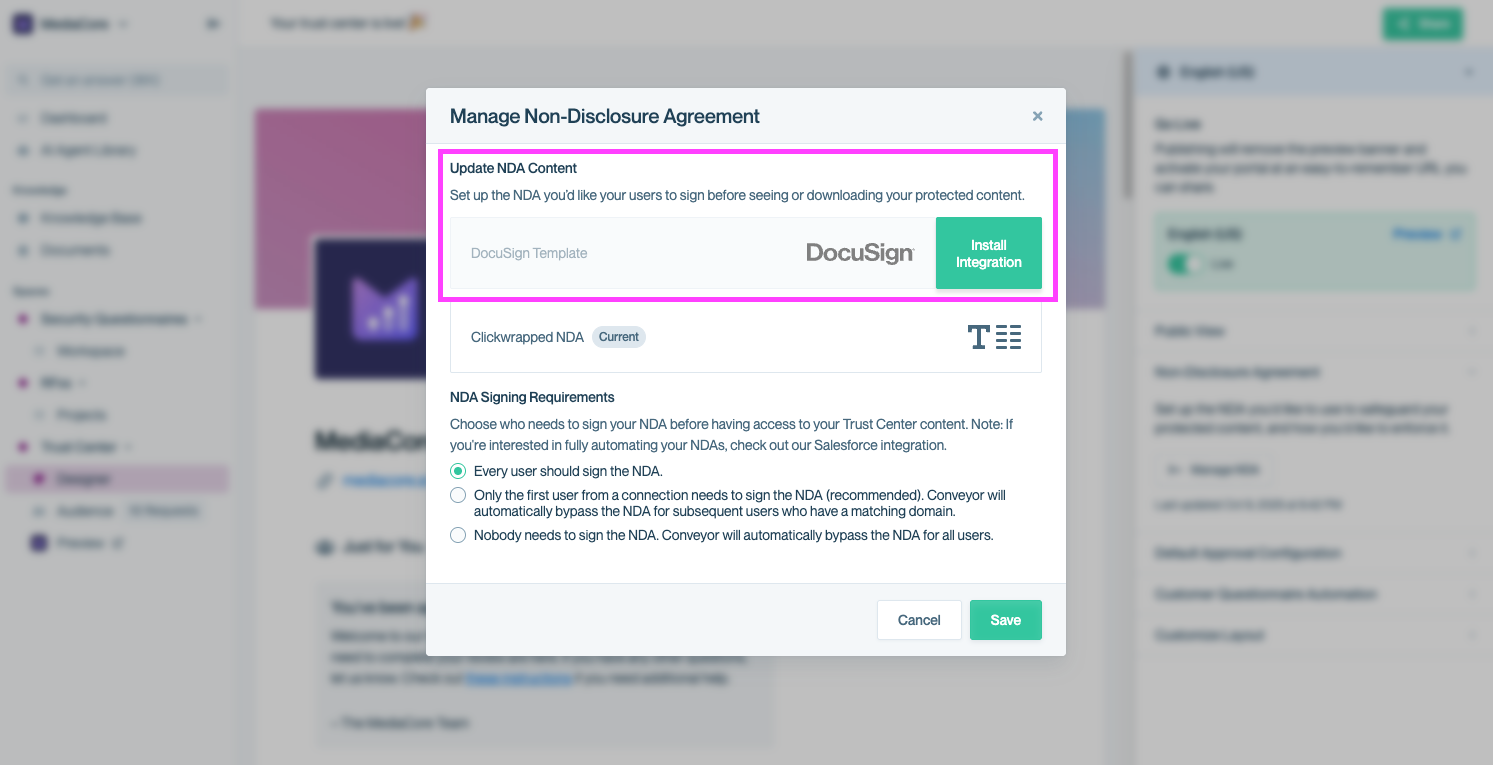
Click "Install Integration" to connect Conveyor with your DocuSign account.
You’ll be redirected to DocuSign to log in and authorize Conveyor. Once complete, you’ll return to Conveyor and your DocuSign templates will become available for use.
Step 4: Select your NDA template
From the dropdown, choose the NDA template you created in DocuSign. Click Save to apply it.

Heads up:Your DocuSign NDA applies immediately once saved, so make sure you’ve tested the signing flow in DocuSign before enabling it here.
Step 5: Verify the signing experience
Once the integration is configured, new visitors to your Trust Center will be prompted to sign the NDA via DocuSign before accessing gated content. You can preview the flow using the Previewing your Trust Center feature or by sending yourself an invite.
📸 Screenshot placeholder — Customer view of DocuSign signing modal.
Common questions
Do I need a specific DocuSign plan to use this integration?
Yes, you’ll need a Business or Enterprise DocuSign account that supports templates. Free accounts don’t include this functionality.
Can I use multiple templates?
Only one NDA template can be active at a time, but you can change templates later if your legal language changes.
What happens if I update the template in DocuSign?
Changes you make in DocuSign will apply automatically to new NDA signers. Previously signed NDAs won’t be affected.
What's next?
- Adjust signing rules: See Adjusting global NDA settings to define who must sign and when.
- Use Clickwrapped NDA instead: If you prefer a lightweight option, see Setting up a Clickwrapped NDA.
- Review signed NDAs: Learn how to find signed agreements in Viewing signed NDAs.
Need help? Start with our Troubleshooting → Trust Center issues. Still stuck? Email [email protected].
Updated 9 months ago