Triaging questionnaires from Salesforce
Overview
The Conveyor managed package can automatically send Salesforce Cases to Conveyor's Triage Agent for processing. Once enabled, the Triage Agent is notified whenever a Case is created, updated, or receives a Chatter post, allowing Conveyor to analyze and triage incoming Cases on your behalf.
Prerequisites
Before setting up Case triage, make sure you have:
- Installed the Conveyor managed package
- Set up the OAuth integration between Salesforce and Conveyor
Enable Case Triage
- Click the App Launcher (grid icon) in the top-left corner of Salesforce and search for Conveyor Settings.
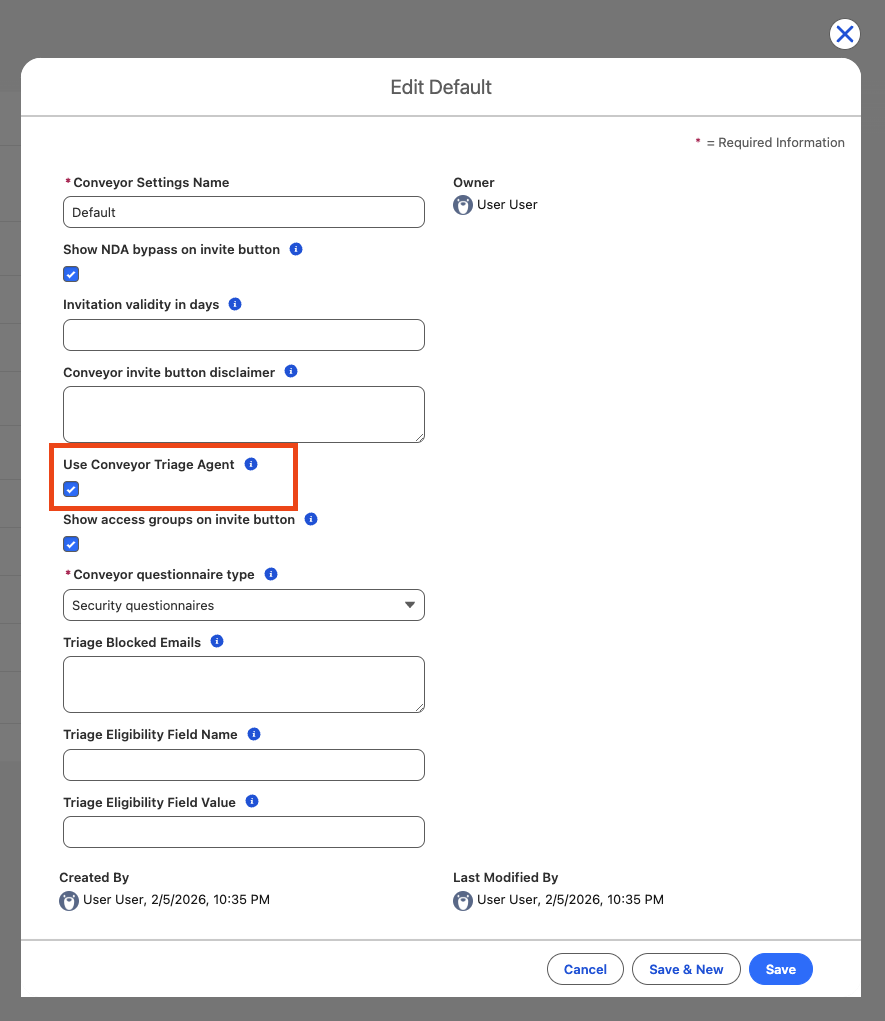
- If a record named Default already exists, click to open it. If no record exists, click New and set the Conveyor Settings Name to
Default. - Check the Use Conveyor Triage Agent checkbox.
- Click Save.
Note: There should only be one Conveyor Settings record, and it must be named
Default.
Once enabled, Conveyor's Triage Agent will automatically be notified when:
- A new Case is created
- An existing Case is updated
- A Chatter post is added to a Case (including text posts, file attachments, links, and case comments)
Customizations
Filter Eligible Cases
By default, all Cases are sent to Conveyor for triage. You can optionally filter which Cases are eligible based on a field value.
- Open the Default Conveyor Settings record.
- In the Triage Eligibility Field Name field, enter the API name of the Case field you want to filter on (e.g.,
Type). - In the Triage Eligibility Field Value field, enter the value that eligible Cases should have (e.g.,
Questionnaire). - Click Save.
With the example above, only Cases where the Type field equals Questionnaire will be sent to Conveyor for triage. All other Cases will be ignored.
Note: Field value matching is case-sensitive. Make sure the value you enter matches exactly.
Note: If either the field name or field value is left blank, all Cases will be sent for triage (no filtering is applied).
Block Specific Users
You can prevent certain users from triggering triage actions. This is useful for system or integration users that automatically update Cases or add comments, where you want to avoid unnecessary calls to Conveyor.
- Open the Default Conveyor Settings record.
- In the Triage Blocked Emails field, enter the email addresses of users you want to block.
- Separate multiple email addresses with commas or newlines.
- Click Save.
Any Case activity by a blocked user will not trigger the Triage Agent.
Permissions
Conveyor Settings
To manage Conveyor Settings, users need the Conveyor Admin permission set. This permission set grants full access to the Conveyor Settings object and all triage-related fields.
To assign the permission set:
- In Setup, search for Permission Sets in the Quick Find box.
- Click Conveyor Admin.
- Click Manage Assignments.
- Click Add Assignment and select the users who should have access.
- Click Next and then Assign.
Only users with this permission set will be able to enable, disable, or configure Case triage settings.
Case, Account, and Opportunity
You should grant your OAuth user read access to all the fields you want the Conveyor Triage Agent to reference when evaluating whether a Caseshould have its questionnaire processed. Also, you should grant your OAuth user write access to all the fields you want the Conveyor Triage Agent to write back to in Salesforce.
Updated 4 months ago