Import Spreadsheets (Excel/CSV)
Time to complete: 5-10 minutes
Prerequisites: A questionnaire file in .xlsx, .xlsm or .csv (if needed)
Overview
Upload a spreadsheet to let Conveyor automatically find questions across tabs and draft answers.
You can import everything at once or take control by choosing tabs and manually mapping question/answer columns.
Best practice — Google Sheets
- Download Google Sheets as
.xlsxbefore uploading for the smoothest import.
Adding a Spreadsheet Questionnaire
Step 1 - Add Questionnaire
Go to Security Questionnaires → Workspace and click Add Questionnaire
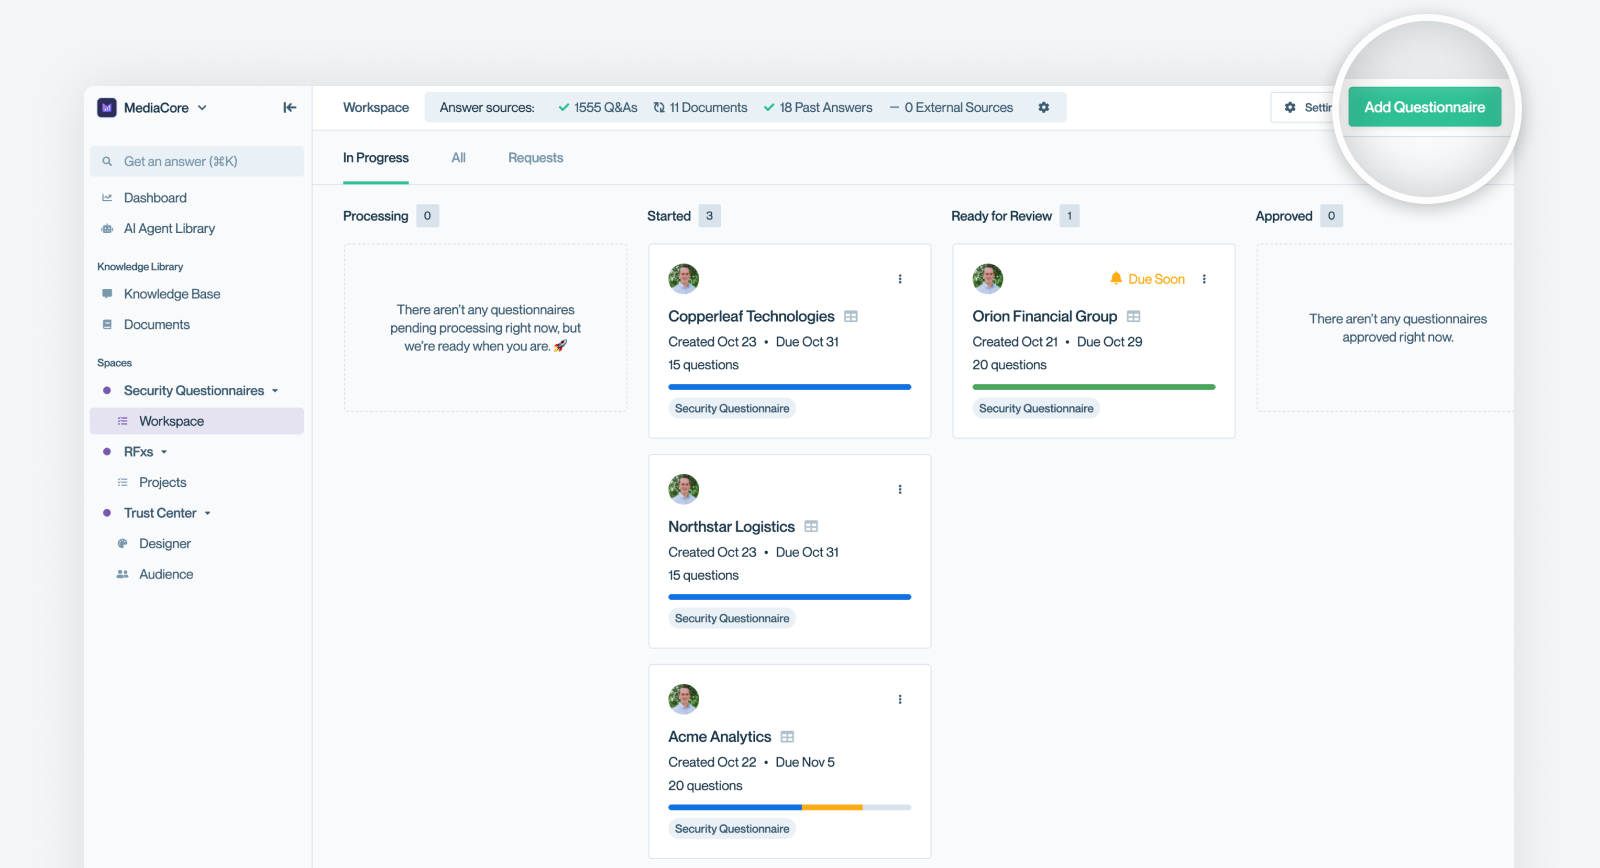
Clicking "Add Questionnaire" will let you start the process of adding a questionnaire to your account.
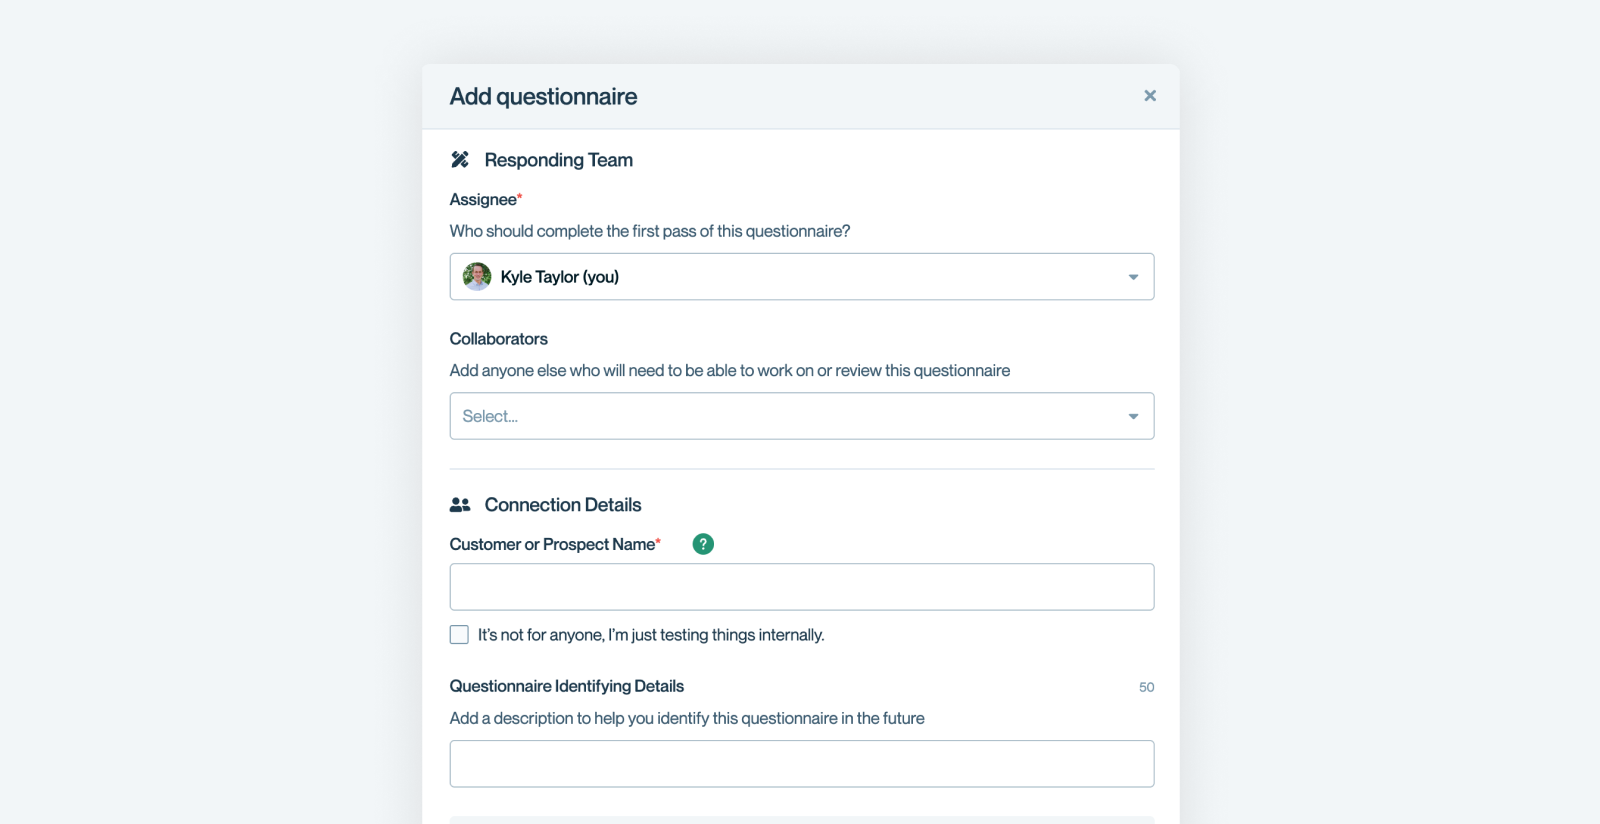
Step 2- Fill out the form
Begin filling out the fields in the form that is presented. See the description of the form fields for more information. We'll discuss the file uploading portion of the form below.
Step 3 - Upload the file
When you get to the Format section of the form upload your .xlsx, .xlsm, or .csv. Once the file is loaded you'll see that Conveyor detects the tabs in the spreadsheet.
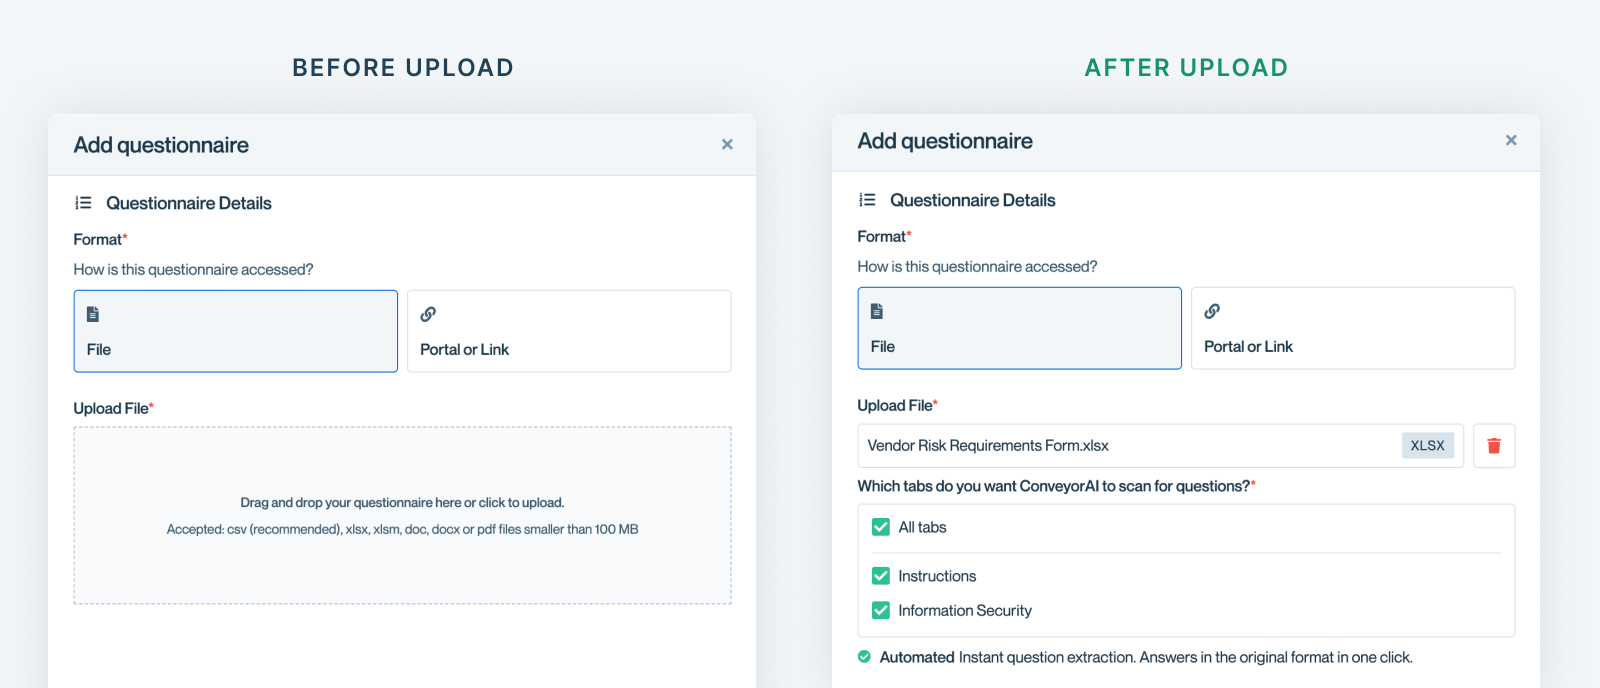
File uploaded and tabs automatically detected
.XLSM & Macro SupportSIG questionnaires (Core/Lite): Conditional logic is automatically handled. Hidden questions appear/disappear based on parent answers.
All other macro (.xlsm) spreadsheets: Macros are preserved, but hidden conditional rows are shown as visible questions. Macros remain intact on export.
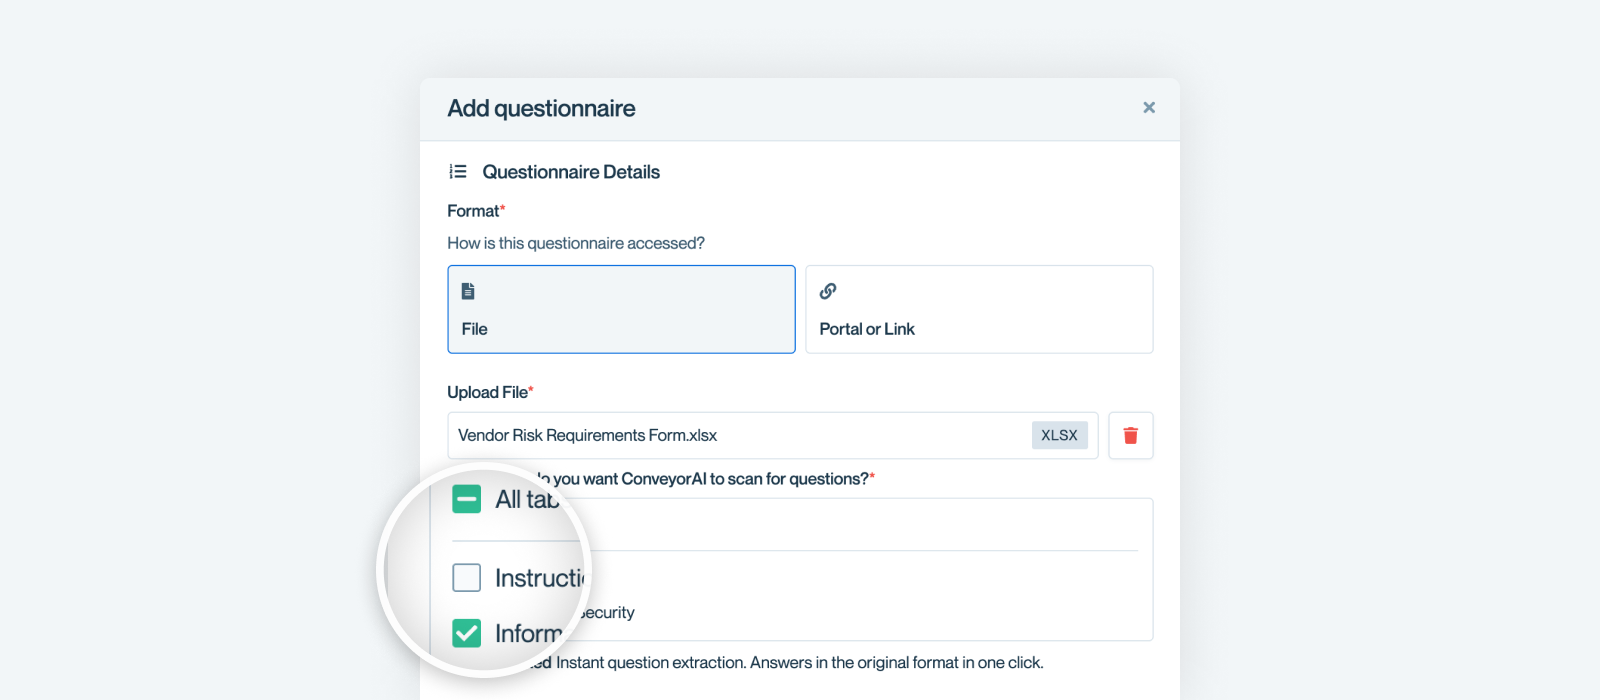
Step 4 - Choose tabs to auto-scan (optional)
By default Conveyor will scan every tab for questions. You can uncheck tabs you know are unnecessary to scan. You can also uncheck all tabs if you want to manually map questions yourself in the next step.
Step 5 - Manually map questions (optional)
If you didn’t auto-scan a tab—or you want finer control—define the question/answer pattern yourself. On, the mapping screen click on the spreadsheet tab you want to work inside. Then follow the mapping steps below.
Click on Questions Manually
Conveyor typically does a good job of detecting the question/answer pattern within your website. If you hover over a question you'll see how the app has auto-detected the column for question, answer, and additional info.
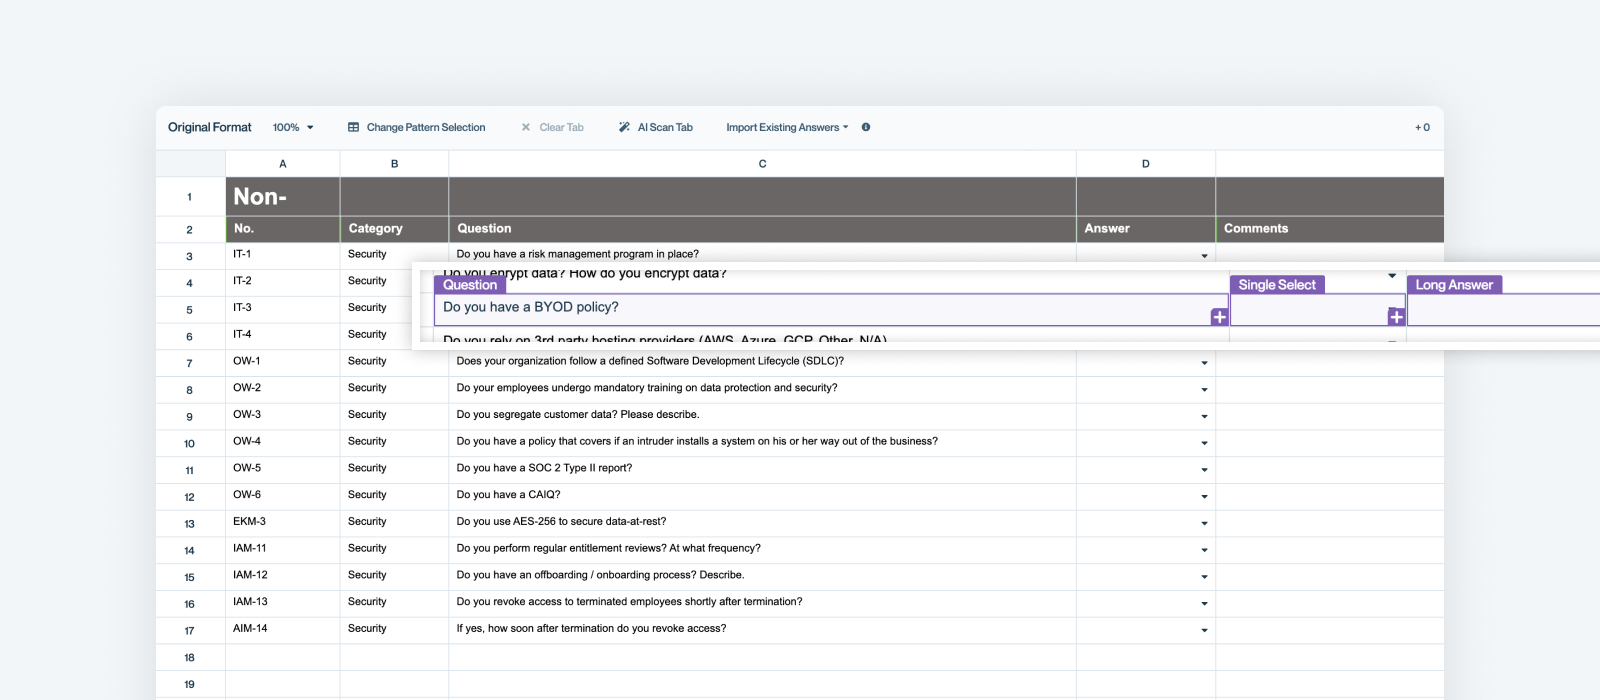
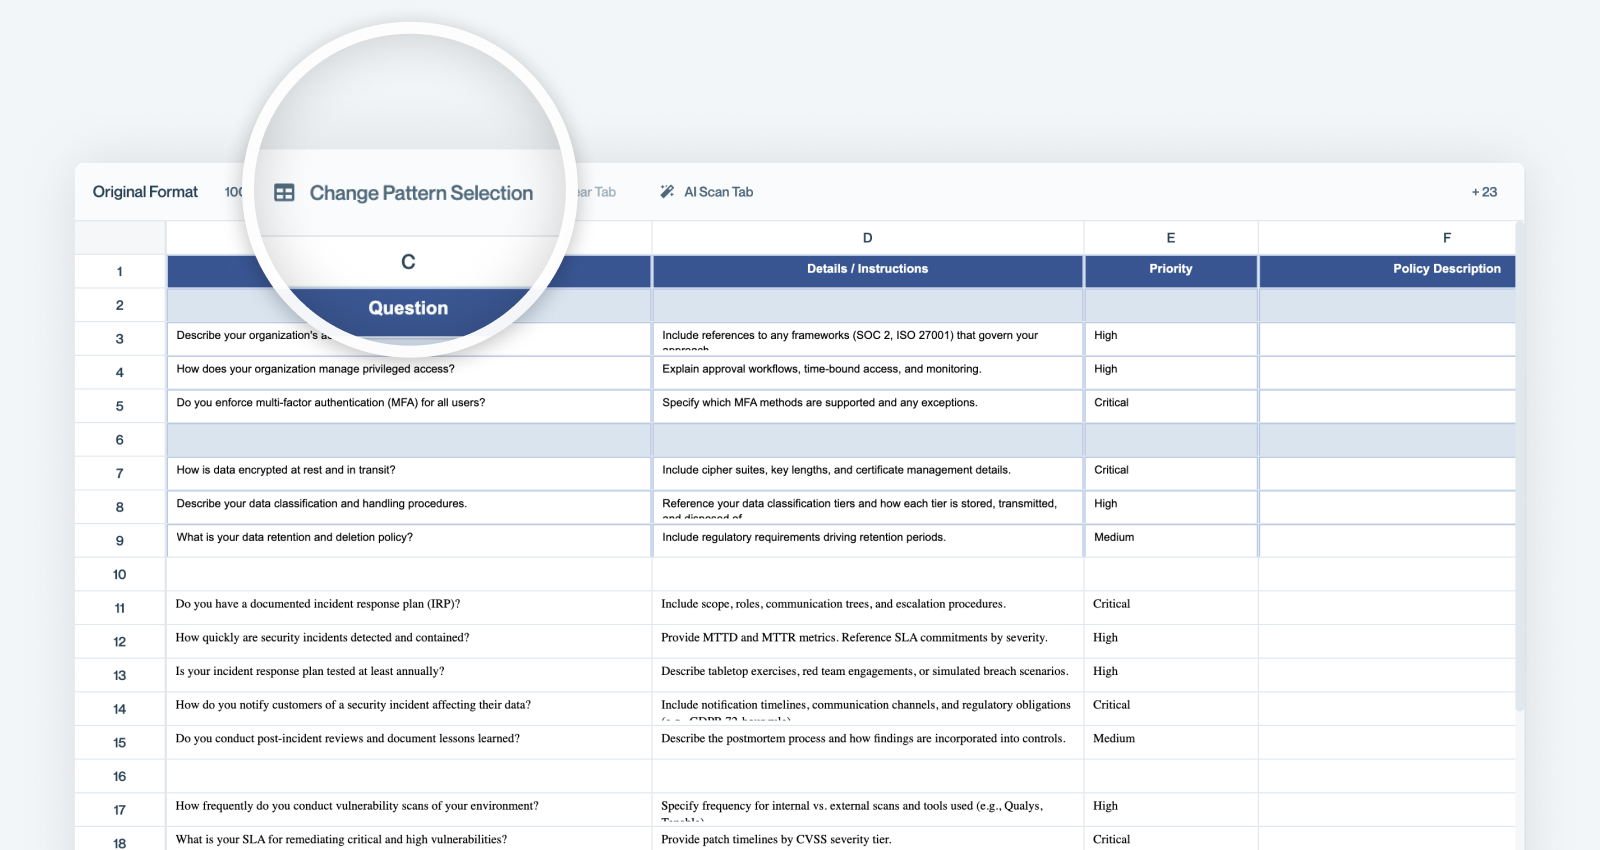
Don't like the detected pattern selection? Change It!
If Conveyor's automatic mapping doesn't match your needs, or if you're working with an unusual spreadsheet format, you can manually configure the mapping by clearing the tab or deselecting mapped question rows, and then by using Change Pattern Pattern Selection.
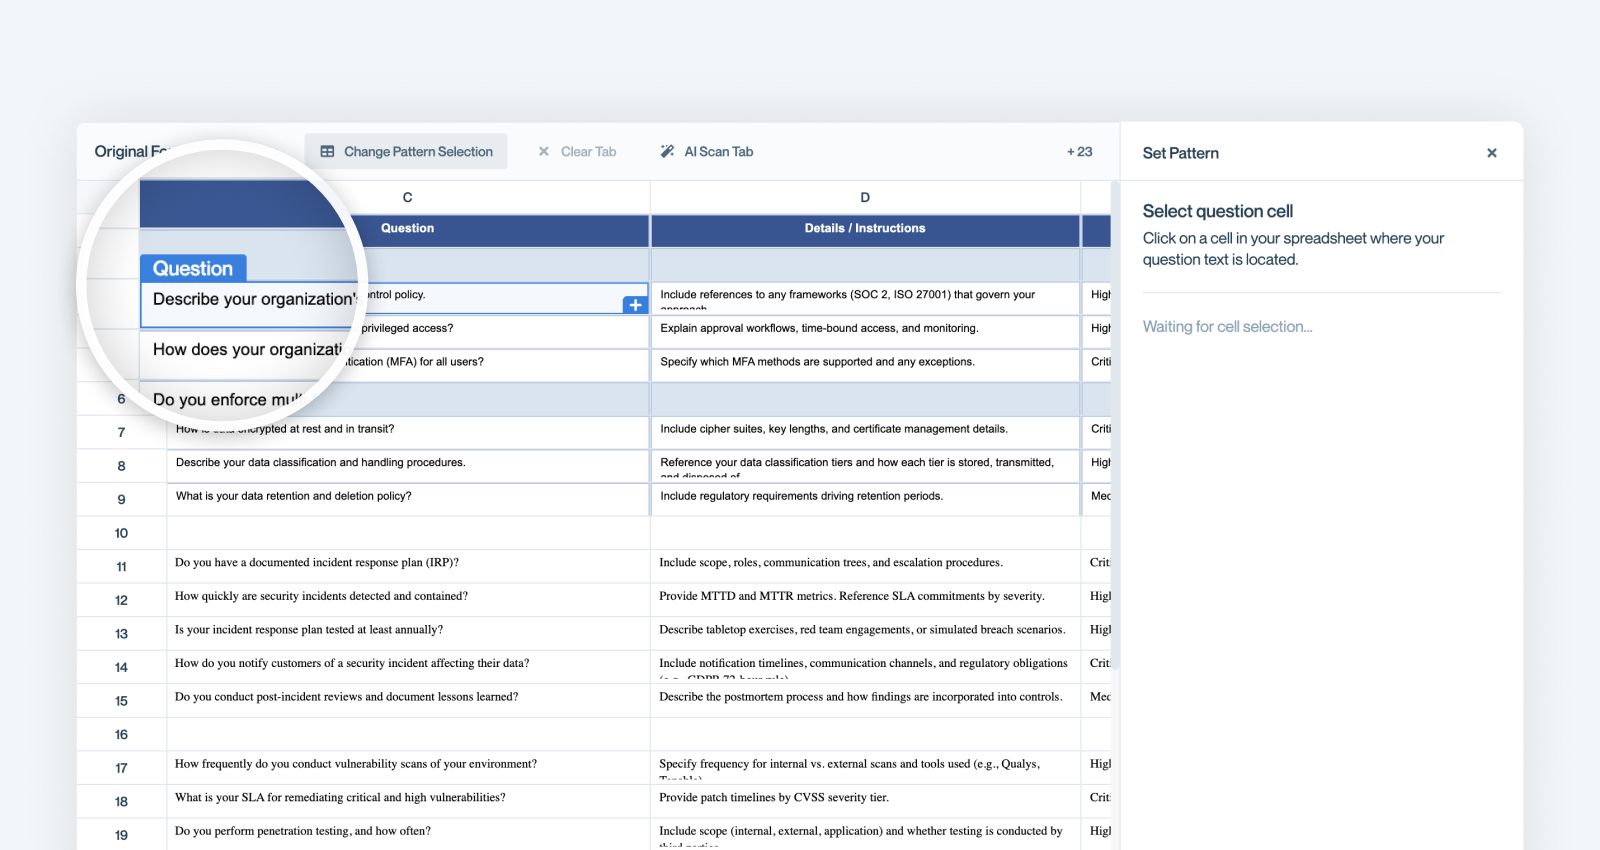
Select a question cell
You need to "teach" Conveyor which column / cell questions are found in.
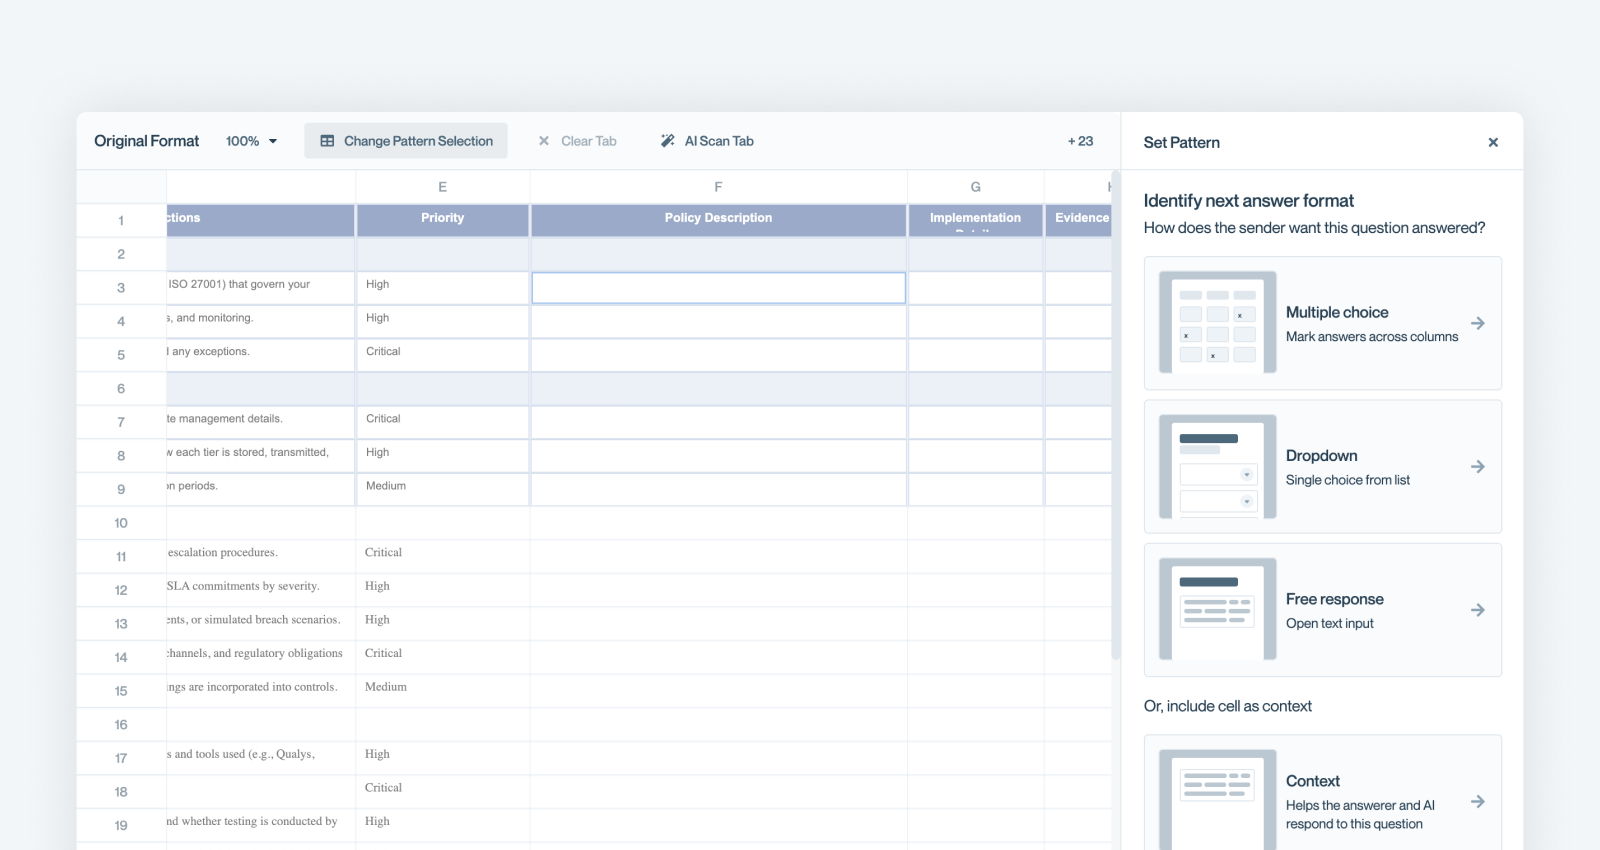
Select answer type
After you select the question, you need to select what answer type this question is looking for. Select the format (Multiple Choice , Dropdown, Free Response) that the first response cell asks for.
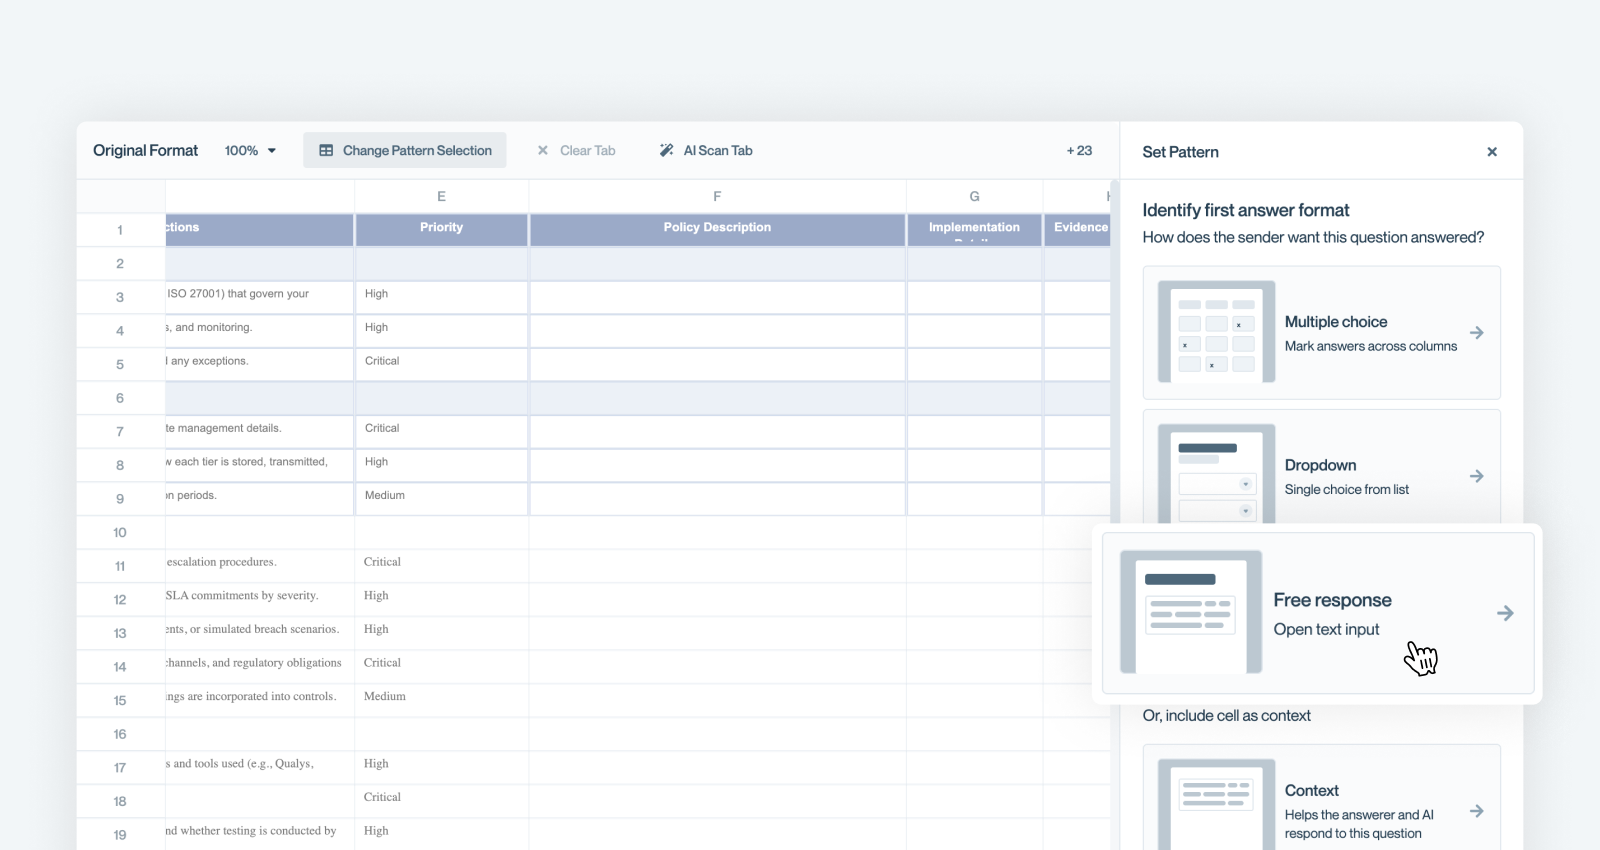
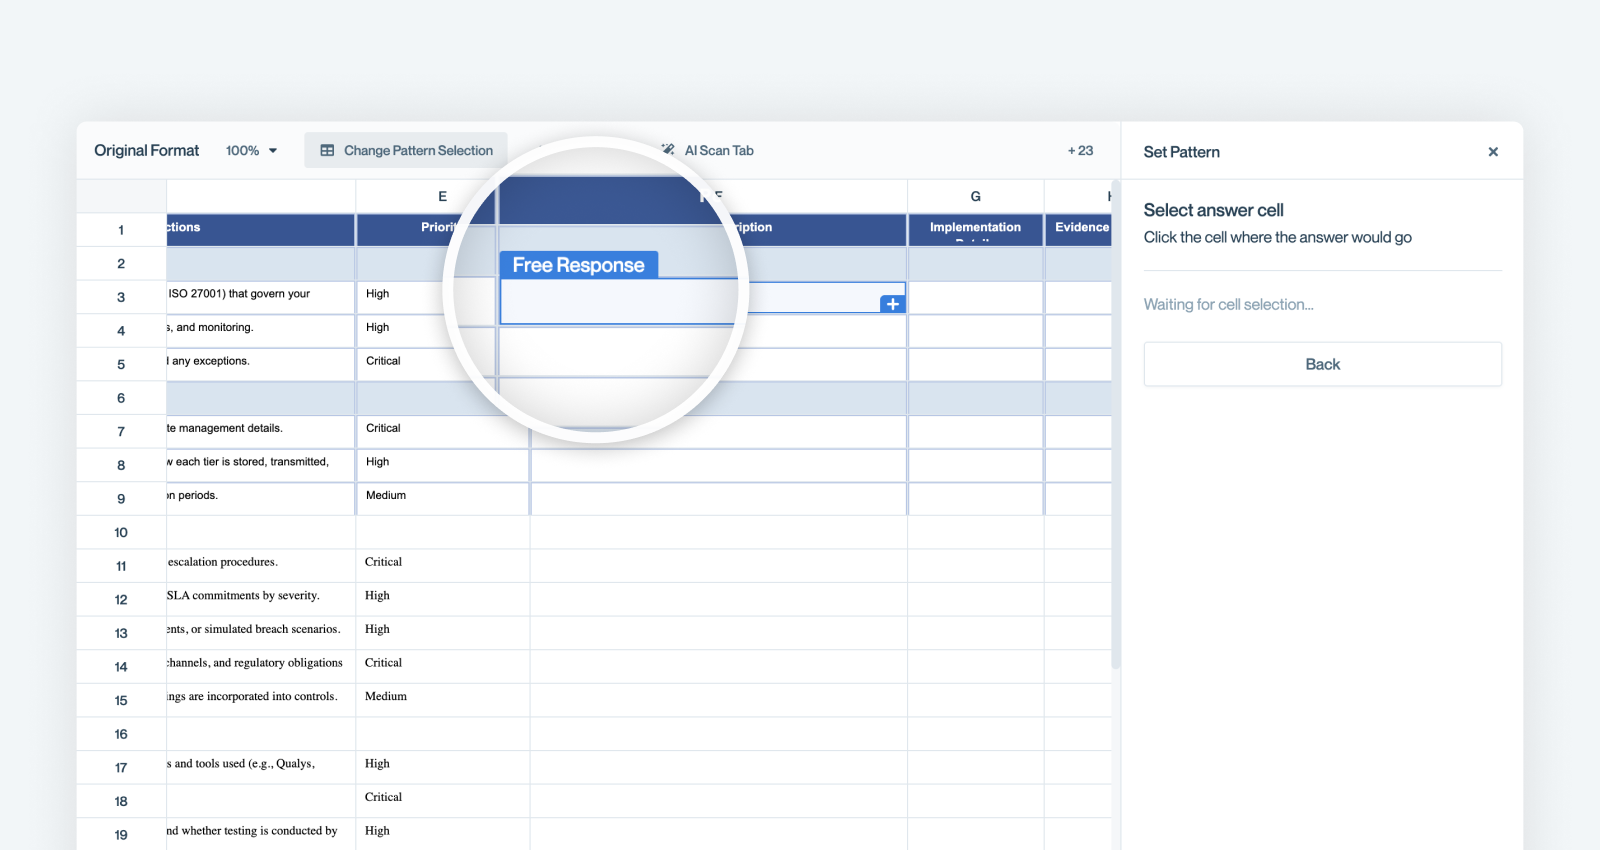
Select answer cell(s)
After you select the answer type for the first answer cell (Free Response in the example above), the right panel will prompt you to select the answer cell. In this case we're selecting the first Free Response cell, "Policy Description".
Repeat for all answer cells
Repeat for each additional response field. When prompted "Identify next answer format," continue selecting until all response columns are mapped.
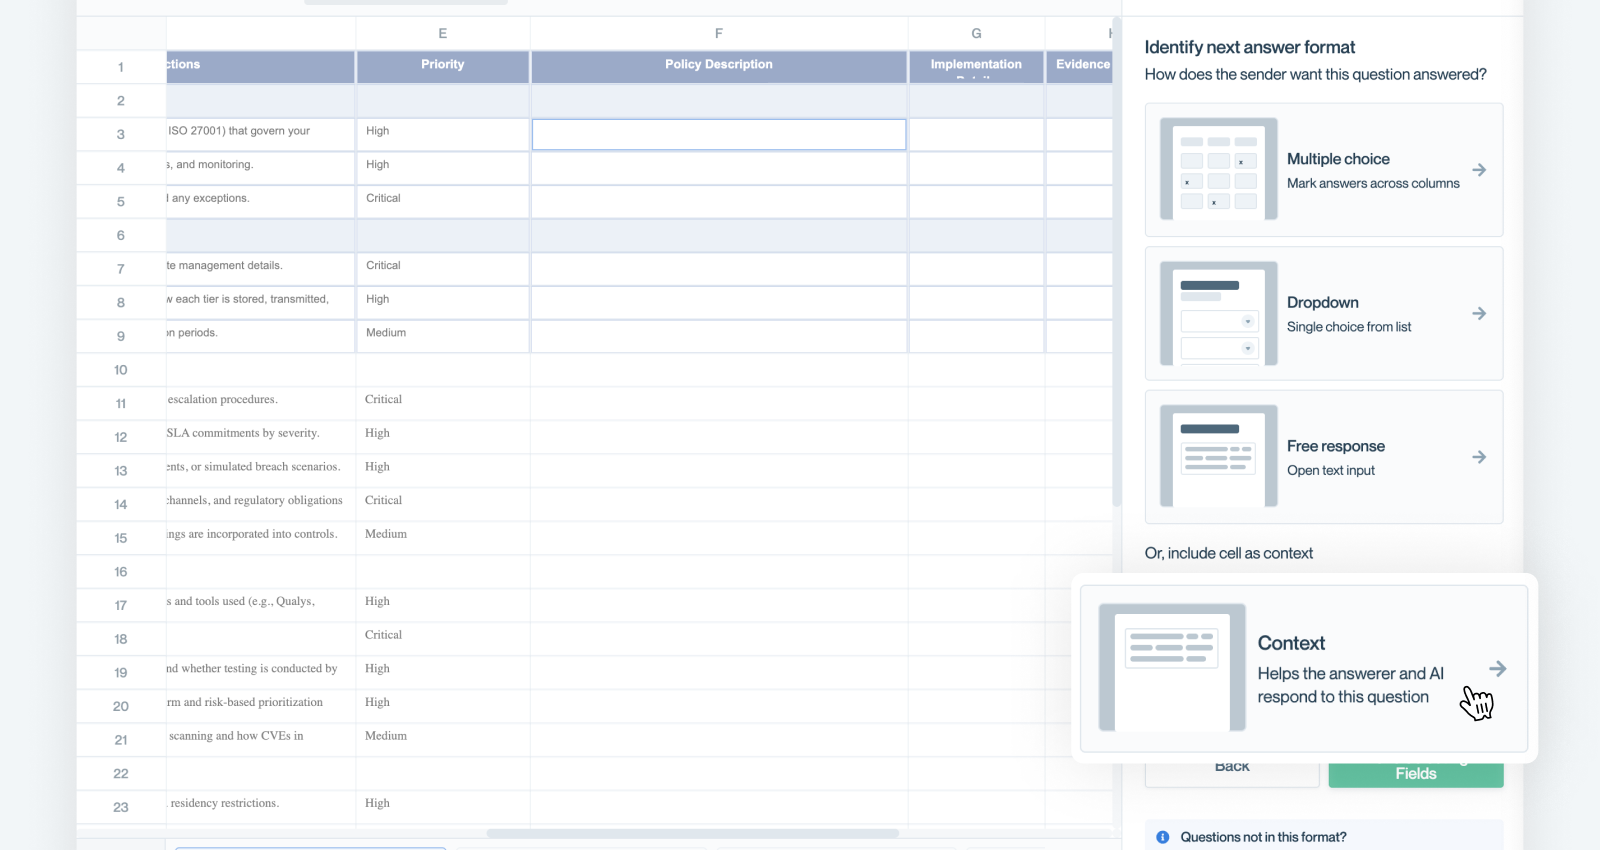
Map Context Columns If Applicable
if your questionnaire contains context columns that would be helpful for Conveyor AI to use when answering questions, you can select those in the same way you selected answer cells.
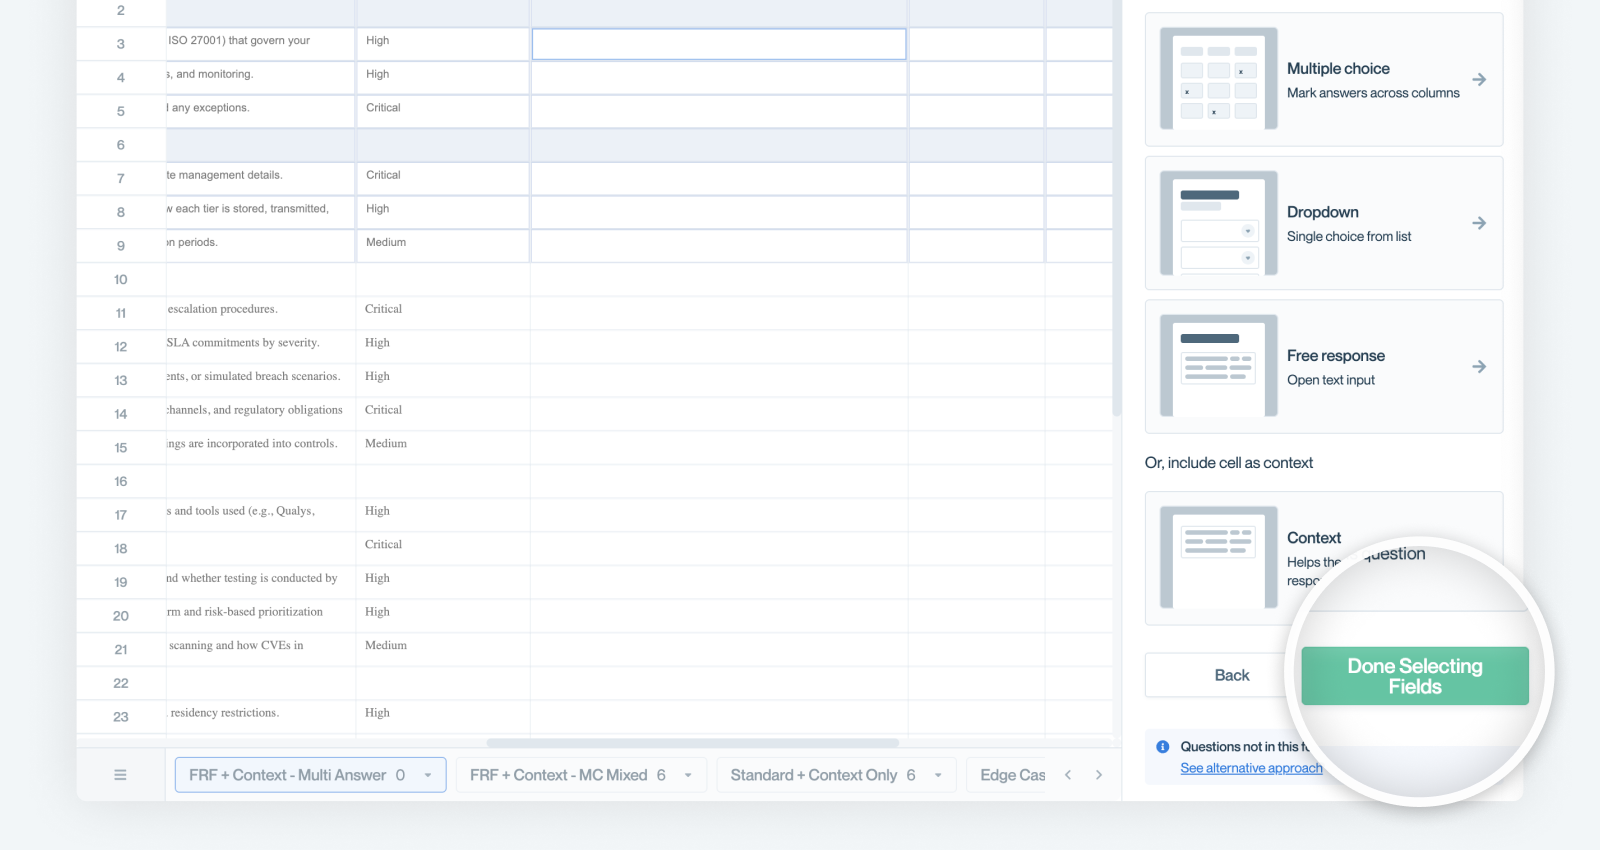
Done Selecting Fields
Once you're done selecting all the answer fields, select Done Selecting Fields.
Confirm Answer Column Headers
because we now allow multiple response fields, we need to make sure we label each response field correctly. The next step is to confirm the header values for each response field.

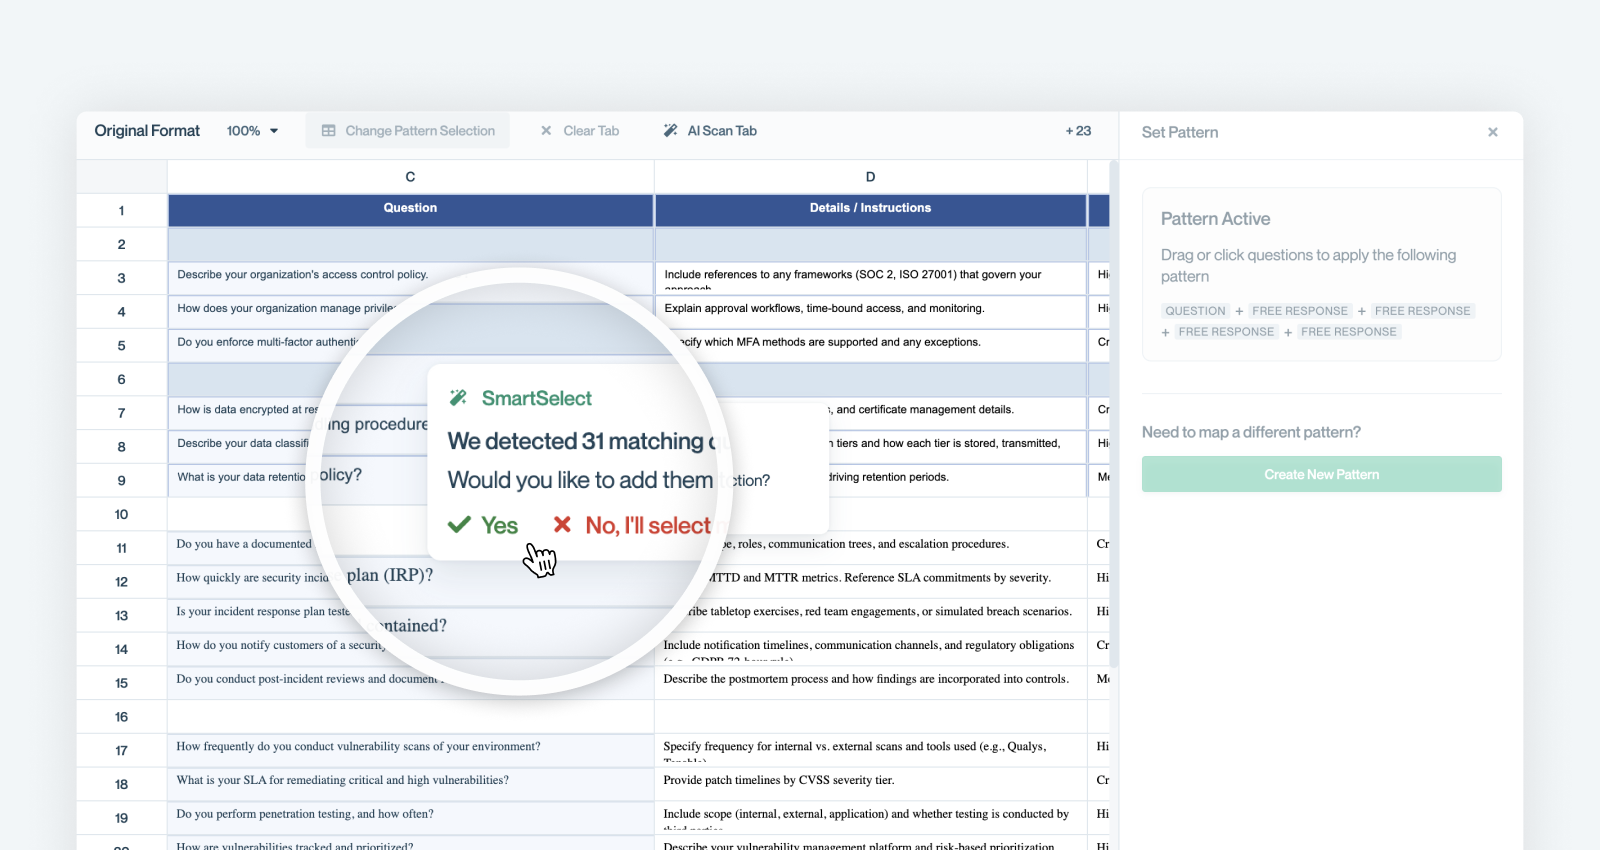
Set the Pattern
Make sure on the next screen you set the pattern. This allows Conveyor to auto-detect other question rows that follow this same pattern.

Confirm "SmartSelect"
Once you click "Set Pattern", Conveyor will auto-detect questions that match that same pattern on the tab you're currently on. You can confirm this selection for it to include all the questions in ConveyorAI's responses.
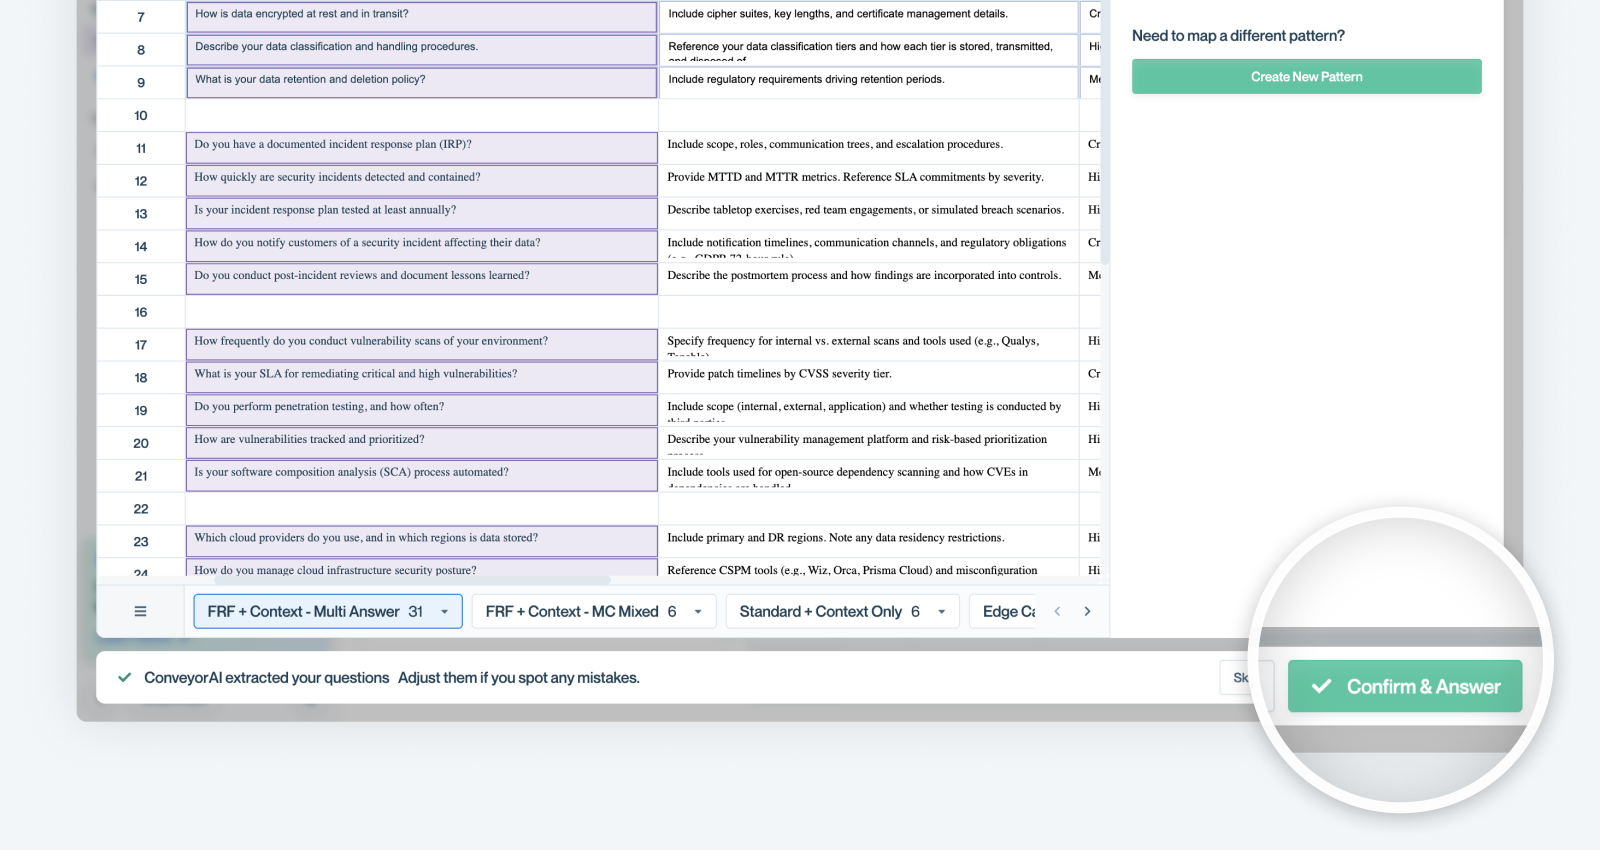
Confirm & Answer
Once you've mapped questions across all tabs, you simply click "Confirm & Answer" and Conveyor will begin processing your questionnaire.
“Overview” Tab (after import)
Once you've clicked "Confirm & Answer" it will drop you on the Overview tab of the questionnaire. You'll likely see the questionnaire still processing. The overview tab provides you a summary of answers and the questionnaire file with responses inline color-coded by confidence.
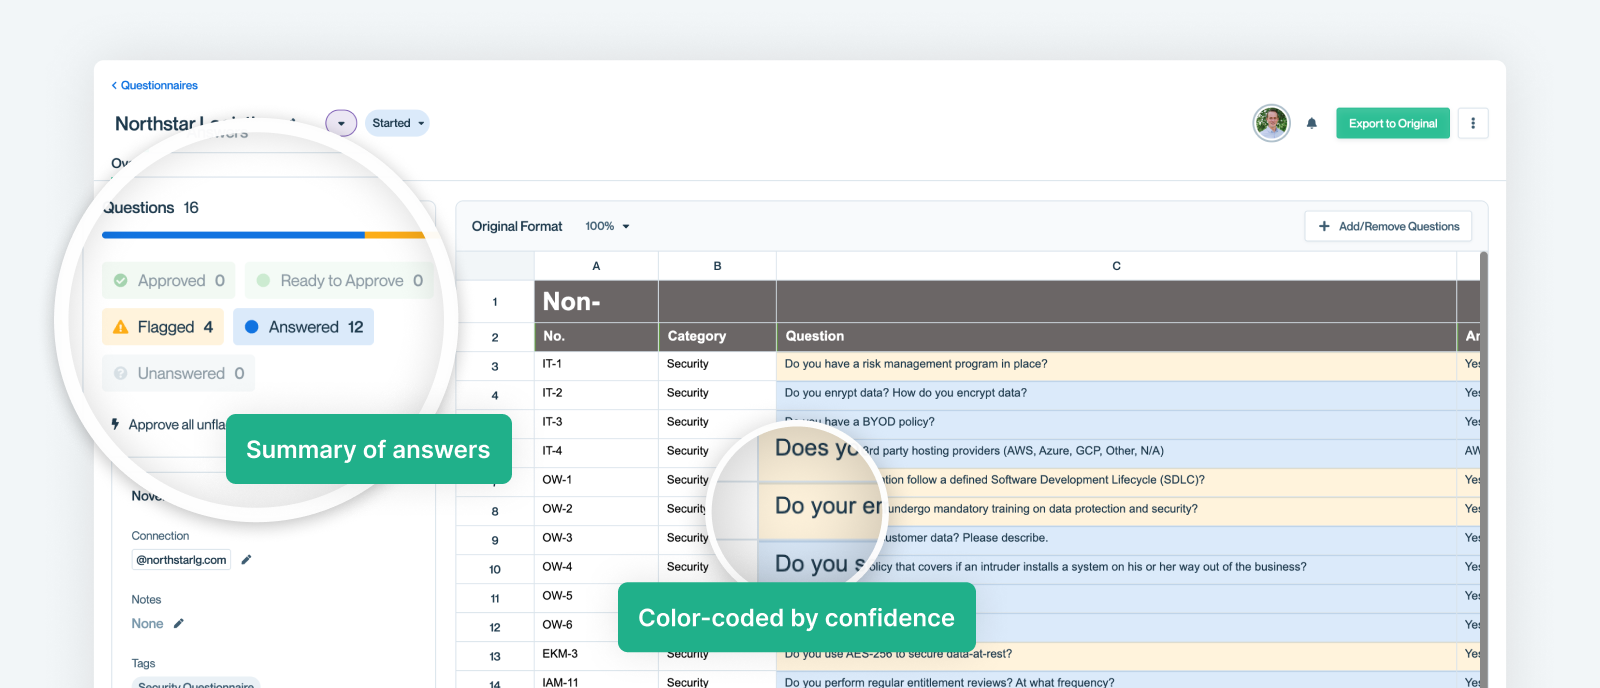
Overview shows answered counts and color-codes by status.
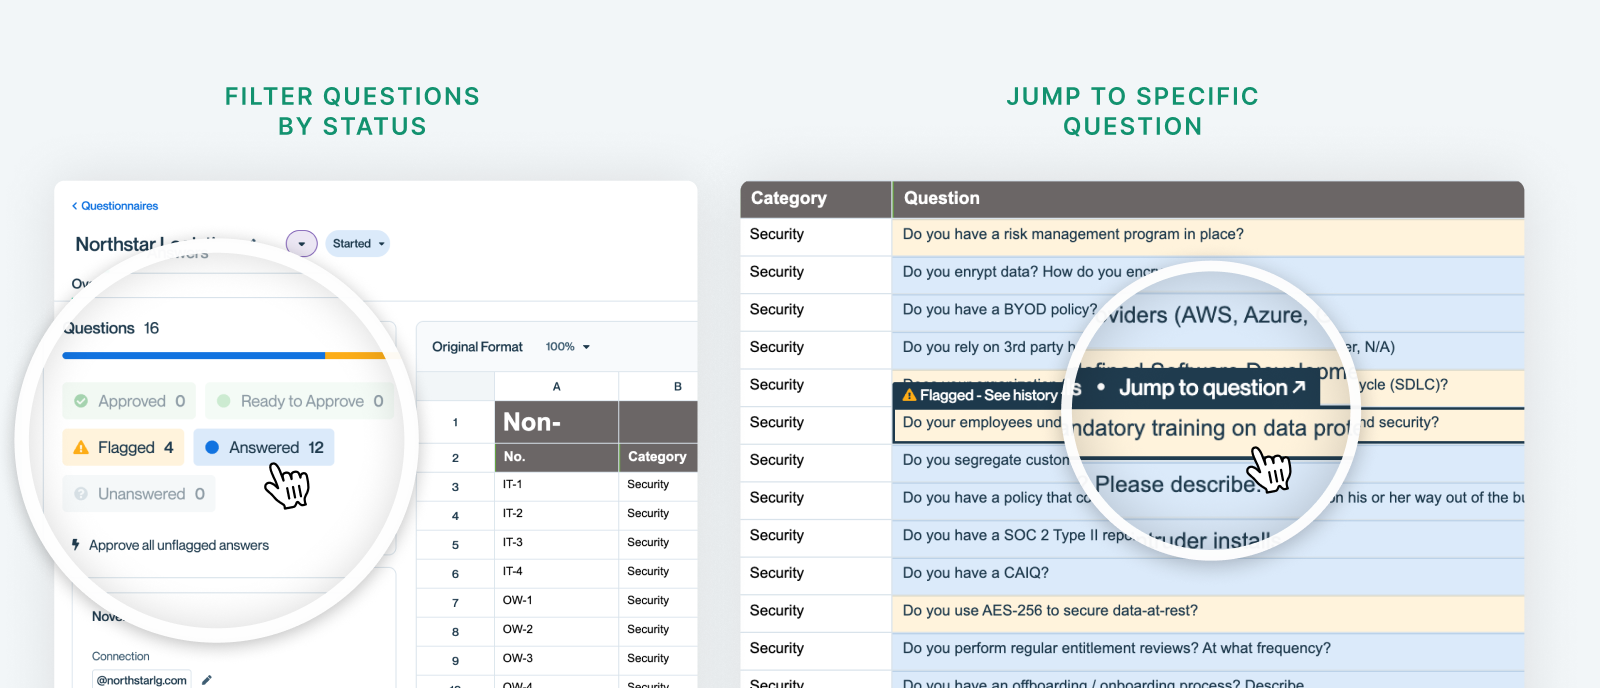
Filter & Jump to Questions
You can use the answer summary to quickly jump to a filtered view of just those questions. Or if you want to find a specific question on the answers tab, simply hover over it and click.
Add/Remove Questions
Sometimes you need to change which questions are in scope even after a questionnaire has been processed. Other times questions weren't able to be imported like you may have expected. That's not a problem you can always Add/Remove Questions from the Overview tab.

Mapping Screen
Clicking the "Add/Remove Questions" button brings up a screen that's identical to the mapping screen that we discussed earlier. Clicking on a previously selected question will remove it. If you want to add a question, follow the Mapping Instructions above.

Clearing A Tab
If you want to de-select all questions on a given tab, simply navigate to that tab and click the Clear Tab button.
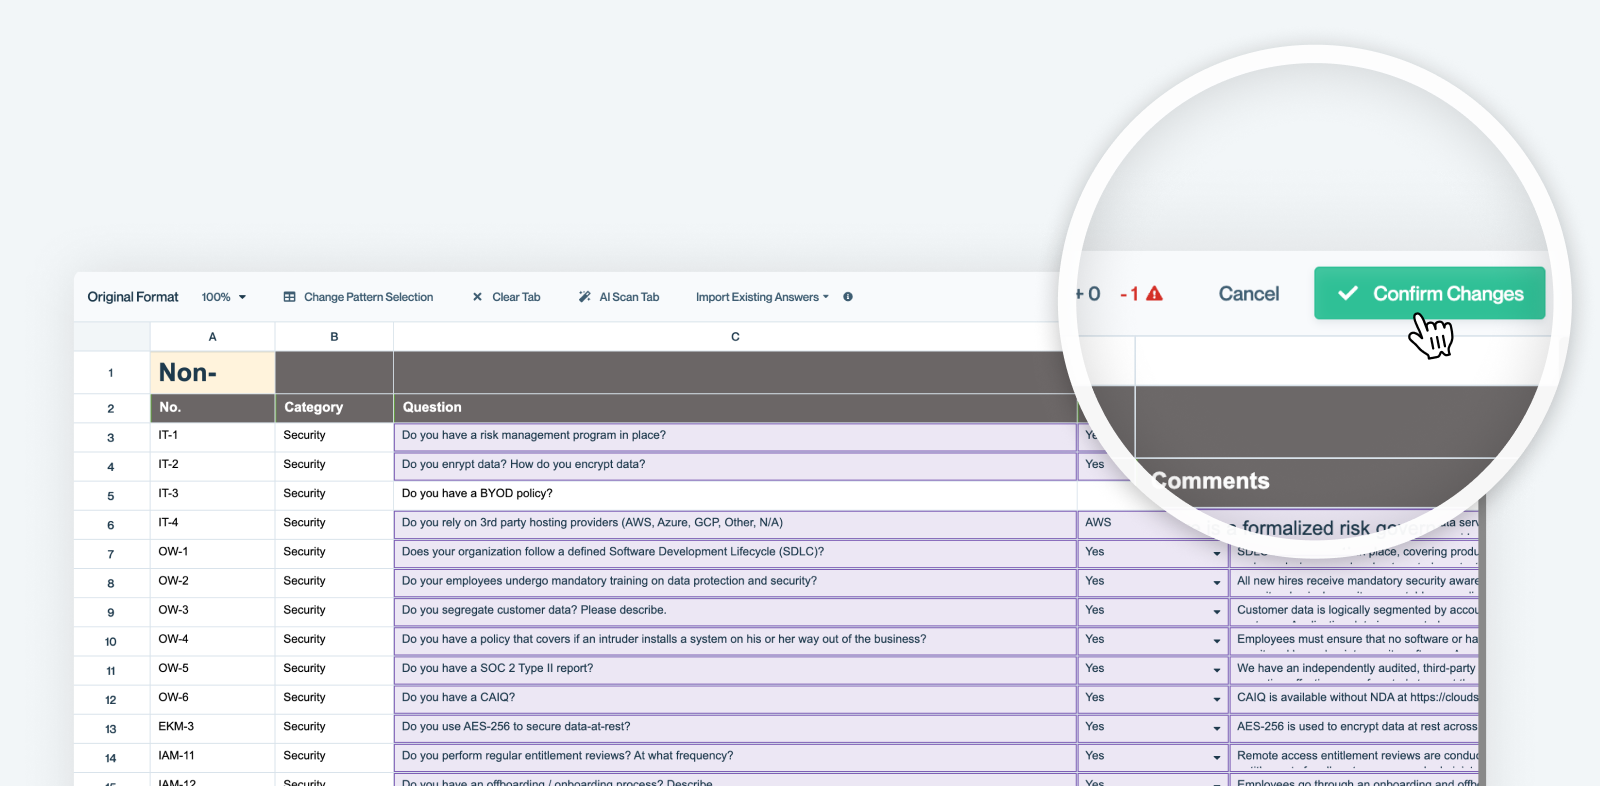
Confirm Changes
Once you've added or removed everything, you'll see an indicator of how many questions you've either added or removed. Click the Confirm Changes button to the right of that indicator and you'll be good to go.
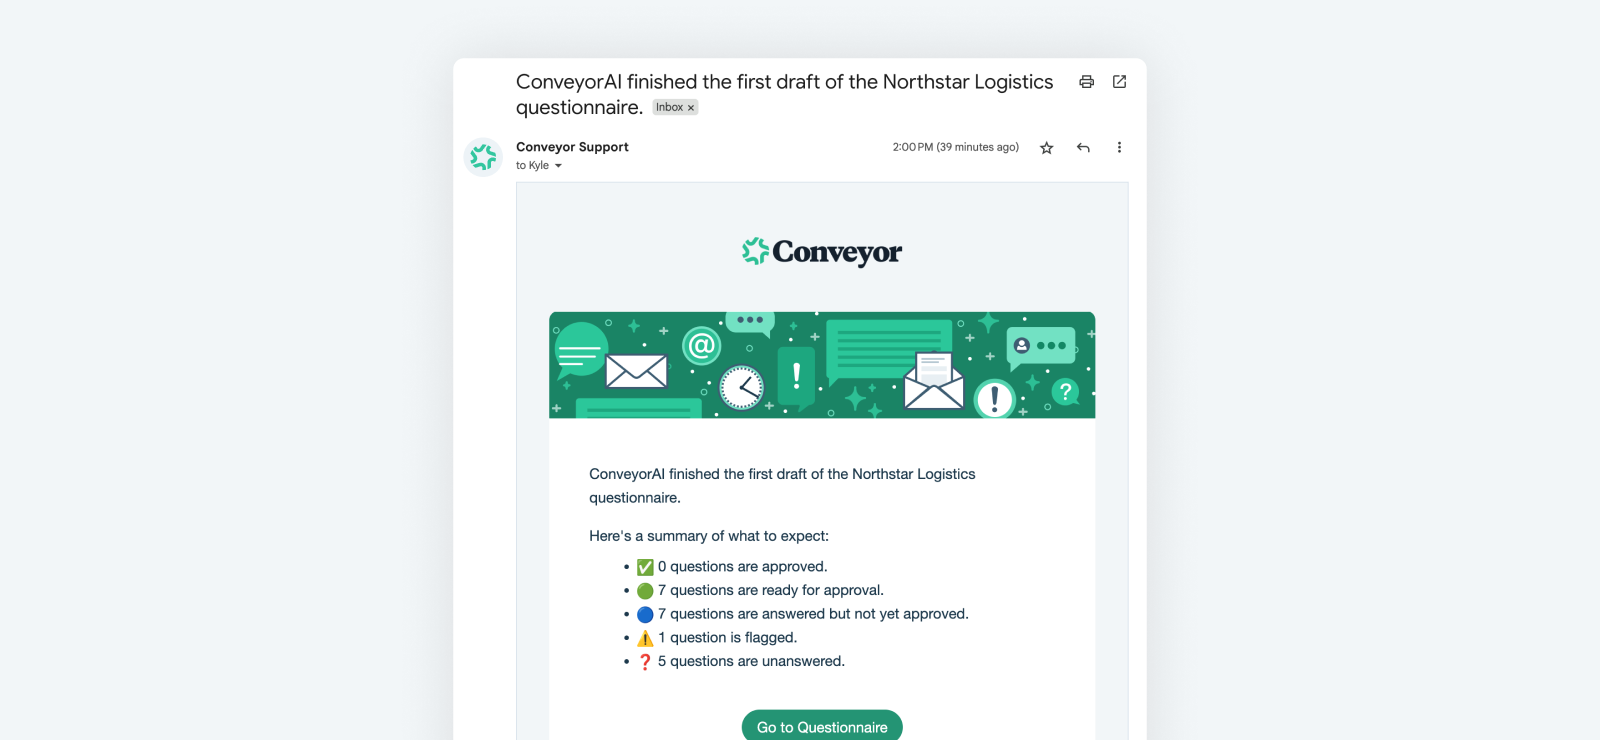
Receiving A Notification
Once you upload the spreadsheet / document ConveyorAI immediately starts working on it. You can leave the screen, and you'll be notified via email or Slack/Teams when it's done being processed.
What’s next
Need help? If you are feeling stuck contact [email protected].
Updated 3 months ago