Managing document access
Time to complete: 15–20 minutes (depending on number of documents)
Prerequisites: At least one access group created
The four access levels
Every document in your Trust Center has one of four access levels. These control who can see the document and when:
-
Anyone
Visible on the public view — no approval or NDA required.
Use for: SOC 3, public certifications, marketing materials. -
Approved customers
Visible to all approved visitors (they’ve signed the NDA if required).
Use for: SOC 2, security policies, standard compliance docs. -
Some approved customers
Only visible to visitors in specific access groups.
Use for: Pen test results, detailed architecture, partner materials. -
Internal only
Not visible to any external visitors - for internal use only.
Use for: Documents powering Questionnaire Automation or internal workflows.
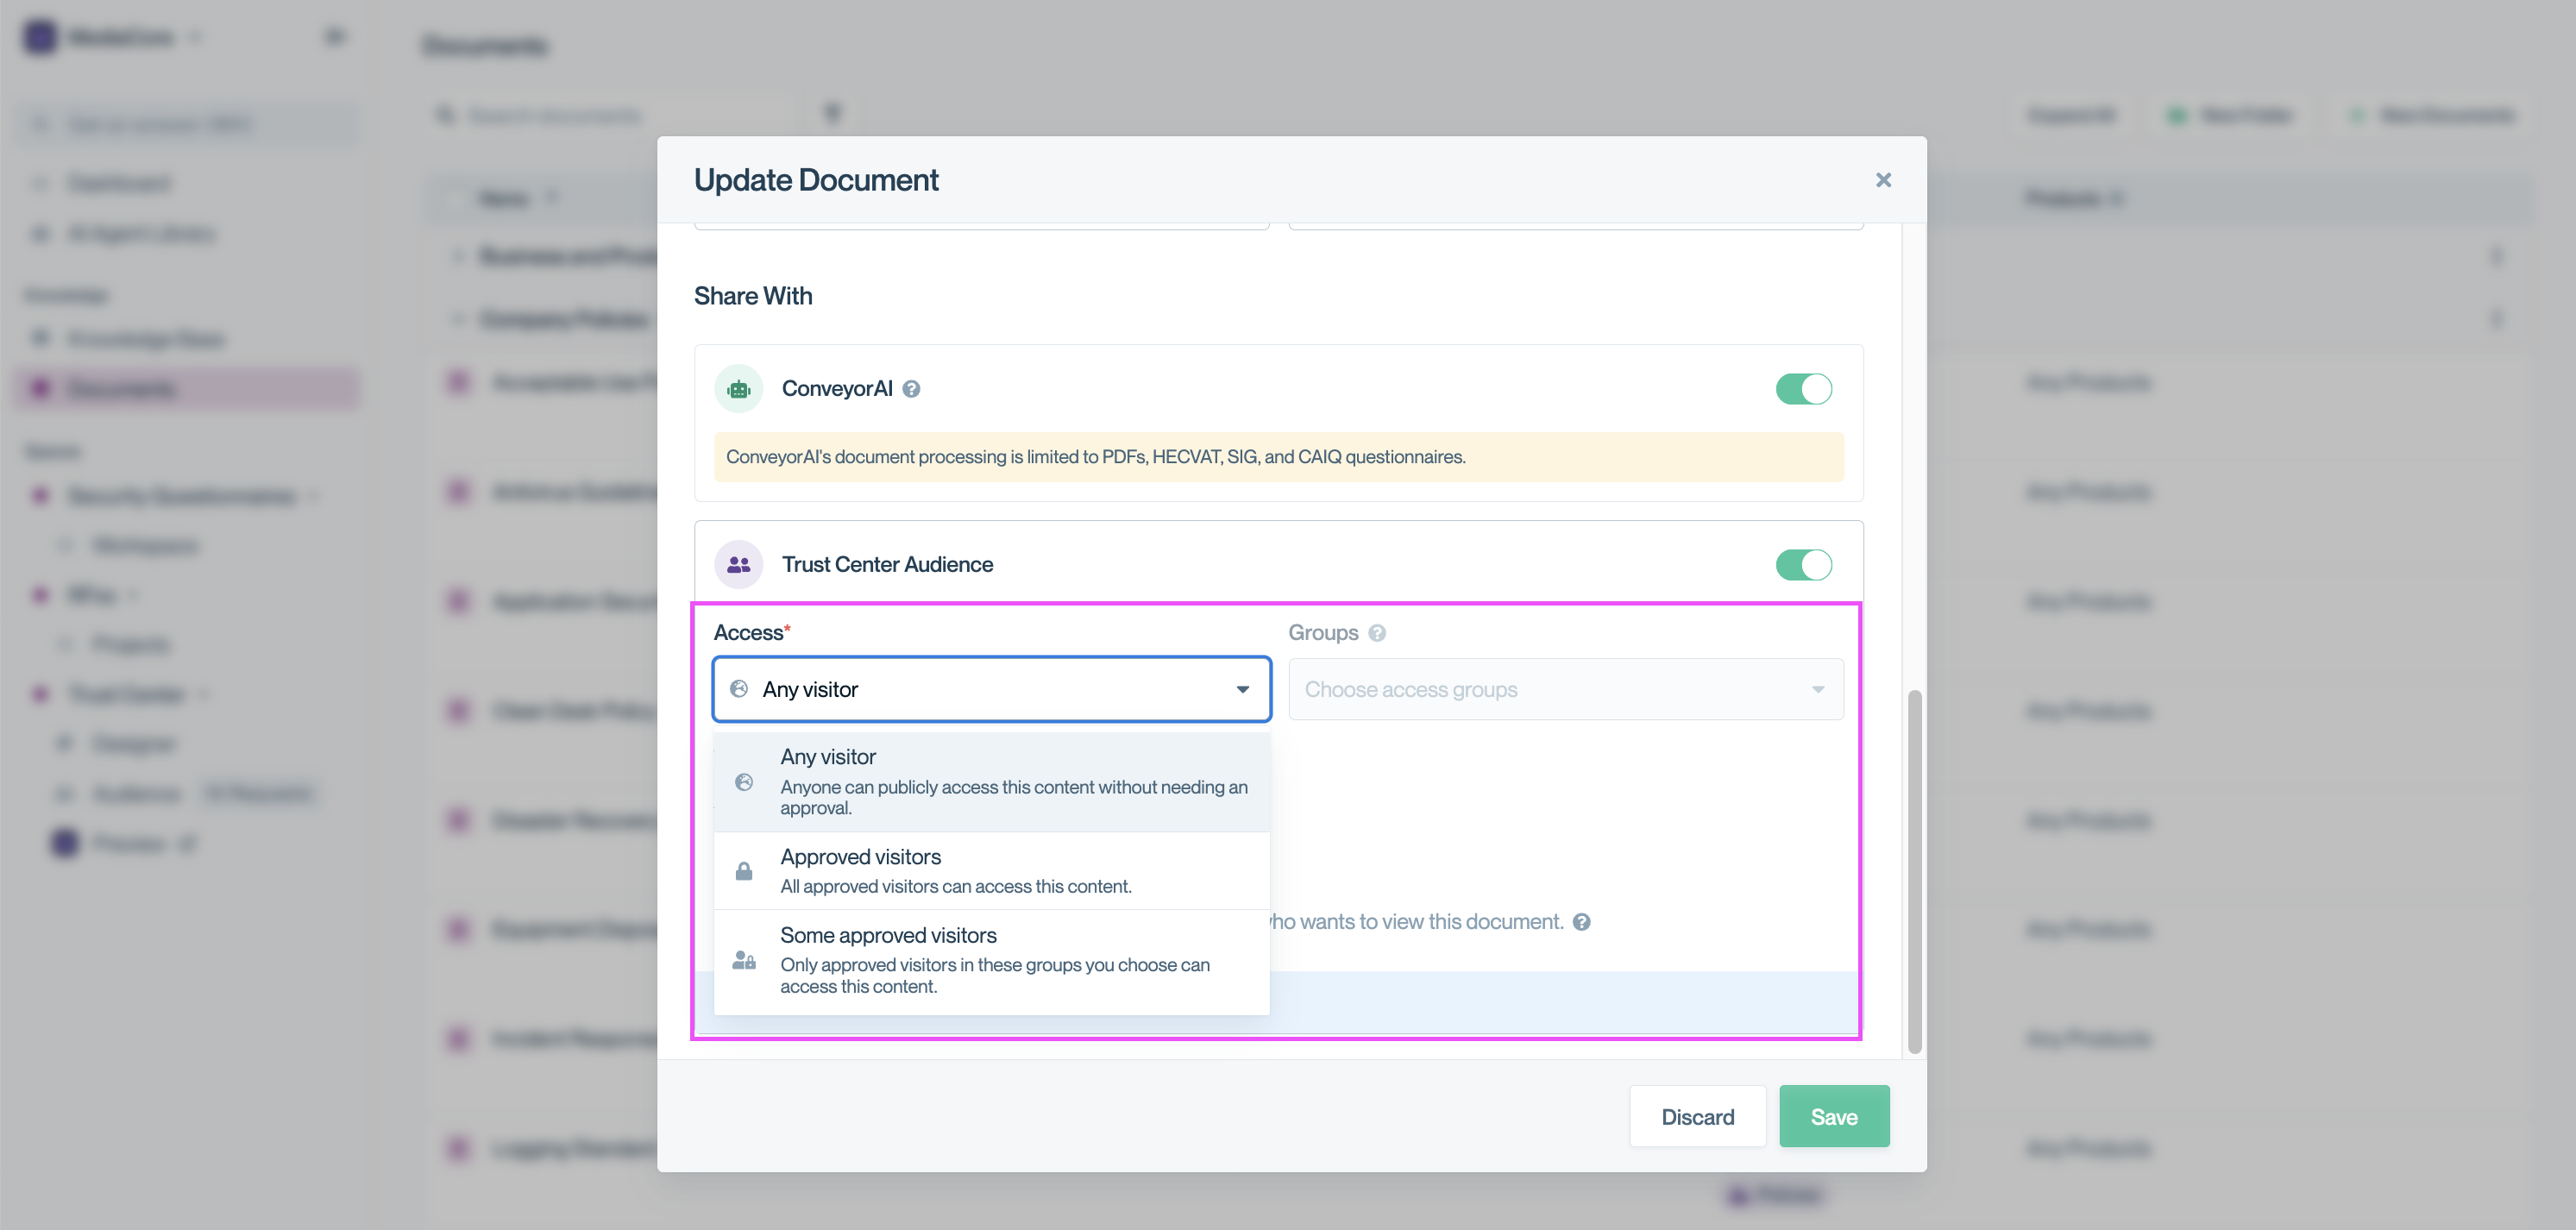
Set document access level and assign access groups. The Groups field is only enabled when ‘Some approved visitors’ is selected.
Setting access on individual documents
When adding a new document
- Upload your document.
- Choose the Access level from the dropdown.
- If you select Some approved customers, choose the relevant access groups.
- Click Save.
When editing an existing document
- Click Edit on the document.
- Adjust the Access level as needed.
- If using Some approved customers, update the access groups.
- Click Save.
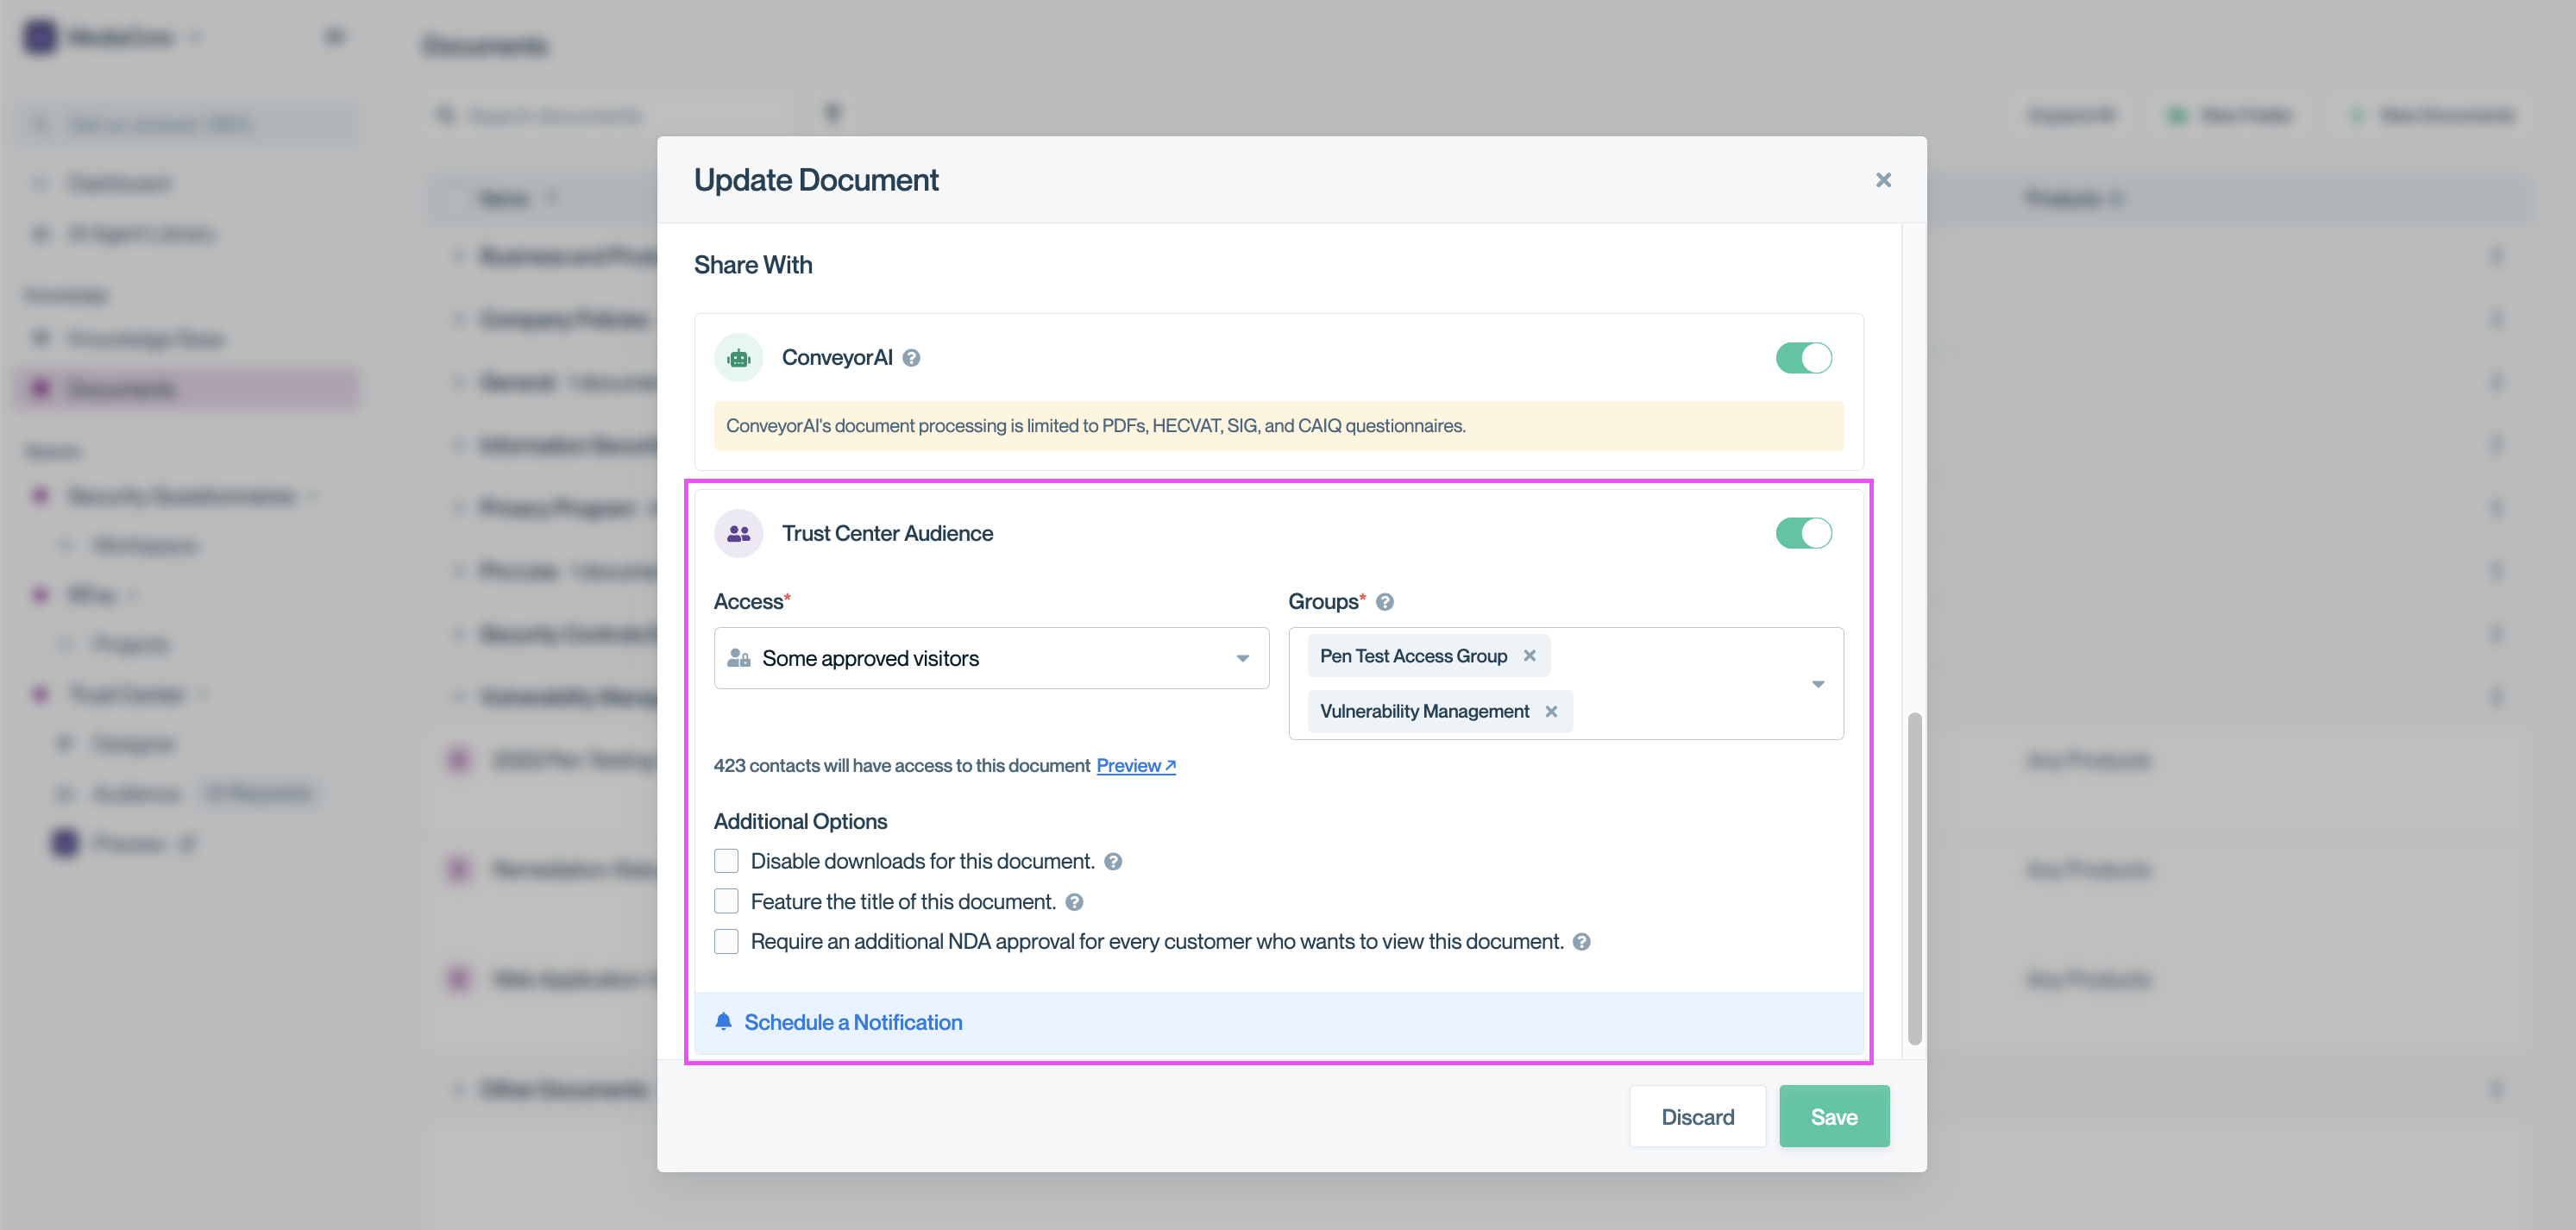
Assign one or more access groups to a document when ‘Some approved visitors’ is selected to control which customers can view it.
Bulk-editing multiple documents
Bulk editing is the fastest way to update access levels and assign access groups to several documents at once - especially when you’re setting up your Trust Center or reorganizing existing content.
- Go to the Documents page.
- Use the left column to select individual documents.
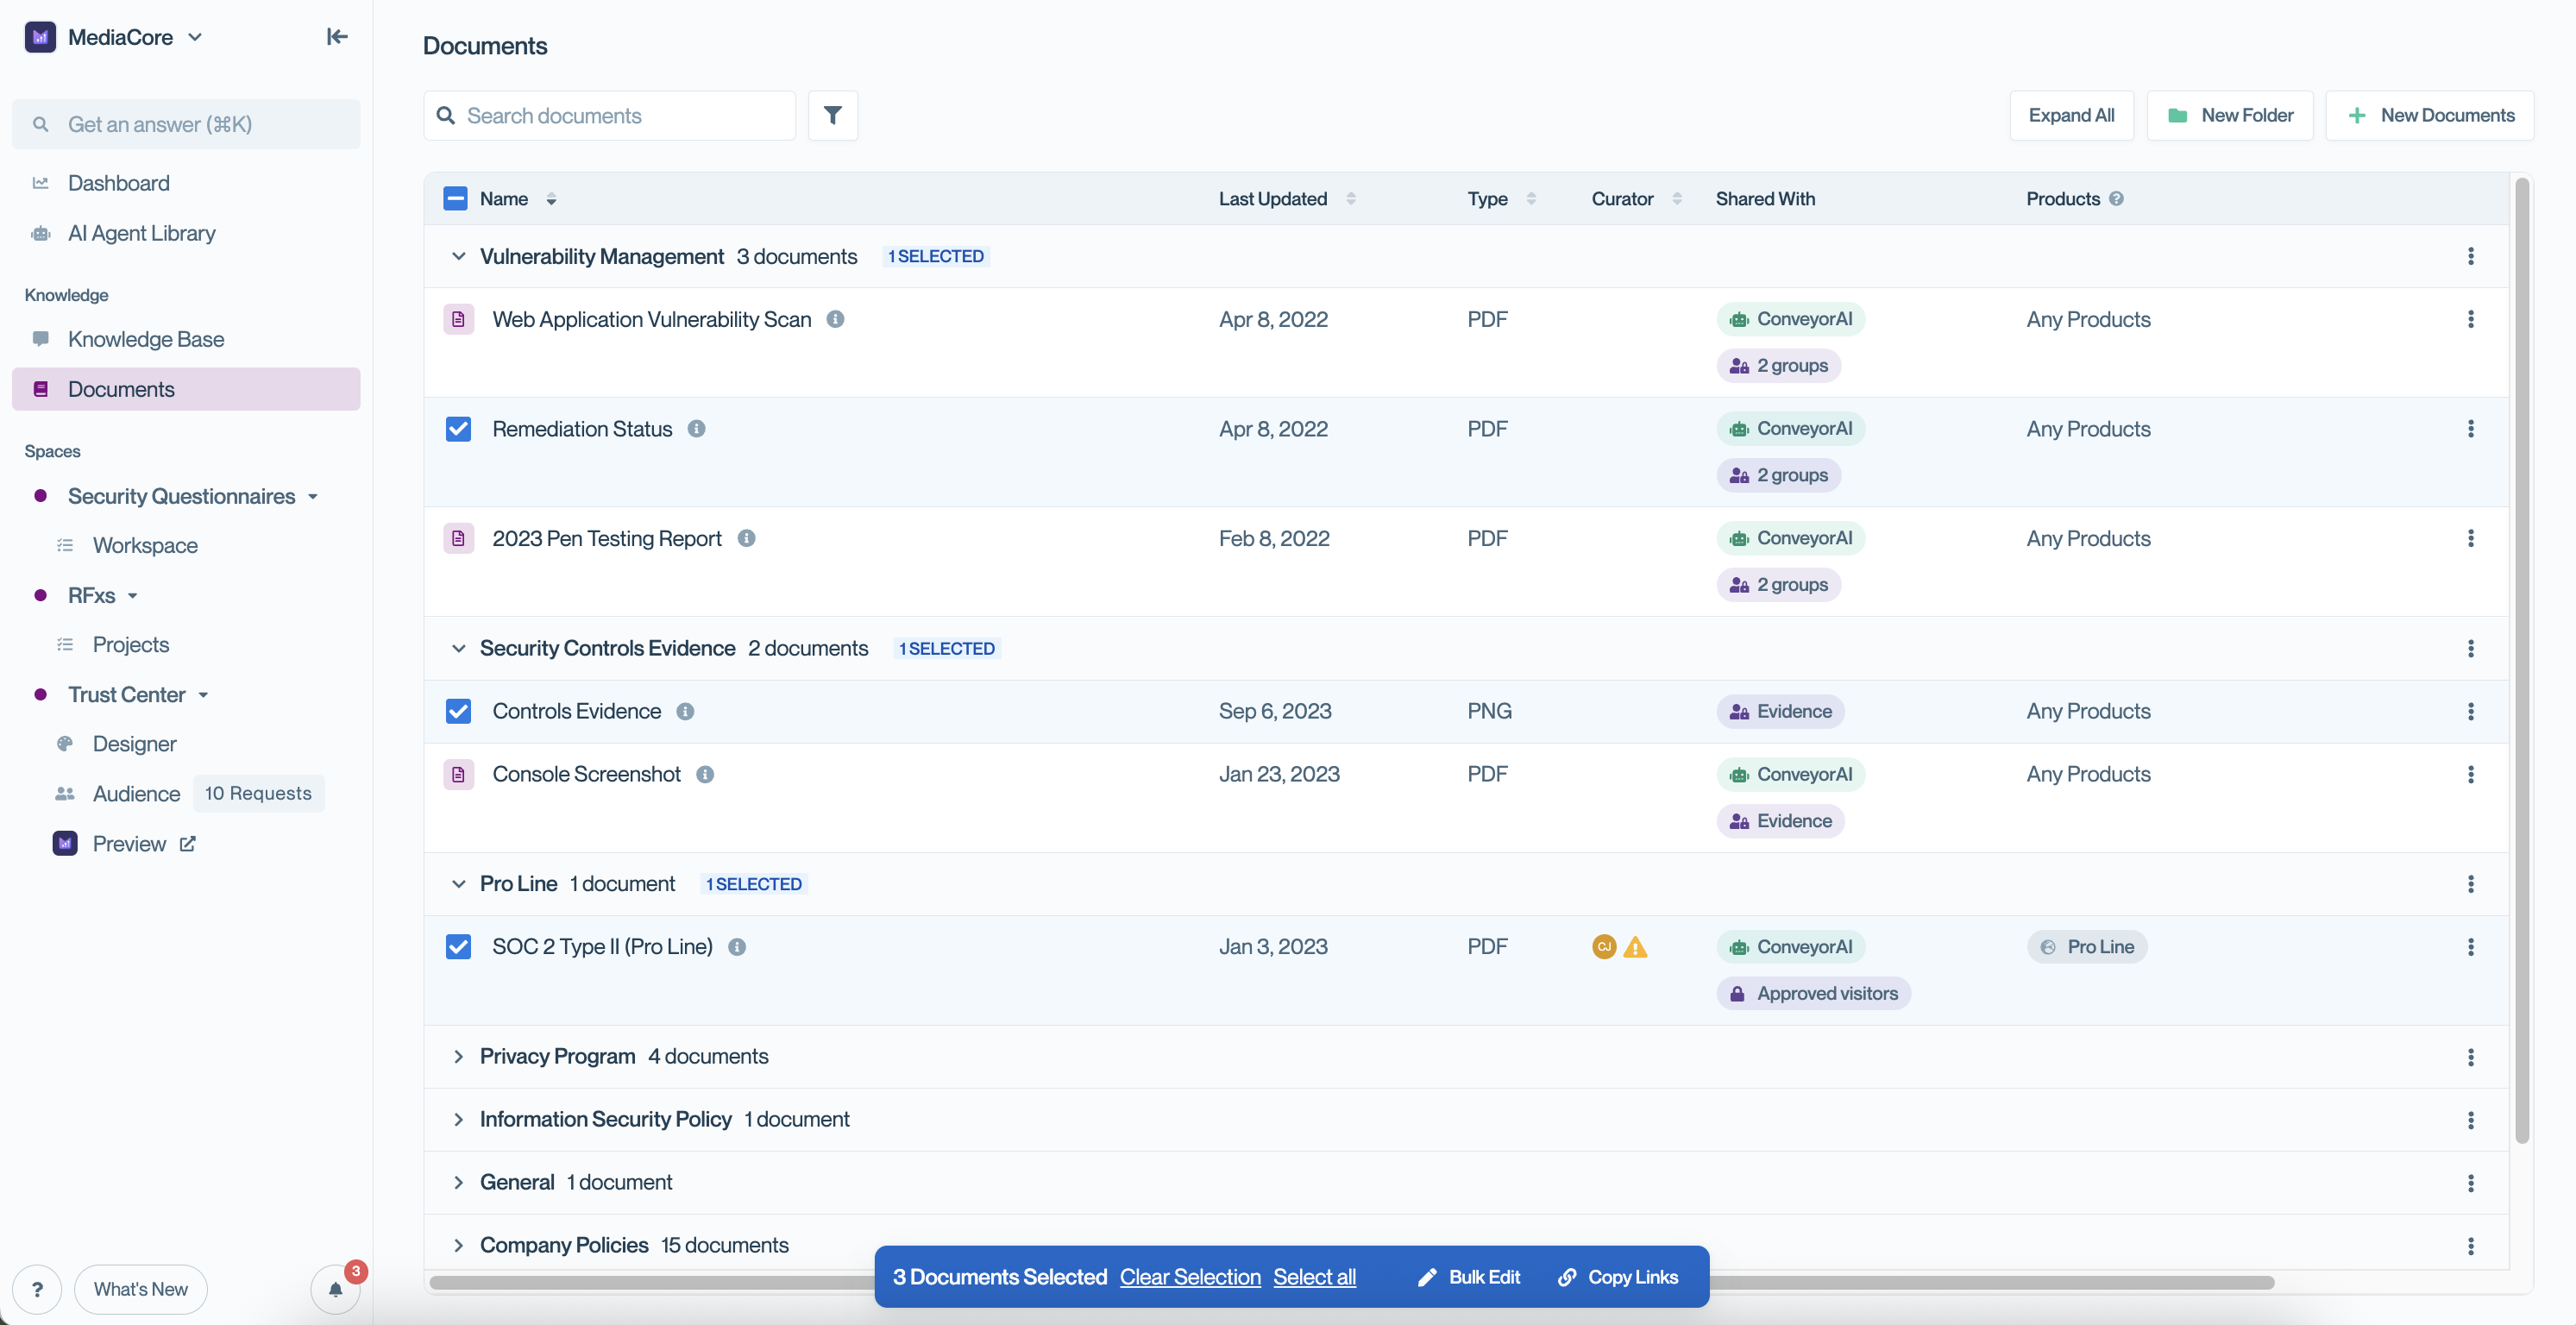
Select multiple documents across folders to bulk edit their access levels and group assignments in one action.
- (Optional) Use the Select Documents option to the right of a folder to select all documents in that folder.
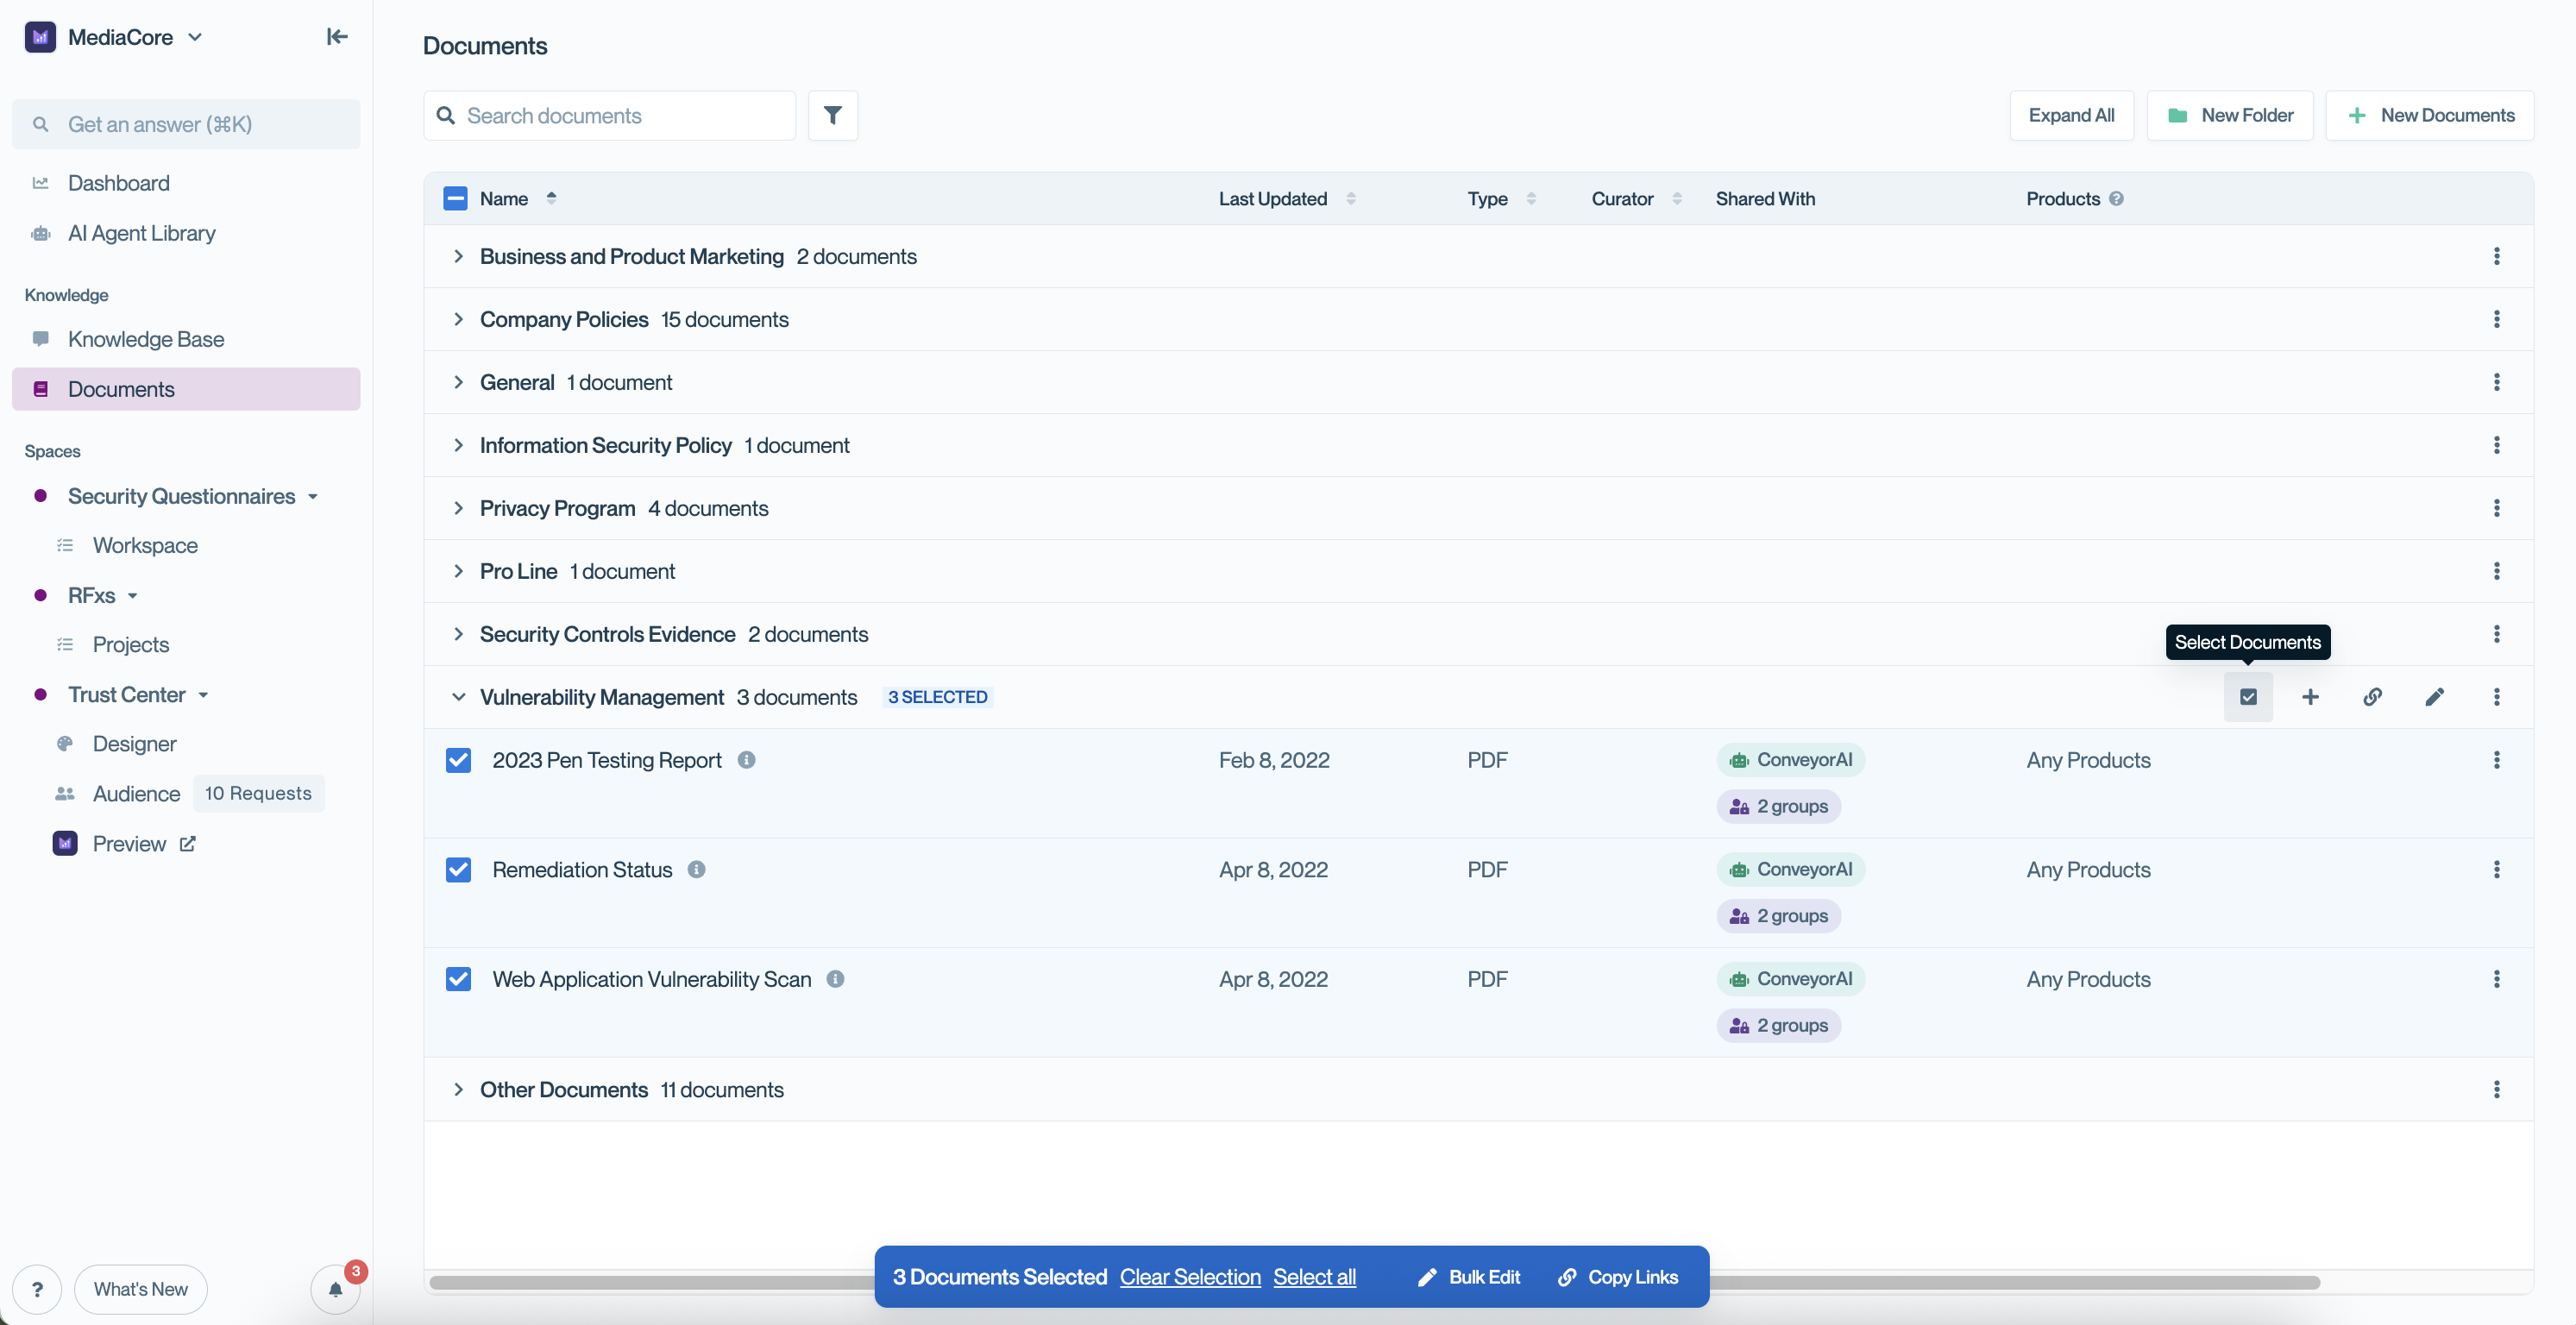
Selecting documents by entire folder using "Select Documents" at the folder level can help speed up edits.
- Once documents are selected, an actions bar will appear at the bottom of the page. Click Bulk Edit.
- In the Bulk Update panel, choose the new Access level and assign access groups as needed.
- Click Update Documents to apply changes to all selected files.
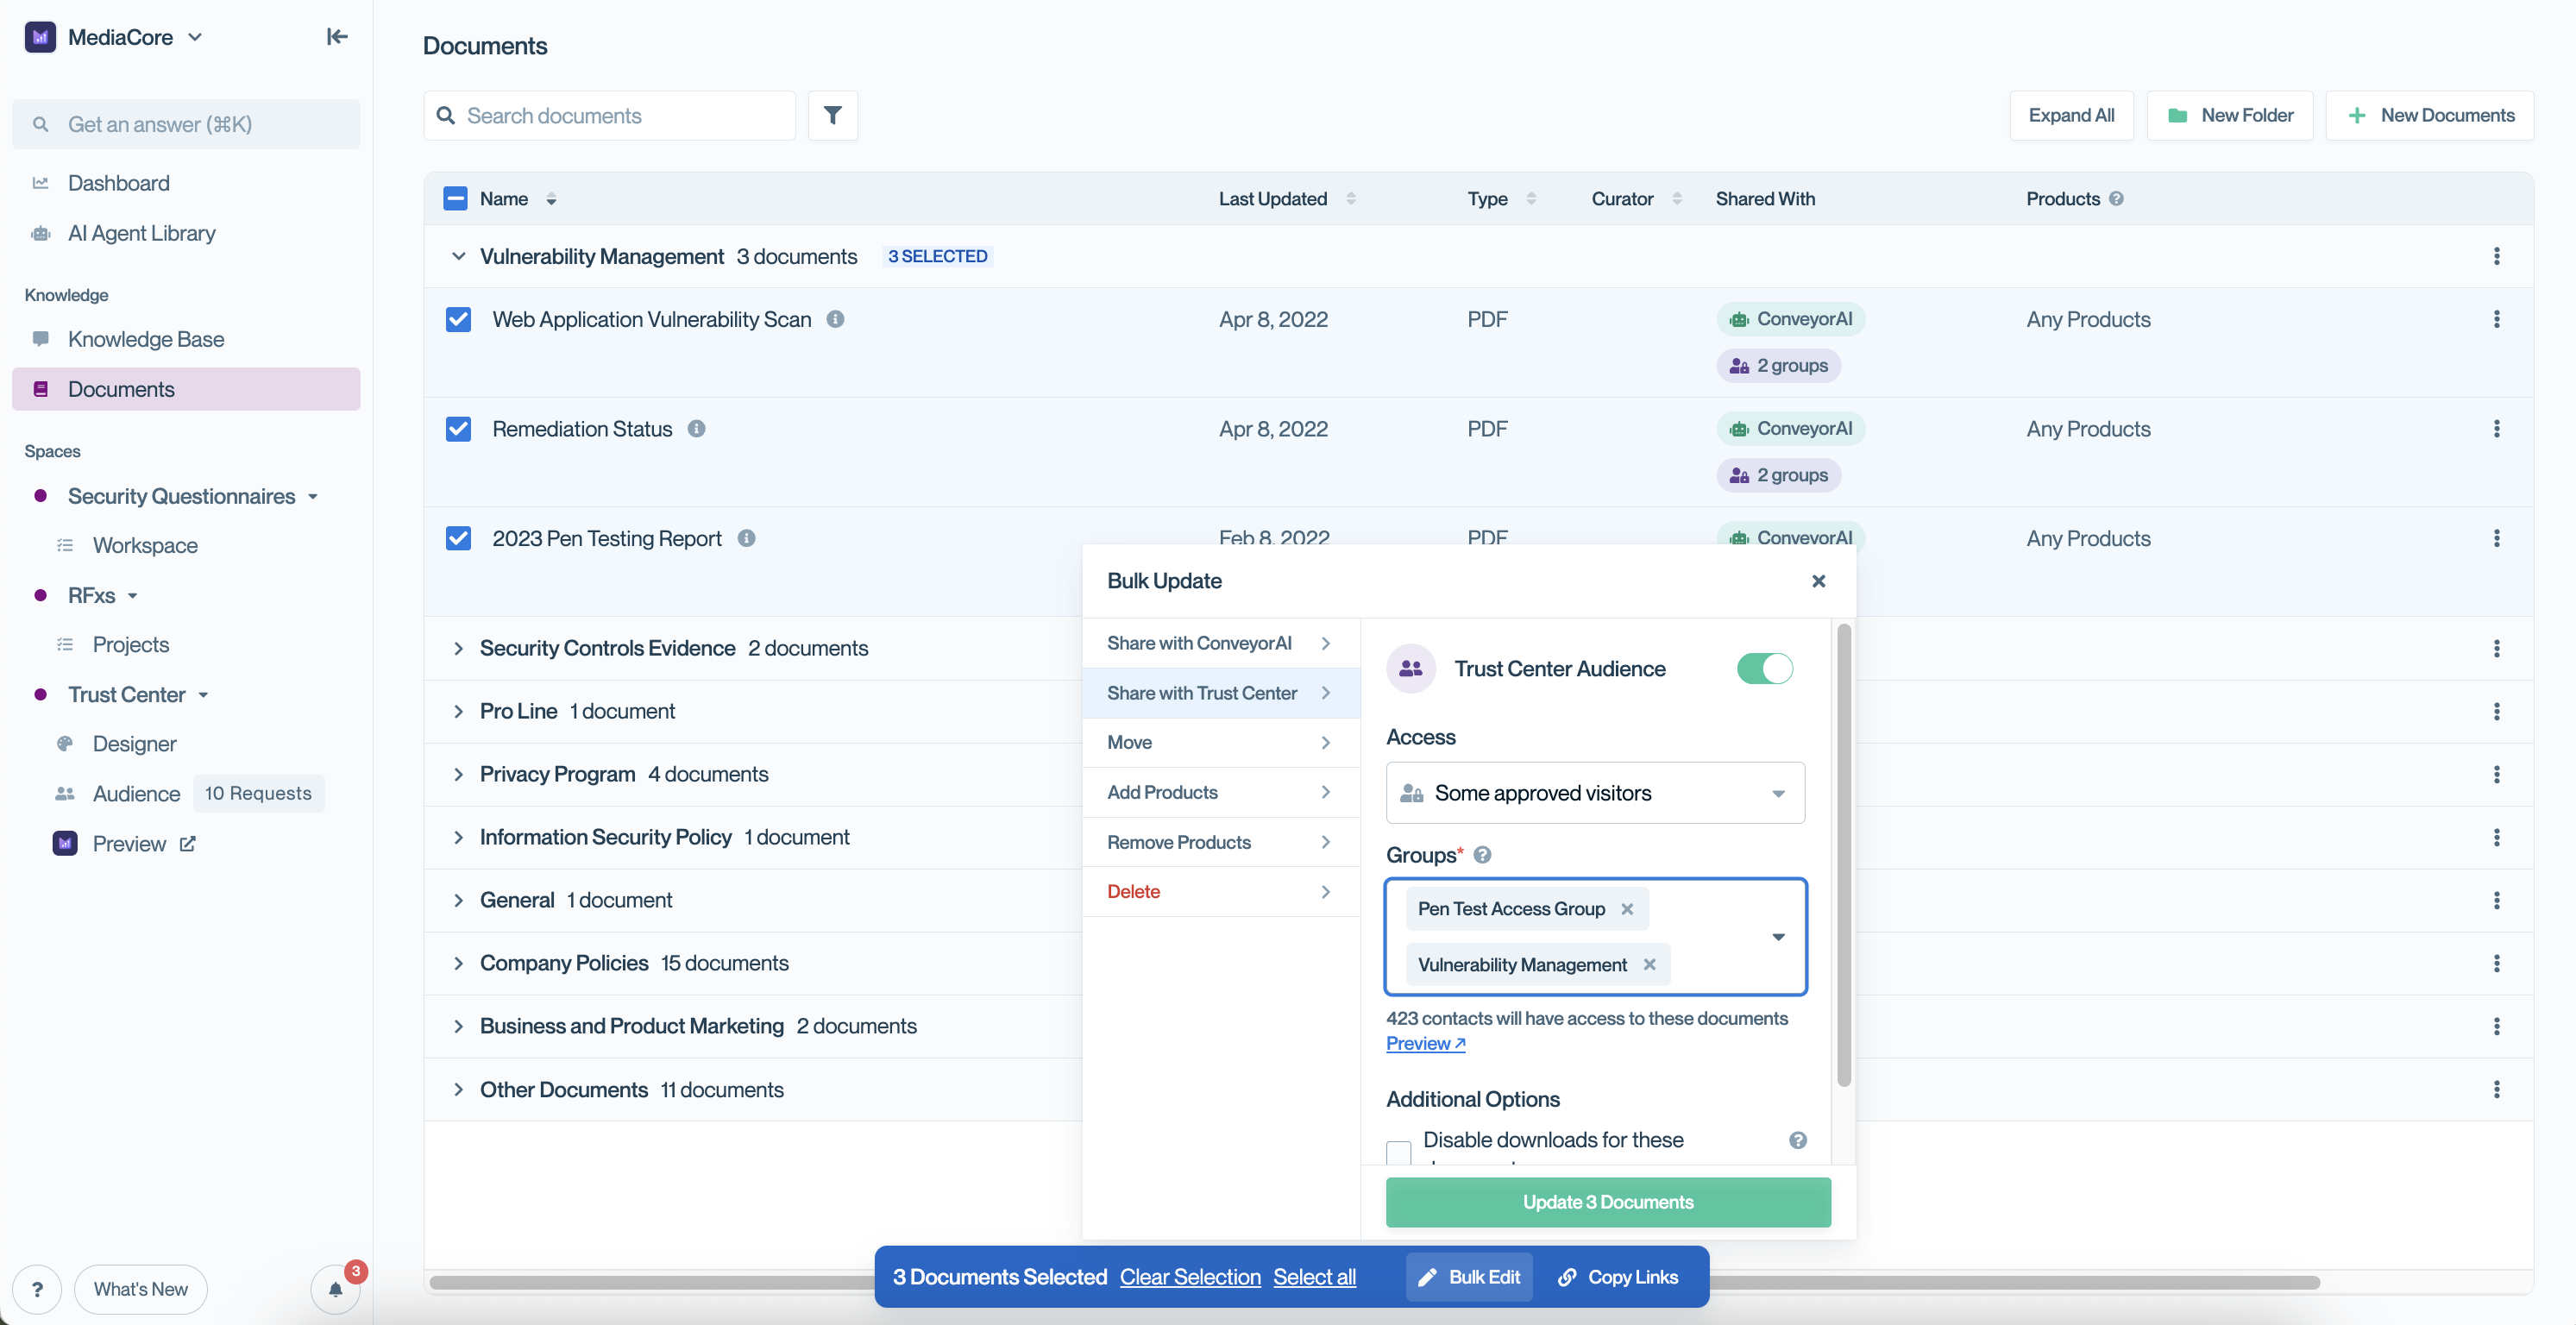
Bulk update panel where you can set access levels and assign access groups to multiple documents at once.
Pro tipOrganize documents into folders first, then bulk-assign access by selecting all documents in the folder. It’s much easier than updating each file individually or sorting your entire file list.
Common questions
What’s the default access level for new documents?
“Internal only.” You must explicitly make them visible to visitors.
Can a document belong to multiple access groups?
Yes. You can select multiple groups — anyone in any of those groups can see the document.
What happens if I change a document’s access level?
The change takes effect immediately. Visitors will gain or lose access based on the new setting.
Can I see which documents are in which access group?
Yes. Use the filter by access group option on the Documents page to review group assignments.
What's next?
- Grant groups to customers: Adding connections to access groups
- Test what customers see: Previewing your Trust Center
Need help? Start with Troubleshooting → Trust Center issues or email [email protected].
Updated 9 months ago